The New Guy From NewZealand

ide like to see the little green car with a transbraked auto and the correct diff gears :biggrin: but the owner likes manual and wont change it till he cant go any faster :cool:
 
haha glad you like it.our engines 18psi is on the edge people have forced in 20psi but they start lifting heads and blowing gaskets.so at some stage soon we need some arp headstuds and some mls gaskets and see how far we can get it to go.then after that in with forged rods and pistons maybe a couple or 4 billet main caps and a diy girdle with arp studs all round and a good balance job. when my ported heads arrive they will most likely go on it as well for a couple of months that should wake the stocker up a bit :biggrin:
 
things have sort of now got out of hand after reading in the buick powersoarce manual that they dont like solid mounting as it stresses the main bearings but it also said balance 2 at 50% and join them together you get perfect balance so the lads took this as a sign from god himself LOL
IMGP4409.jpg
 
right found the leak was nothing major just the fact the rear main seal no longer existed at all LOL im not joking pics attached that peice of fluff is the only peice of seal that was in the rear main cap must of not liked high rpm after all these years bet my vn one is the same as i have the same leak LOL
IMGP4416.jpg

IMGP4417.jpg

IMGP4419.jpg

also looks like boost on a 249000km+ engine has taken its toll on the bearings very nearly through to the copper on most bearings and one is on copper so a new set of mains and bigends going in while the sumps off looks like we caught it just in time if we had entered the burnout comp or had another day of racing it would of spat a rod out the side or something stupid
 
I would definately take the crank in to a machine shop and have it checked. If you have the kind of wear you said on the bearings then I'll bet she needs grinding a little.
 
things have sort of now got out of hand after reading in the buick powersoarce manual that they dont like solid mounting as it stresses the main bearings but it also said balance 2 at 50% and join them together you get perfect balance so the lads took this as a sign from god himself LOL
IMGP4409.jpg

wow! that thing is going to move.
 
I would definately take the crank in to a machine shop and have it checked. If you have the kind of wear you said on the bearings then I'll bet she needs grinding a little.
yeah we are not even pulling the heads of just give it a set of mains and bigends and hopefully it lasts the 2 next meetings and we can build the new engine thats sitting here its a few years newer with wider bearing shells and odds and ends
 
bearing picks they wernt to bad but can see where they have been loaded on the upper conrod shells
IMGP4424.jpg

IMGP4421.jpg

IMGP4422.jpg

IMGP4420.jpg

clutch still holding in there but had a hard life LOL
IMGP4426.jpg

motor on its way back in
IMGP4425.jpg
 
Looks like it needed a little love. I'm wondering why the one bearing looks like it was flattened though.
 
that shell was turned into a tool with the help of a hammer to remove the bearing shell with the thrust washer sides on it as it was hard to slide round the crank to get it out :biggrin:
 
more bits for the bigblock chev powered project arrived today for measuring purposes now stands about 3/4 the way up the front windscreen :biggrin:
IMGP4436.jpg
 
right the hunt for 10's in the little green car has begun today started fitting the new 1.65:1 yellow terra shaft mounted adjustable roller rockers :cool: 
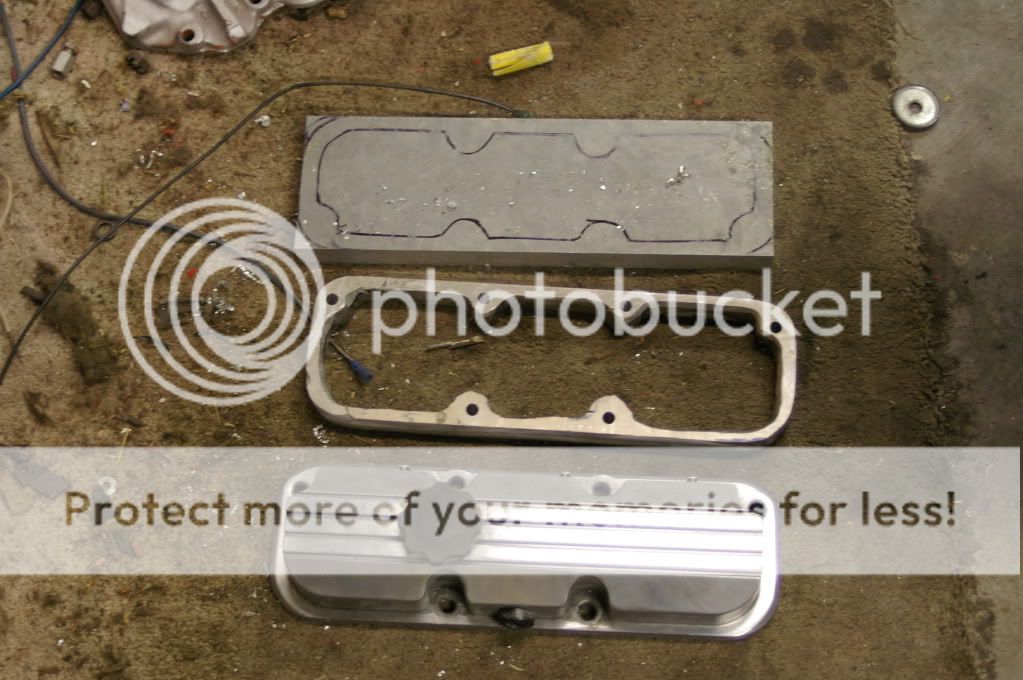
but to fit them we need to lift the rocker covers for clearance so begins the epic kiwi battle against alluminium in the trusty shed :biggrin:
IMGP4822.jpg

IMGP4823.jpg


take a peice of billit alloy 25mm thick LOL and draw a shape

IMGP4826.jpg


prepare the precision milling machine seen here mid use

IMGP4818.jpg


mid alloy battle fallen soldiers everywhere and i mean everywhere but we are winning LOL

IMGP4821.jpg


finish drilling all 107 holes with said precision mill and attack with 1mm cutoff wheel

IMGP4820.jpg
 
after a number of hours with the above tools and grinder and flapper disks you now have a spacer ready to polish but only after drilling yet another 6 holes LOL few only one more spacer to make :frown:

IMGP4827.jpg


IMGP4828.jpg


bit of a polish :p
IMGP4830.jpg


not looking forward to the second one :tongue:
 
Top