Hot air 109 engine build

Toby_Goodmk

Test Fit officianto
Joined
Dec 9, 2011
All my restoration body builds I document. However I have never documented an engine build like this. I have spent a considerable amount of resources in the past seeming to do work over. This time I am going about things in a different manner.

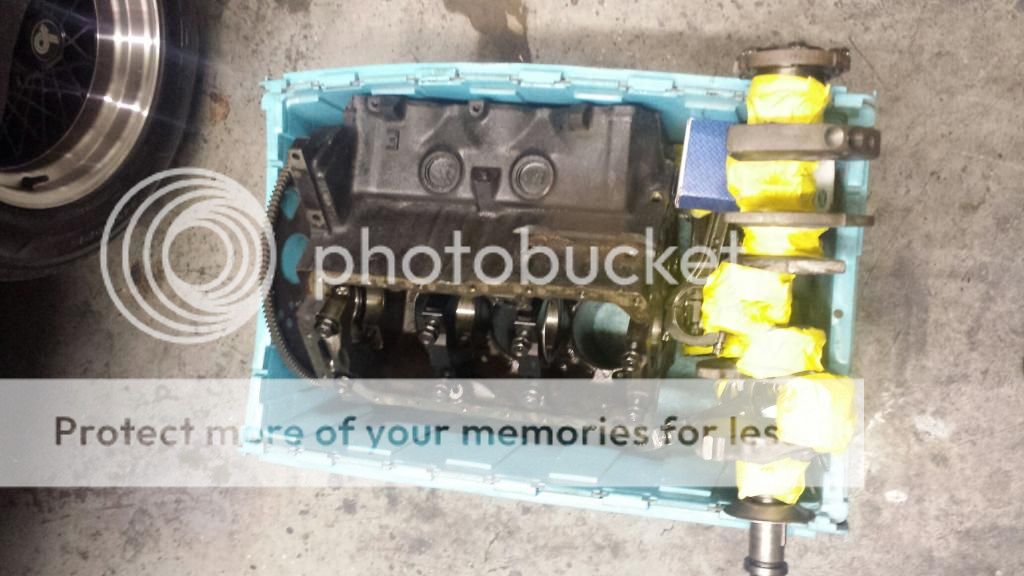
A true basket case delivered to the machinist
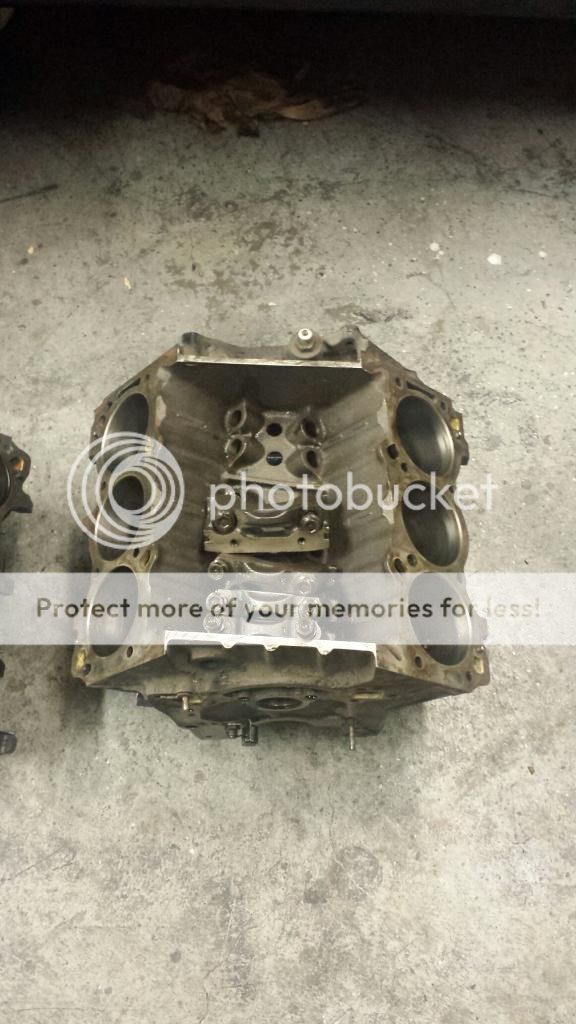
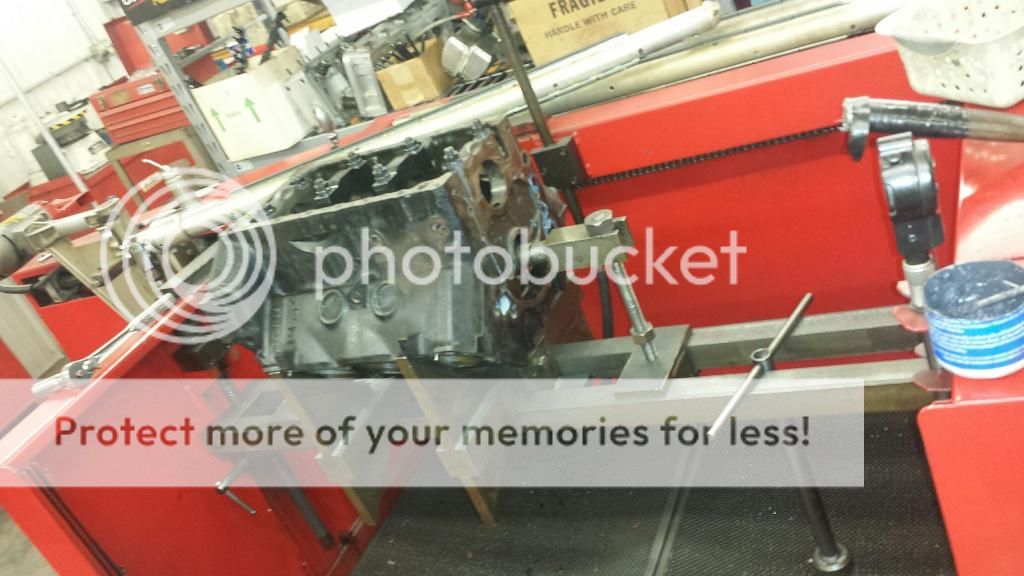

The bare 109 block


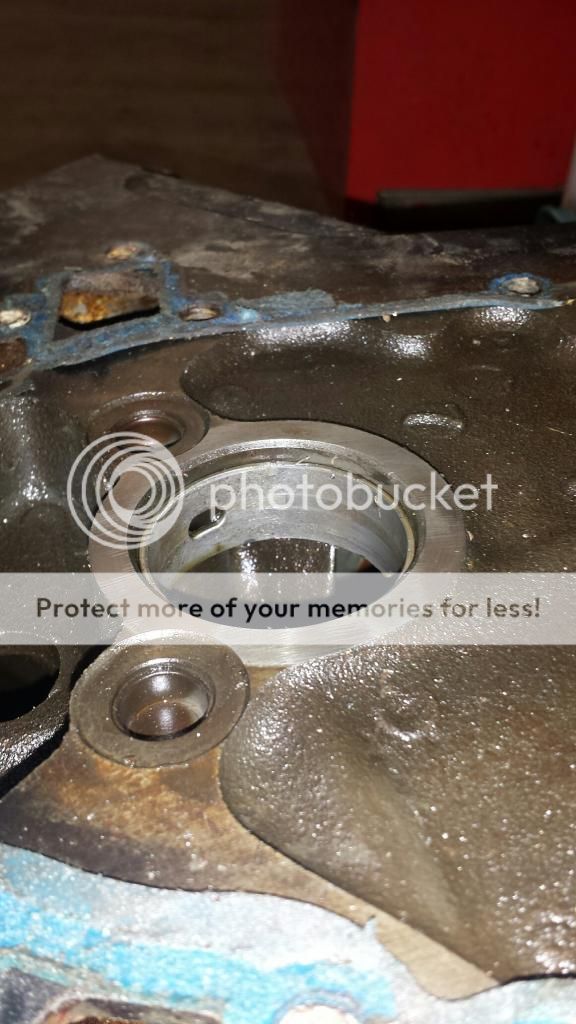
This block has a very nice thrust surface


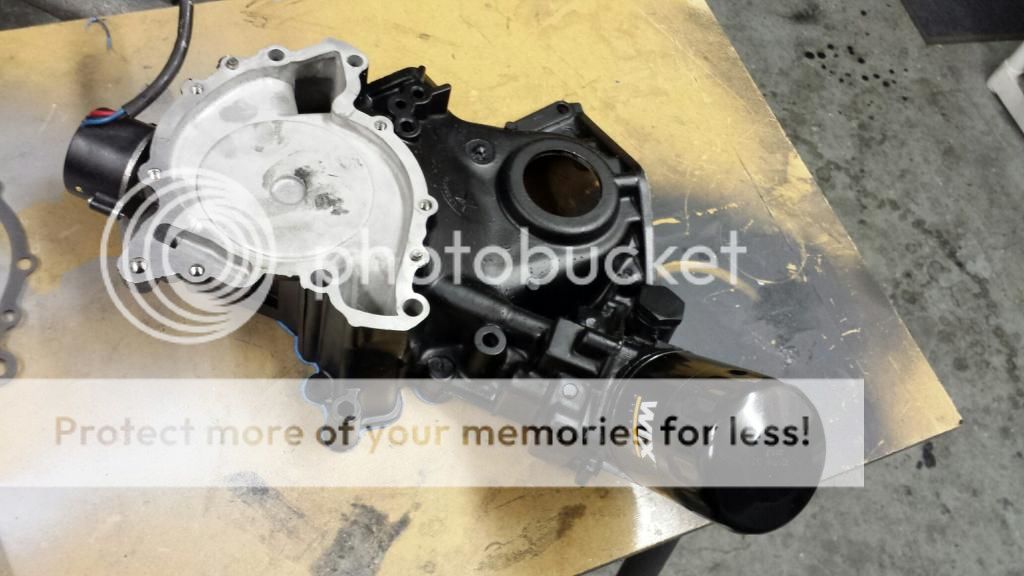
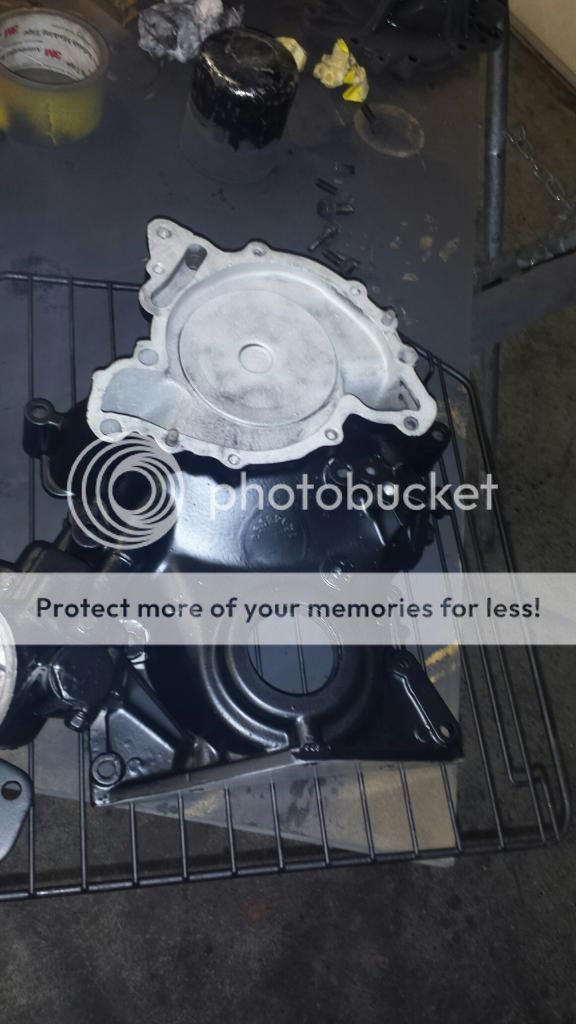
NOS timing cover ported and powder coated


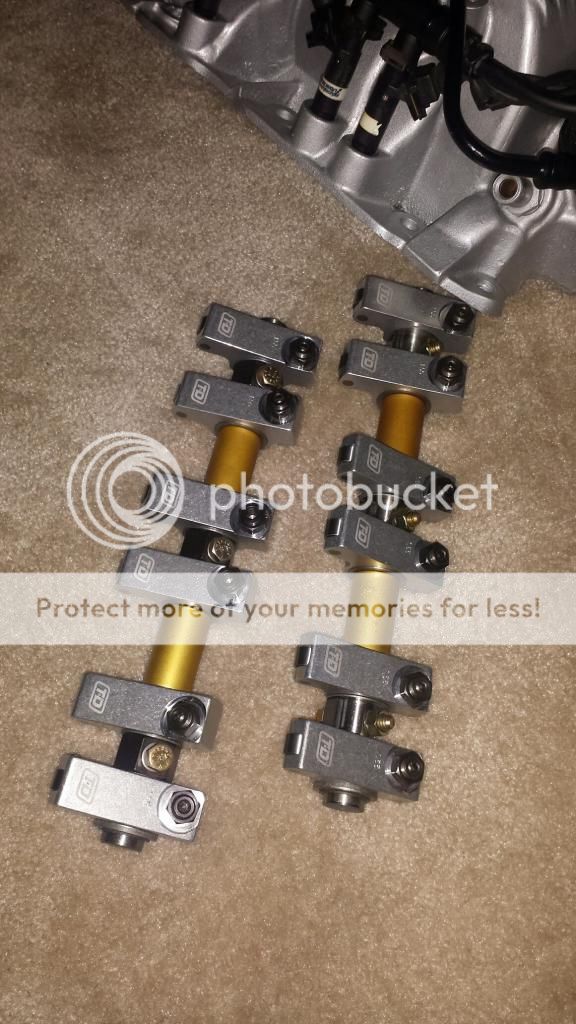
T & D 1:55 roller rockers will compliment the Champion irons, Comp 212/212 and TBP roller lifters


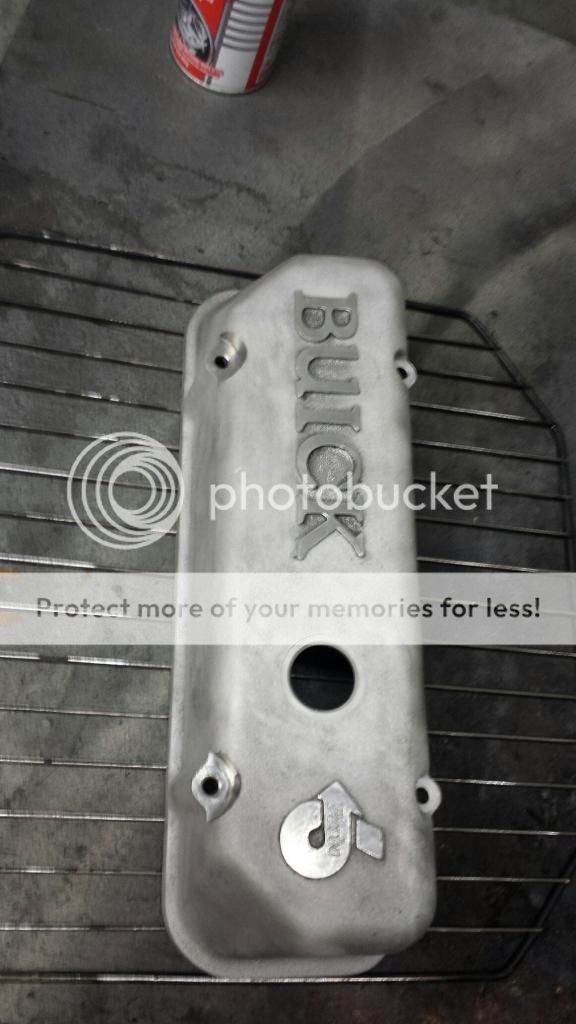
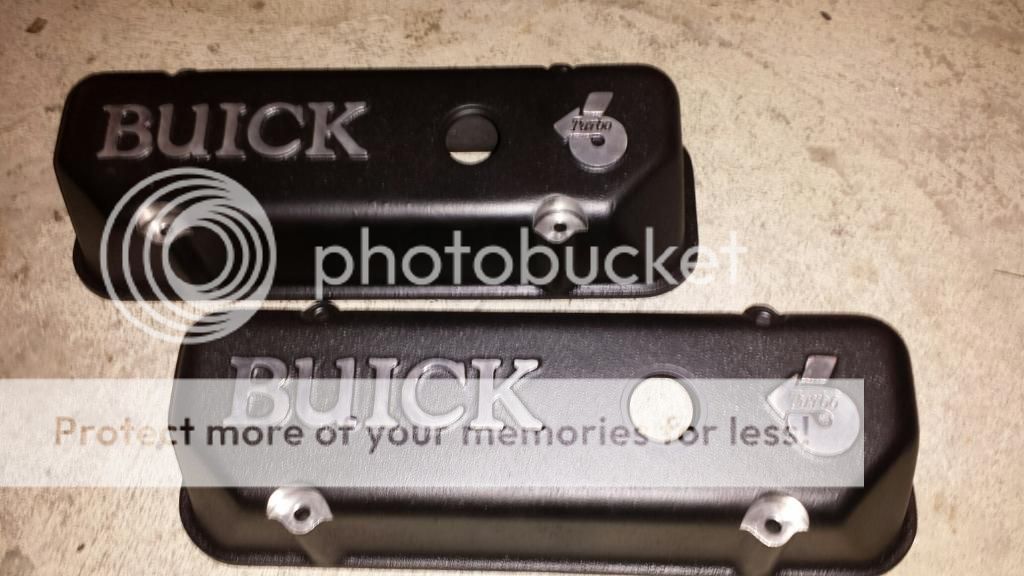
Blasted all the crap off my valve covers so I could powder coat them correctly and nicely


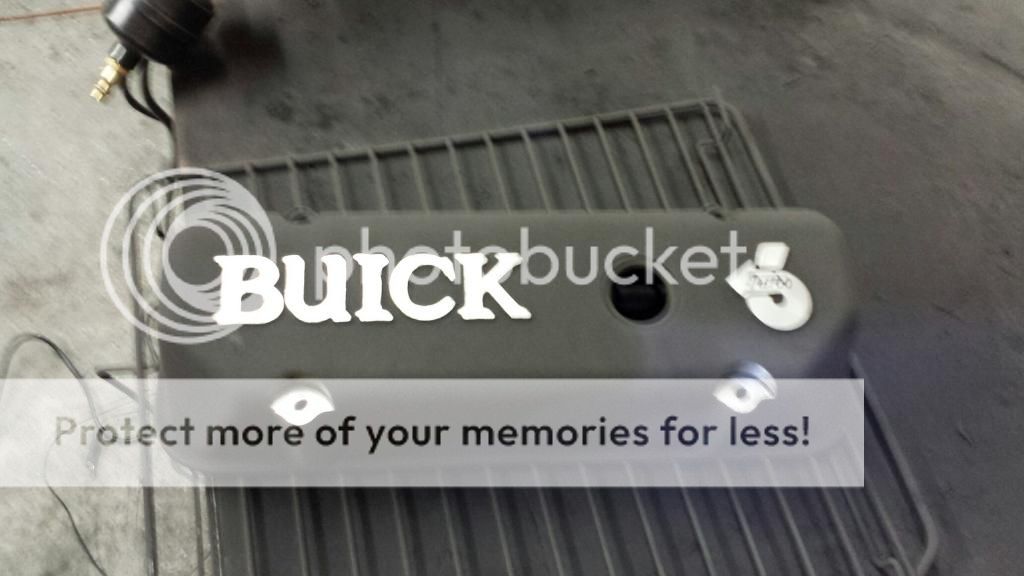
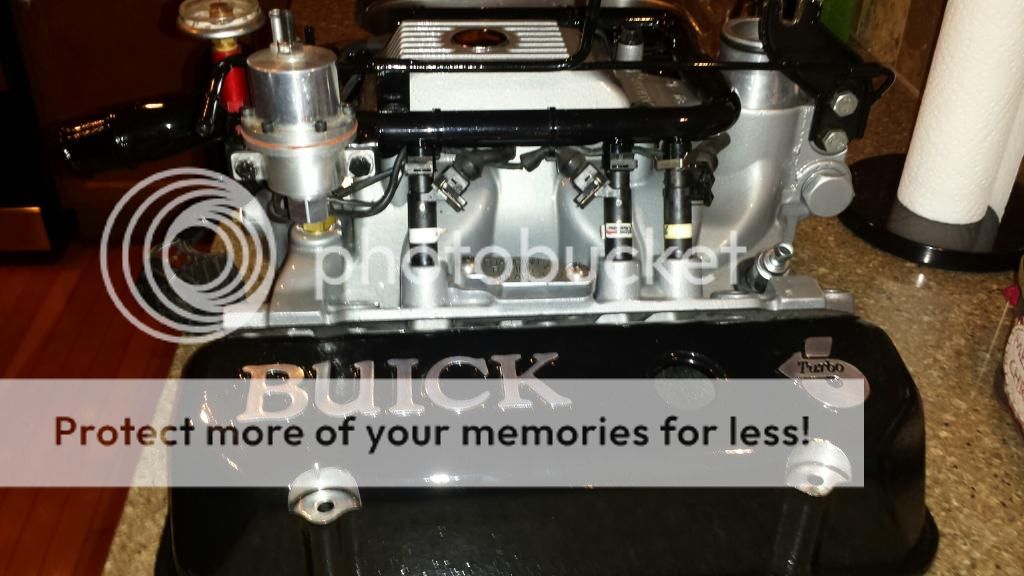
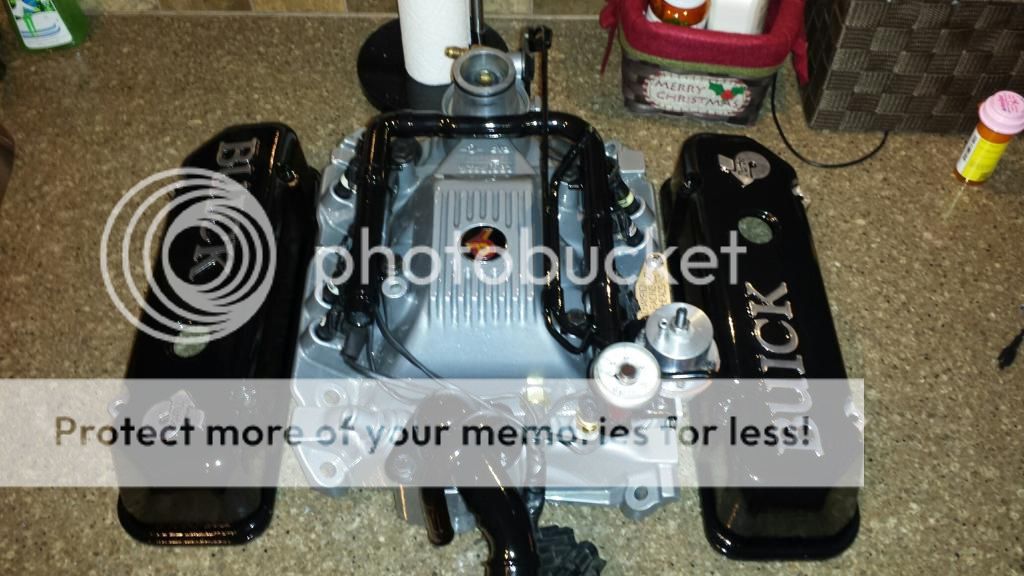
Powder coated and cleared the intake with the valve covers and all the brackets to the engine
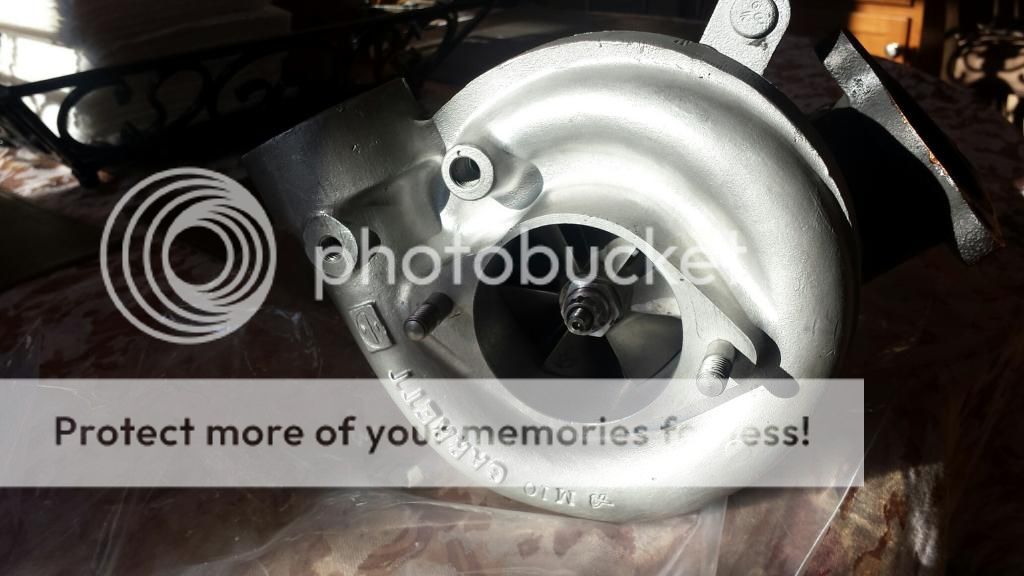
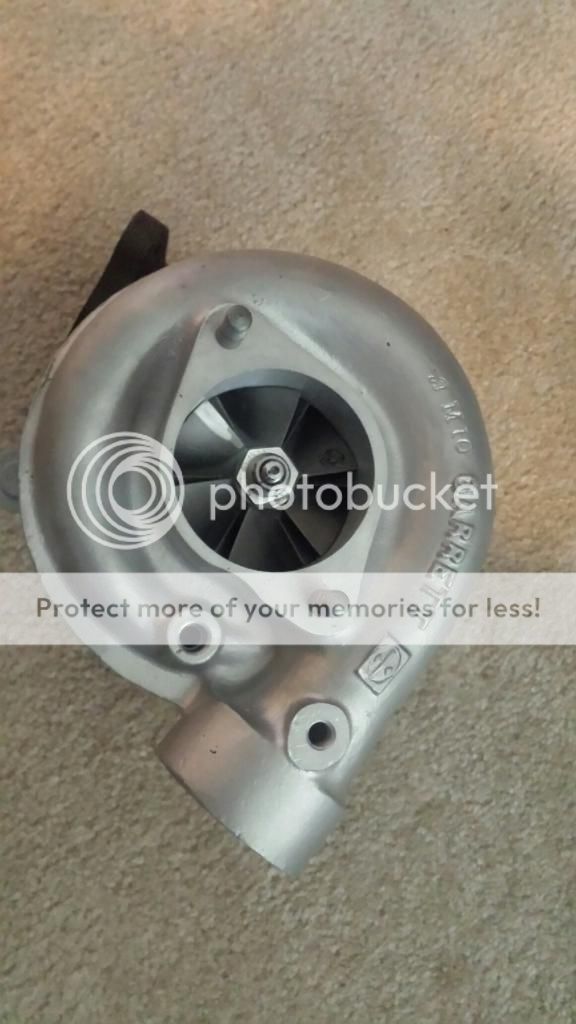
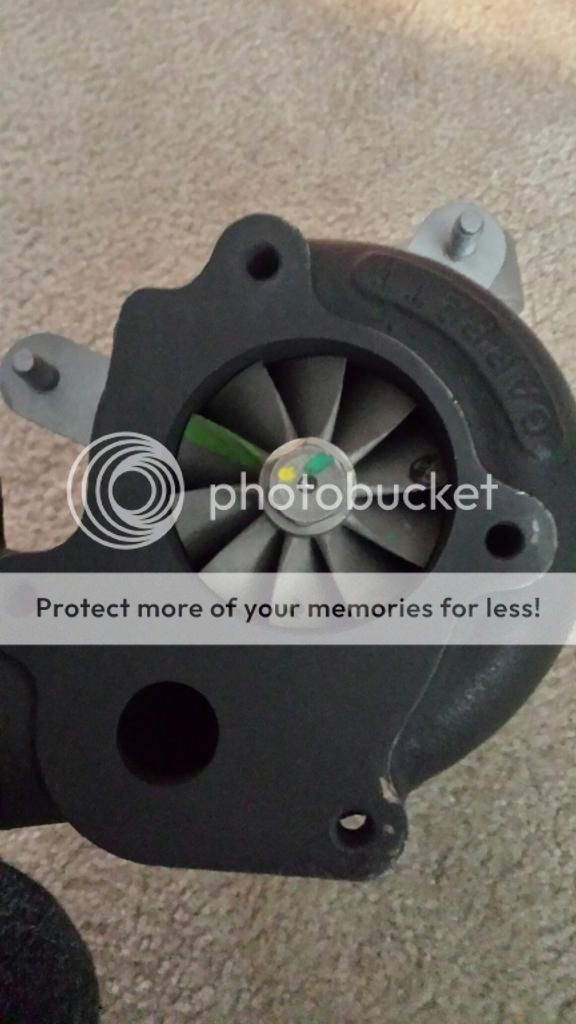


61.5 MM turbo


Visited the machinist today delighted to see that the block was in the honing machine getting ready to get an align hone. He was able to save the billet caps we had on the SG1 block and put them into the new block


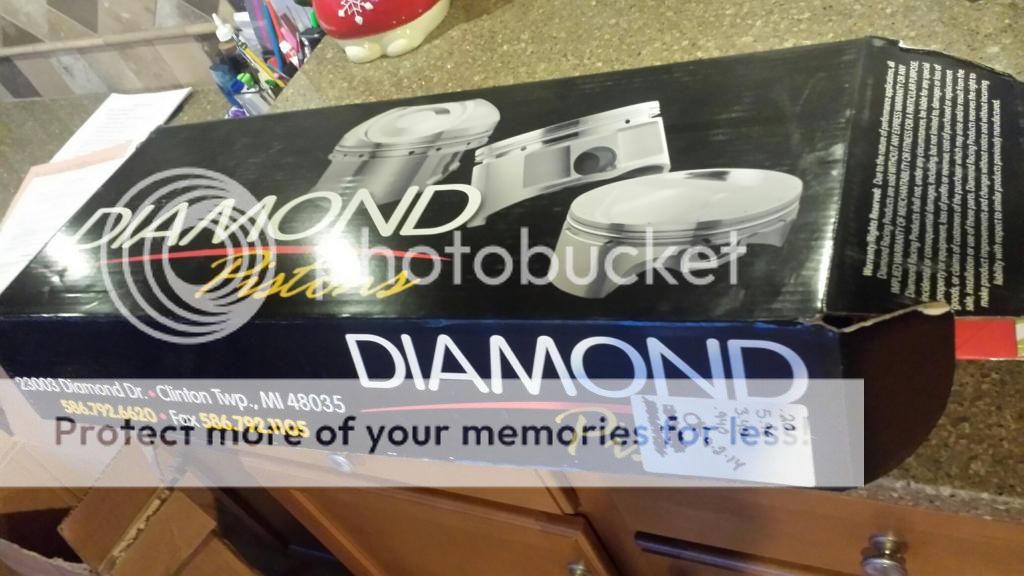
Come home today from work to find a present on the front door step for me


Next steps will be more powder coating to finish all the pulleys and such, then start trimming the engine bay with new silicone hoses in yellow....i know yellow?? It looks so cool and pops against black and chrome/silver.
 
At the machinist today to see the melted piston that forced me to purchase new ones. Then to be advised a crank is cracked!
 
Crank Cracked so.....going stroker. Dave Husek setup

Got the 4340 crank, molnar rods, and Wiseco pistons. Also have the TD roller rockers, comp 212/212, Husek roller lifters, rollmaster timing chain, pac1201, all ready to go


Last night I received my new sand blaster, so I could do some real finish work, this thing is a beast. Going to finh ALL the items I can under the hood.

 
Tony di you get that at TP tools what model is it ?message me the details .I am in the market and have been considering TP
 
Is your machinist local? Who do you use?


Sent from my iPhone using Tapatalk


Yea he is local. Only a few minutes from my house. He is Steve Barker with Barker Machine and Fab. He specializes in engine building and builds custom frames on full blown sled tractors and trucks. I guess he is widely known in the sled pulling circuit for his craftsmanship. He is quite diversified. He did my olds 307 442 engine for me, and does head work for Dave Fiscus from what I understand. He doesnt advertise either and has a full (busy as well as equipment) shop that is organized. His has a really nice machinist named Tim, which appears to be a retired engineer or machinist that does all the balance, and head work. Signs of a good builder.
 
Last edited:
Tony di you get that at TP tools what model is it ?message me the details .I am in the market and have been considering TP
Hey Bob

Yea, its a TP setup. I'll tell you this. I could not be more impressed,,,,and I make parts, and deal with steel and craftsmanship all the time. I have spent a considerable amount of time looking at cabinets and studying. This product is stout, built well, and the gun works amazingly. Simple things like a piano hinge on the door for rigidity as well as a quality latch is something to consider....the wearable items.... This model is the 850-T (for trigger) and came with the vacuum. Some people said the vacuum doesnt work as well as it should. I beg to differ. It is the vacuum 40 model. It's big enough for a block, as well as anything else I can fit into it. I mean the platform holds 200lb, its made of quality steel grate, and has multiple cross members. If I had extra room (which I dont have) I would opt for a wider cabinet. The product came shipped very very well, on a skid. I paid 1100, included shipping, the vac, gun, all the items needed to make it work. I then turned around and purchased a foot pedal (highly recommended) since your wrist tires after 15 minutes of pulling a trigger. Also purchased an extra set of gloves, carbide nozzle (you will wear out steel ones in a couple hours), a few window protectors (as a package deal for 80$.) Also grab a sifter; a parts tray; and their cool ass bolt/ screw canister, which allows you to blast into the canister and shake bolts around. I'll be getting a turntable next. I also built a roll around cart out of bed frame angle iron/cheap weld on casters so i could move it around my shop with ease, it also raised the cabinet perfectly for me, at 6'1" for "ergonomic sake." The thing does weigh about 300lb with the material in it.

Buy the 850, or opt for a larger 960, you wont be dissapointed.
 
Last edited:
Engine bore .020 and being decked

20141222_105053_resized.jpg 20141222_105101_resized.jpg
20141222_105053_resized.jpg
20141222_105101_resized.jpg
 
Hey Bob

Yea, its a TP setup. I'll tell you this. I could not be more impressed,,,,and I make parts, and deal with steel and craftsmanship all the time. I have spent a considerable amount of time looking at cabinets and studying. This product is stout, built well, and the gun works amazingly. Simple things like a piano hinge on the door for rigidity as well as a quality latch is something to consider....the wearable items.... This model is the 850-T (for trigger) and came with the vacuum. Some people said the vacuum doesnt work as well as it should. I beg to differ. It is the vacuum 40 model. It's big enough for a block, as well as anything else I can fit into it. I mean the platform holds 200lb, its made of quality steel grate, and has multiple cross members. If I had extra room (which I dont have) I would opt for a wider cabinet. The product came shipped very very well, on a skid. I paid 1100, included shipping, the vac, gun, all the items needed to make it work. I then turned around and purchased a foot pedal (highly recommended) since your wrist tires after 15 minutes of pulling a trigger. Also purchased an extra set of gloves, carbide nozzle (you will wear out steel ones in a couple hours), a few window protectors (as a package deal for 80$.) Also grab a sifter; a parts tray; and their cool ass bolt/ screw canister, which allows you to blast into the canister and shake bolts around. I'll be getting a turntable next. I also built a roll around cart out of bed frame angle iron/cheap weld on casters so i could move it around my shop with ease, it also raised the cabinet perfectly for me, at 6'1" for "ergonomic sake." The thing does weigh about 300lb with the material in it.

Buy the 850, or opt for a larger 960, you wont be dissapointed.
YEA I AM BETWEEN THAT ONE AND THIS ONE http://www.redlinestands.com/catalo...40-sand-blasting-cabinet-free-shipping-p-1532
 
I looked at that one as well. Few things to consider...because I have been there and "done that." Fluorescent lamps are only good for a couple uses, as no matter what you do to try to protect them from abrasive they get scratched. If you tape them, or have the film to go over them, it leaves a terrible glue residue that needs to come off with something strong that ruins the surface of the lamp. Any sand that gets behind the film....which it will, scratches as well. Find a cabinet with a simple flood light, the glass does not scratch and lights the crap out of the cabinet. Not being able to see is very frustrating. Shadows create illusions that make you think you are not getting to the substrate. Painting the inside of the cabinet black is not good. Look at all quality cabinets, they are sometimes white, or grey or left bare metal. The darkness makes it hard to see. The Redline models are Chinese. Now you know what I do over in the orient, however some parts made over there are good, and some are not. I would question the assembly, sealing as well as overall durability. I like its features very well. But in my case I traded longevity, and not having the damn thing to put together in contrast. look at the reviews on cabinets that need put together, most people claim it took hours and maybe a couple days to put together. Mine came assembled....took literally 30 minutes to get it running. It looks as if this model would need to be put together as it has many seams, and with seams, come leaks over time. Things to look at are:

The gun is a gun that was in my 98$ bench top Tractor Supply cabinet. It lasted a year and plugged up all the time. You cannot purchase any other types of nozzles (trust me, there is a difference.) Look for models that allow you to re-build the gun. The Chinese gun gets sloppy when it sees use of the media pass through it....as any would. However with good guns rather than buy a new gus you get a re-build kit....like a good HVLP gun gets rebuilt when items wear from use.

The feed is a gravity feed that does not have a vent out the top of the pickup tube, this creates a vacuum perse' and you will experience surging of the media

I like the idea of::

Attached dust canister, however I question its capability to keep up with the cabinet size. It is even bigger than my cabinet size by a few inches, but a smaller collector...which presents smaller CFM, = more dust and more frequent cleaning

Double doors is awesome, but look at the seals...

Over head nozzle looks like a great idea....but more tubes, more clogs, more airflow in directions....in which all you want to do is sandblast something. There is nothing like getting surges and clogs in the lines...terribly frustrating. I have not had one surge, not one clog at all. Getting the job done the easiest, and quickest manner is my key point.

The complication of the model looks nice. But I see a can of worms.

Hope to have shed a little light on my experiences in looking at cabinets.
 
Last edited:
I looked at that one as well. Few things to consider...because I have been there and "done that." Fluorescent lamps are only good for a couple uses, as no matter what you do to try to protect them from abrasive they get scratched. If you tape them, or have the film to go over them, it leaves a terrible glue residue that needs to come off with something strong that ruins the surface of the lamp. Any sand that gets behind the film....which it will, scratches as well. Find a cabinet with a simple flood light, the glass does not scratch and lights the crap out of the cabinet. Not being able to see is very frustrating. Shadows create illusions that make you think you are not getting to the substrate. Painting the inside of the cabinet black is not good. Look at all quality cabinets, they are sometimes white, or grey or left bare metal. The darkness makes it hard to see. The Redline models are Chinese. Now you know what I do over in the orient, however some parts made over there are good, and some are not. I would question the assembly, sealing as well as overall durability. I like its features very well. But in my case I traded longevity, and not having the damn thing to put together in contrast. look at the reviews on cabinets that need put together, most people claim it took hours and maybe a couple days to put together. Mine came assembled....took literally 30 minutes to get it running. It looks as if this model would need to be put together as it has many seams, and with seams, come leaks over time. Things to look at are:

The gun is a gun that was in my 98$ bench top Tractor Supply cabinet. It lasted a year and plugged up all the time. You cannot purchase any other types of nozzles (trust me, there is a difference.) Look for models that allow you to re-build the gun. The Chinese gun gets sloppy when it sees use of the media pass through it....as any would. However with good guns rather than buy a new gus you get a re-build kit....like a good HVLP gun gets rebuilt when items wear from use.

The feed is a gravity feed that does not have a vent out the top of the pickup tube, this creates a vacuum perse' and you will experience surging of the media

I like the idea of::

Attached dust canister, however I question its capability to keep up with the cabinet size. It is even bigger than my cabinet size by a few inches, but a smaller collector...which presents smaller CFM, = more dust and more frequent cleaning

Double doors is awesome, but look at the seals...

Over head nozzle looks like a great idea....but more tubes, more clogs, more airflow in directions....in which all you want to do is sandblast something. There is nothing like getting surges and clogs in the lines...terribly frustrating. I have not had one surge, not one clog at all. Getting the job done the easiest, and quickest manner is my key point.

The complication of the model looks nice. But I see a can of worms.

Hope to have shed a little light on my experiences in looking at cabinets.
Toby,That is why I ask, I knew you would have done some research.the redline has alot of feature i really don't care about. I just want a good hard working cabinet .
You convinced me and the fact you have yours up and running and like it is the icing on the cake .Thanks for the review Merry Christmas
 
Cool build! So are you having the turbo adapter welded on to that turbo, is it going to fit in stock location?
 
more items powder coated along with the throttle body cash silver and clear coated...misc brackets and pulleys too, and nothing like putting the little ones to work. Yes..the C16 is sealed up,,,,that she is standing on...lol
20150102_201015_resized.jpg
20150103_172804_resized.jpg
20150103_172815_resized.jpg
20150103_172822_resized.jpg
20150103_214447_resized.jpg
20150103_214504_resized.jpg
 
Very nice! If you need more practice parts let me know! Silver and black simply belong under the hood of these cars.
 
Top