
You are using an out of date browser. It may not display this or other websites correctly.
You should upgrade or use an alternative browser.
You should upgrade or use an alternative browser.
Extreme budget GN build thread
- Thread starter BuickMike
- Start date
Kevin87TurboT
How many can I own??
- Joined
- Jul 29, 2005
Beautiful car! I love the bumpers. That really cleans things up.
hammer1918
Member
- Joined
- Oct 2, 2011
nice build i might use your s-10 rear sway bar idea
Gunmetal87
Member
- Joined
- Aug 12, 2012
I like the clean look, no badges. Simple and flawless!!!
I'm still having a hard time accepting this thing as a "show car". I started this as a super budget build after I damaged the motor. I initially decided that I need to address the chassis / suspension / brakes to some extent before doing anything else because I honestly didn't care to drive it unless my foot was to the floor. It all snowballed from there. After I got the car back together last year I had enough money together to buy new interior pieces from Nos4GN. When they showed up my wife insisted that I have it painted first. Honestly I was going to scotch brite the whole car and call it done for now haha. I do have to thank my loving / patient wife for allowing me to work a second job lots of hours and find ways to put the money aside to get it done. As you can see the paint job snowballed too!
I like the clean look, no badges. Simple and flawless!!!
The only reason it is badgeless is because I don't want to spend the money for new ones. I will never put the hood badges on again, but eventually I will put the trunk and fender badges on. I really like it debadged, but I know I will get sick of explaining to people that it is a "real" GN.
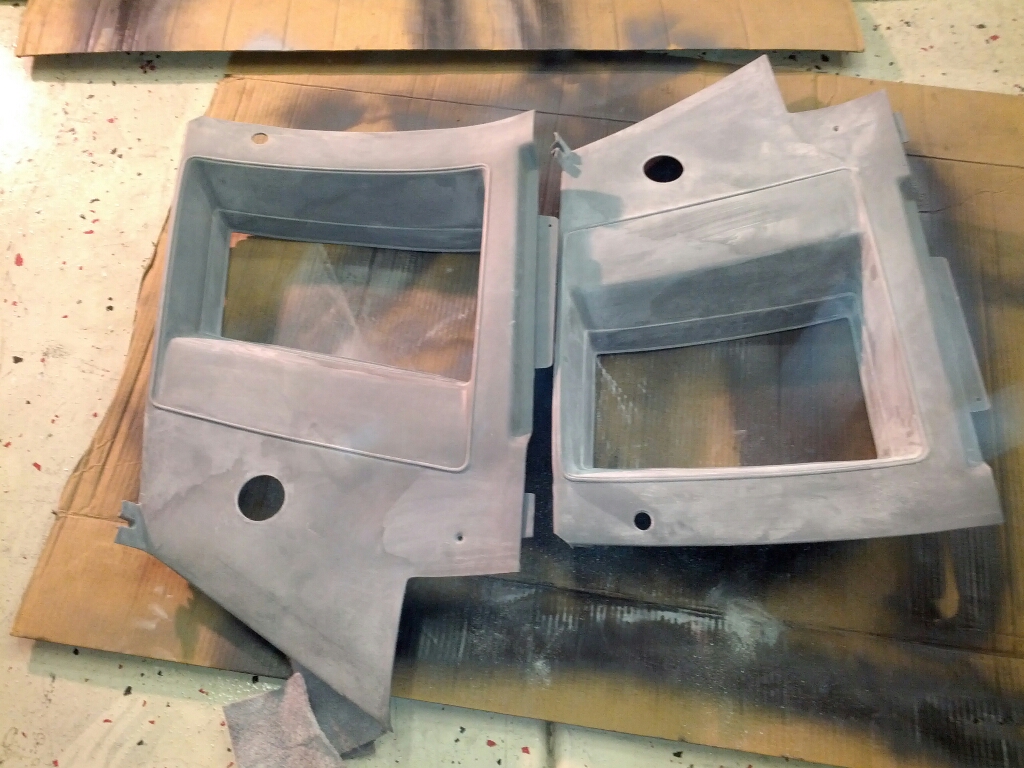
So I got some time to keep plugging away at getting interior parts ready. I'm reusing everything except the headliner, plastic upper dash panel, and t top plastic pieces, so I'm putting in lots of work to get everything looking good. I was able to use plastic weld to fill in some cracks in a couple parts. I also grafted in a missing chunk on a top part using the material from my old upper dash panel and plastic weld. I'm repaining all the plastic parts with the interior paint from G Body Parts. I ordered 3 cans, and it looks like I will have a little left over when I'm done. Before I started doing this, I remembered how I tried to paint the parts in my '68 GS way back and it turned out real bad. The plastic underneath was dry and flaked off. So I took a spare part and tried an idea. It works great! Here is what I did:
Take a red scotch brite pad and sand the pieces. All the dry plastic on top comes right off. It's kind of like exfoliating the dead material right off. Here are the worst panels I had after sanding:
Blow it off with air, wipe it down with a wet cloth, and prep with rubbing alcohol. Here they are prepped:
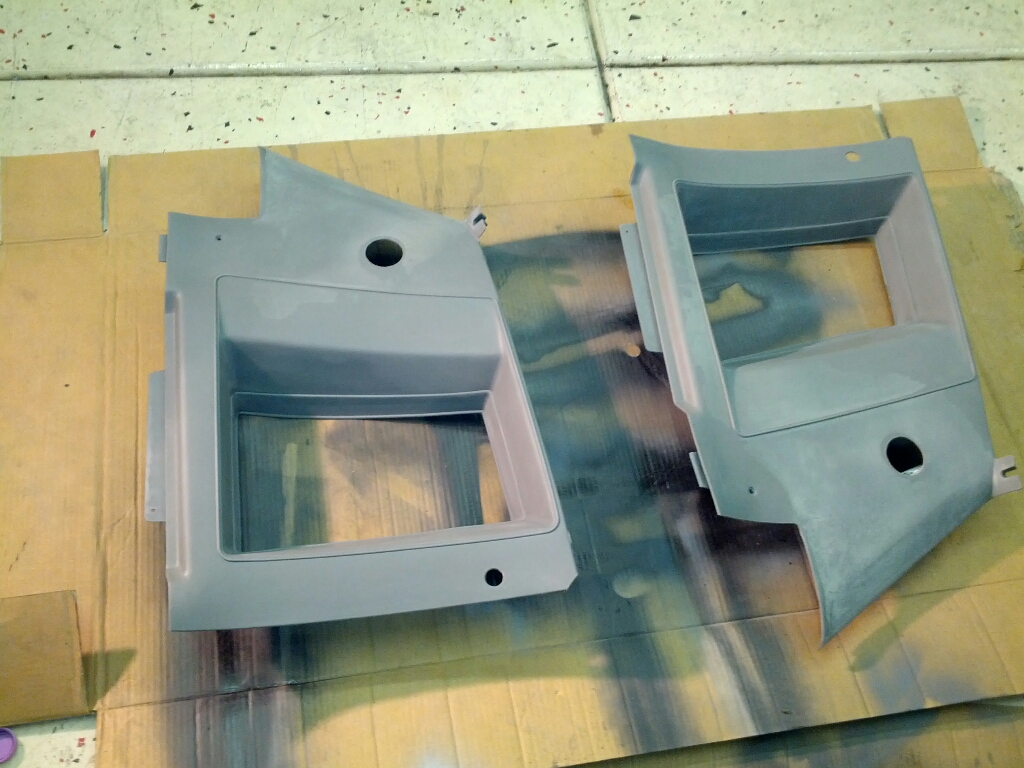
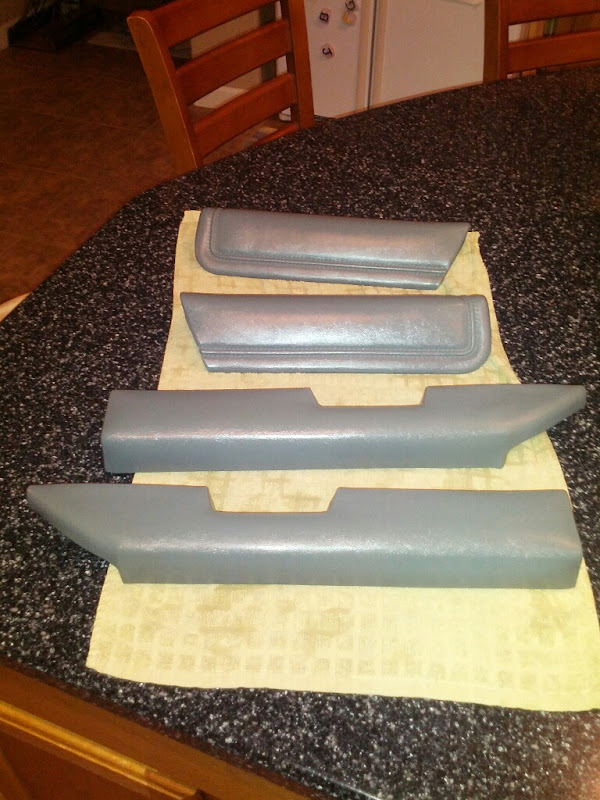
Then I layed down a coat of adhesion promoter followed by 3 coats of the interior paint. Here is the finished product. The picture doesn't do them justice:
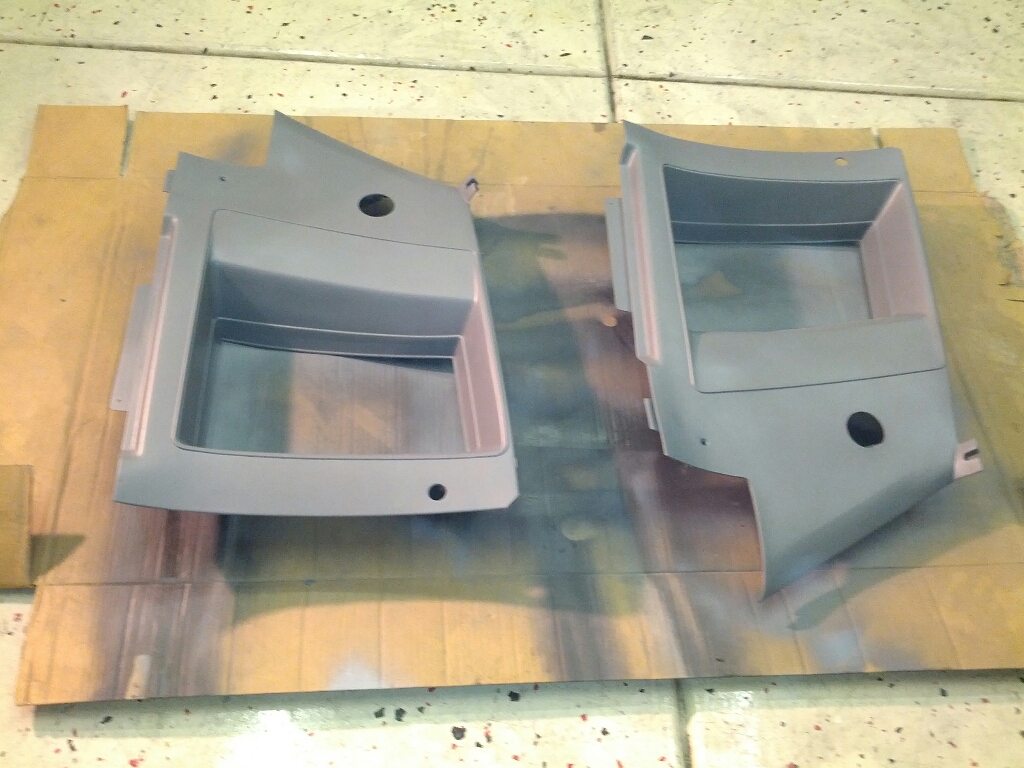
Here is what I got painted so far. All I have left are my kick panels and 3rd brake light. I will rub them all down with a little polising compound before installing them. That will take out any roughness and make them all look like they just got hit with a shine / protectant spray.
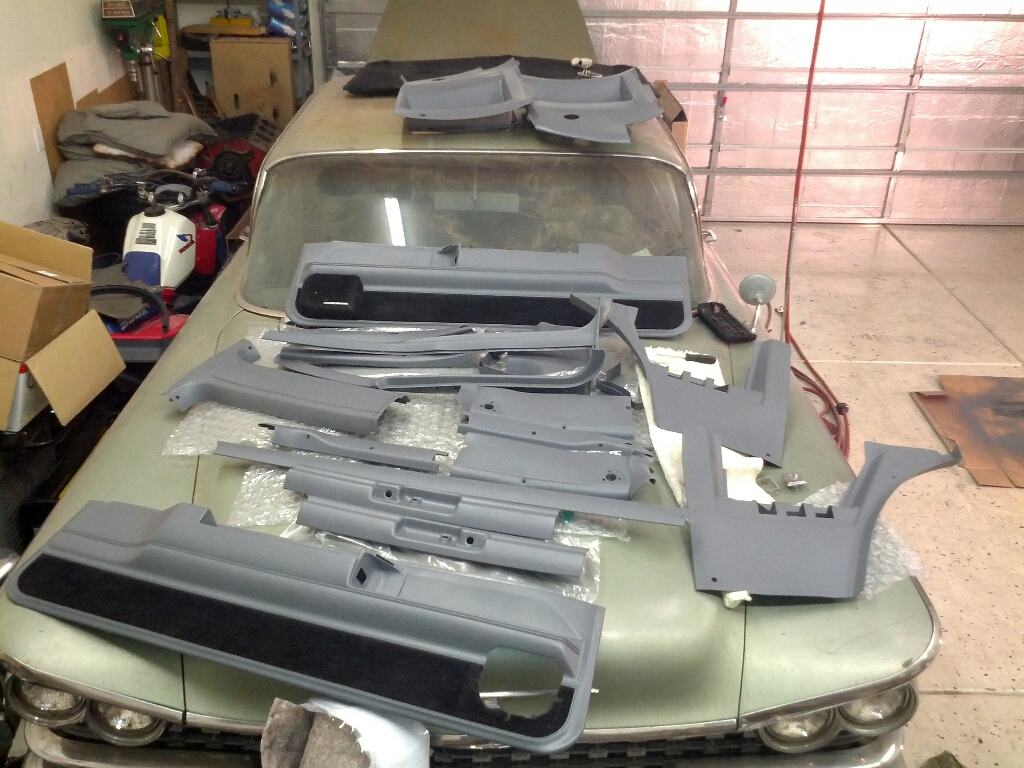
I was lucky enough to clean up the vinyl parts real nice. I used a baking soda / water paste with a little dish soap and an exfoliating glove to scrub everything clean. The dash / center console game out pretty good. I just finished the armrests tonight. Here they are:
Take a red scotch brite pad and sand the pieces. All the dry plastic on top comes right off. It's kind of like exfoliating the dead material right off. Here are the worst panels I had after sanding:
Blow it off with air, wipe it down with a wet cloth, and prep with rubbing alcohol. Here they are prepped:
Then I layed down a coat of adhesion promoter followed by 3 coats of the interior paint. Here is the finished product. The picture doesn't do them justice:
Here is what I got painted so far. All I have left are my kick panels and 3rd brake light. I will rub them all down with a little polising compound before installing them. That will take out any roughness and make them all look like they just got hit with a shine / protectant spray.
I was lucky enough to clean up the vinyl parts real nice. I used a baking soda / water paste with a little dish soap and an exfoliating glove to scrub everything clean. The dash / center console game out pretty good. I just finished the armrests tonight. Here they are:
pmoore4321
Member
- Joined
- Jan 10, 2010
Awesome...those interior panels really look great
I clicked this and read the whole thing. Awesome job, but hardly budget anymore with that paint..
Yeah, the paint killed the "budget". I started out thinking that my buddy and I were going to paint the car ourselves for around 1k. I'm glad we didn't try to take it on, because it needed a lot more work than we anticipated. Considering that I worked my ass off by moonlighting, selling stuff, doing as much of the work myself, and bartering, it really still is a budget build. I honestly don't have a ton of money tied up in this car. I would most likely break even or even make a little profit if I wanted to sell this car when done.
BuickMike said:Yeah, the paint killed the "budget". I started out thinking that my buddy and I were going to paint the car ourselves for around 1k. I'm glad we didn't try to take it on, because it needed a lot more work than we anticipated. Considering that I worked my ass off by moonlighting, selling stuff, doing as much of the work myself, and bartering, it really still is a budget build. I honestly don't have a ton of money tied up in this car. I would most likely break even or even make a little profit if I wanted to sell this car when done.
Congrats. I love projects like this. Very demonstrative of the snowball effect most of us have encountered. Good luck and great work.
highboostgn
Well-Known Member
- Joined
- May 24, 2011
nice!!
Alright. Quick update. I pulled out the seats and carpet. The floor pan looks great!
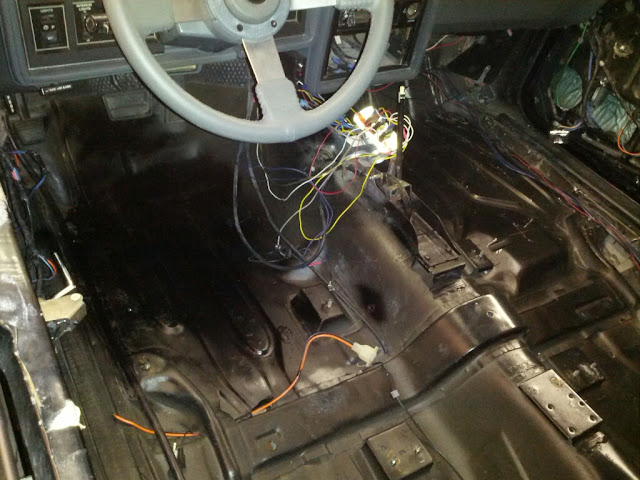
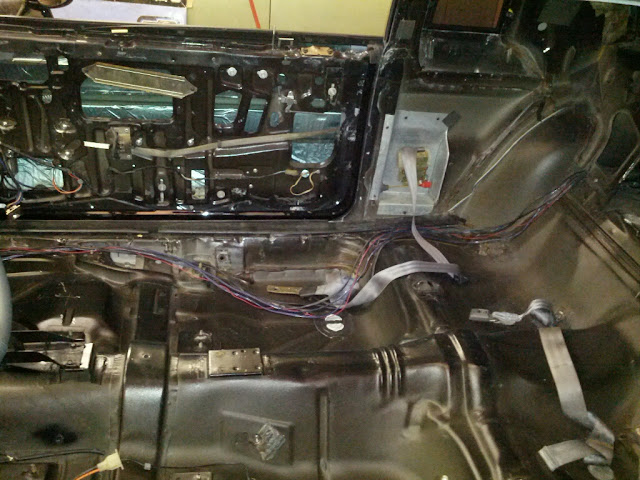
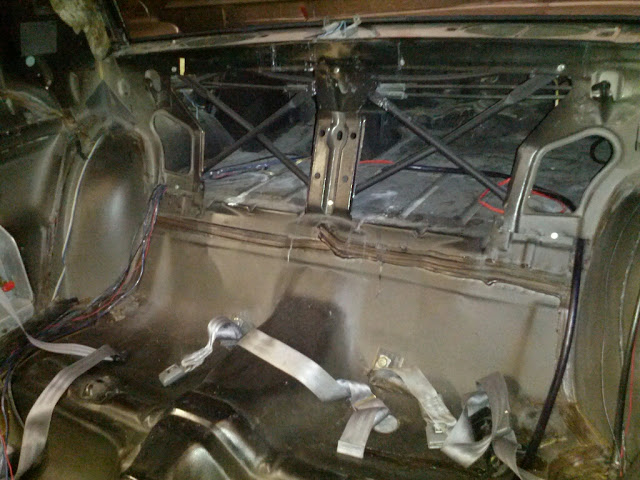
So years ago I got a bunch of E Dead V1 super cheap. I had a couple rolls left over, so I decided to use it all up on the floor. I already have 2 layers in the outer door skins. Not sure if I've covered that in this thread or not. I had just enough to do 2 layers on all the flat spots and across the roof.
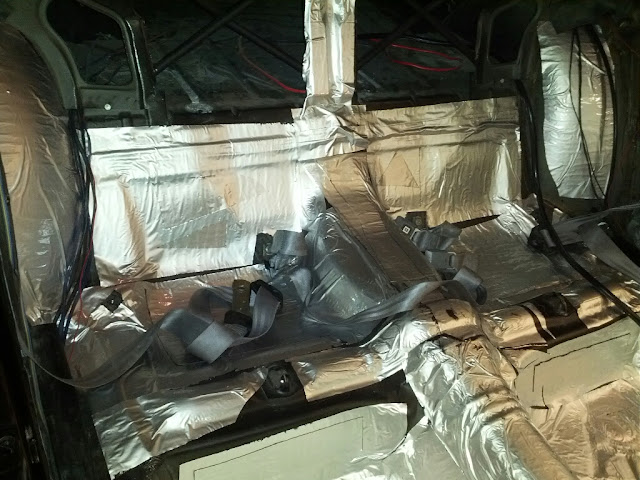
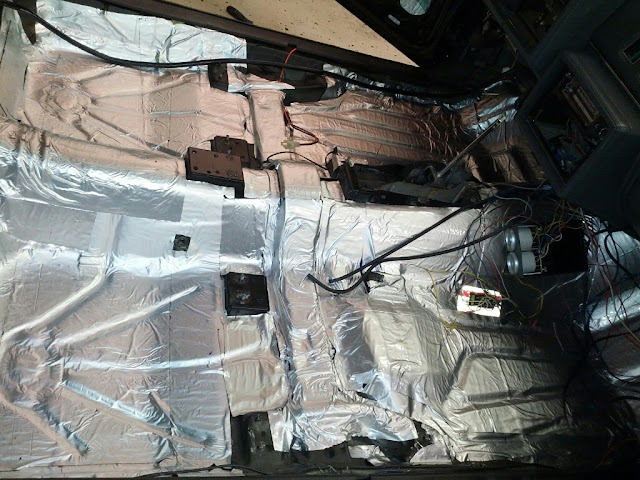
Holy cow what a difference that made. Especially after the second layer. I know its not the prettiest job in the world, but it will do. It looked better after I hit it all with a heat gun and flattened it out a bit.
Maybe if I'm lucky I will get the new carpet in place this weekend...
So years ago I got a bunch of E Dead V1 super cheap. I had a couple rolls left over, so I decided to use it all up on the floor. I already have 2 layers in the outer door skins. Not sure if I've covered that in this thread or not. I had just enough to do 2 layers on all the flat spots and across the roof.
Holy cow what a difference that made. Especially after the second layer. I know its not the prettiest job in the world, but it will do. It looked better after I hit it all with a heat gun and flattened it out a bit.
Maybe if I'm lucky I will get the new carpet in place this weekend...
Gunmetal87
Member
- Joined
- Aug 12, 2012
Great pics. I plan on redoing my interior too.
Yes - very detailed work which I admire. I also use a soft bristle toothbrush on the vinyl to get any smudges or dirt that is in the faux grain of the vinyl. Wiping or scrubbing doesn't always get it off, but the toothbrush seems to get in those micro pores.So I got some time to keep plugging away at getting interior parts ready. I'm reusing everything except the headliner, plastic upper dash panel, and t top plastic pieces, so I'm putting in lots of work to get everything looking good. I was able to use plastic weld to fill in some cracks in a couple parts. I also grafted in a missing chunk on a top part using the material from my old upper dash panel and plastic weld. I'm repaining all the plastic parts with the interior paint from G Body Parts. I ordered 3 cans, and it looks like I will have a little left over when I'm done. Before I started doing this, I remembered how I tried to paint the parts in my '68 GS way back and it turned out real bad. The plastic underneath was dry and flaked off. So I took a spare part and tried an idea. It works great! Here is what I did:
Take a red scotch brite pad and sand the pieces. All the dry plastic on top comes right off. It's kind of like exfoliating the dead material right off. Here are the worst panels I had after sanding:
Blow it off with air, wipe it down with a wet cloth, and prep with rubbing alcohol. Here they are prepped:
Then I layed down a coat of adhesion promoter followed by 3 coats of the interior paint. Here is the finished product. The picture doesn't do them justice:
Here is what I got painted so far. All I have left are my kick panels and 3rd brake light. I will rub them all down with a little polising compound before installing them. That will take out any roughness and make them all look like they just got hit with a shine / protectant spray.
I was lucky enough to clean up the vinyl parts real nice. I used a baking soda / water paste with a little dish soap and an exfoliating glove to scrub everything clean. The dash / center console game out pretty good. I just finished the armrests tonight. Here they are:
What is your plan on refinishing the T-top panels / exterior reveal moldings? SEMS Satin? Mine are fading and need some TLC and I'm looking for the suggestion.
I never really documented what I did with that. I used I used Krylon Industrial semi flat black on all the t top area metal and all the metal trim. It all turned out real nice. SEMS is good stuff, but the Krylon industrial is cheap and works fantastic. Heath Elmer turned me on to it.
So cool! I figured you had that answer.
And of course, like it that you found a reasonably priced solution.
Notice I didn't say cheap, but I know that is shorthand for low priced when writing on the blog! ;-)
Krylon Industrial Semi Flat Black - in a spray can - I am assuming?
I'll Google ASAP.
I've used the Duplicolor instead of ordering the SEMS; and not super happy with the heavy coat of paint the spray can wants to apply.
It's decent enough for occasional work, but I've found it tough to keep it from running or sagging.
Similar threads
- Replies
- 10
- Views
- 602
- Replies
- 3
- Views
- 508
- Replies
- 15
- Views
- 666