Extreme budget GN build thread

BuickMike

Money pit
Joined
Jun 7, 2001
***Update about pics. I lost a bunch, but will see what I can find and replace as I go. ***

I'm just going to copy my posts from another thread I've been making on a local board as I go. My GN has been apart for 5 years now. I've been picking away at it slowly as I can sscrounge money together and make time for it. Hope you all enjoy:

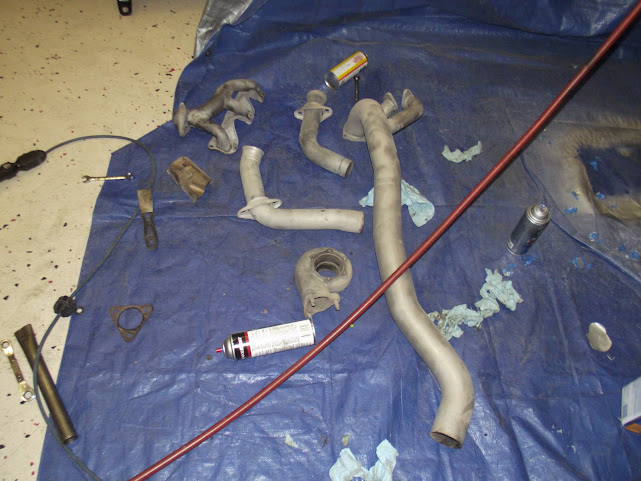
5 years ago I blew a head gasket. When I pulled the heads I found another head gasket leaking into the crank case and a cracked exhaust valve. I ran a 12.0 a week prior and have no idea how I was able to pull that off. At least I knew why the motor sounded funny and why I was getting a bunch of blow by under boost.

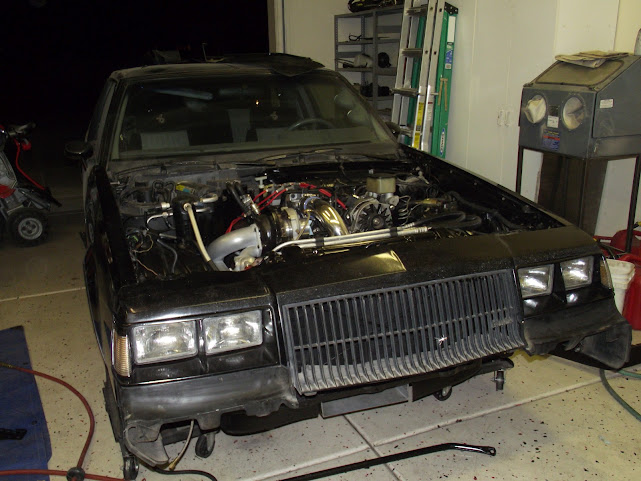
After realizing that I could not get rid of the car I went crazy one day and did this:

DSCF8607.JPG


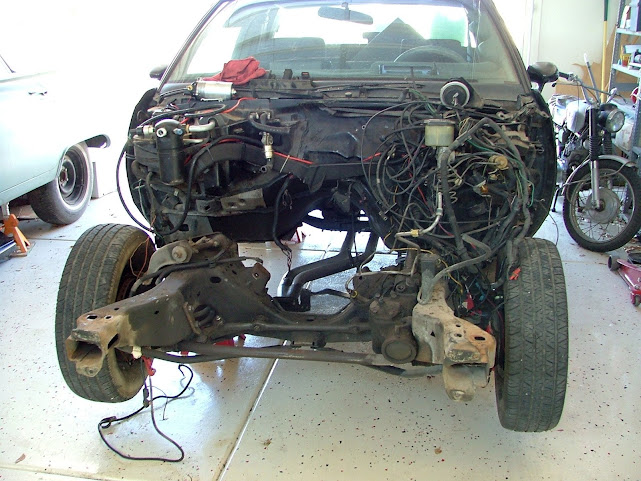
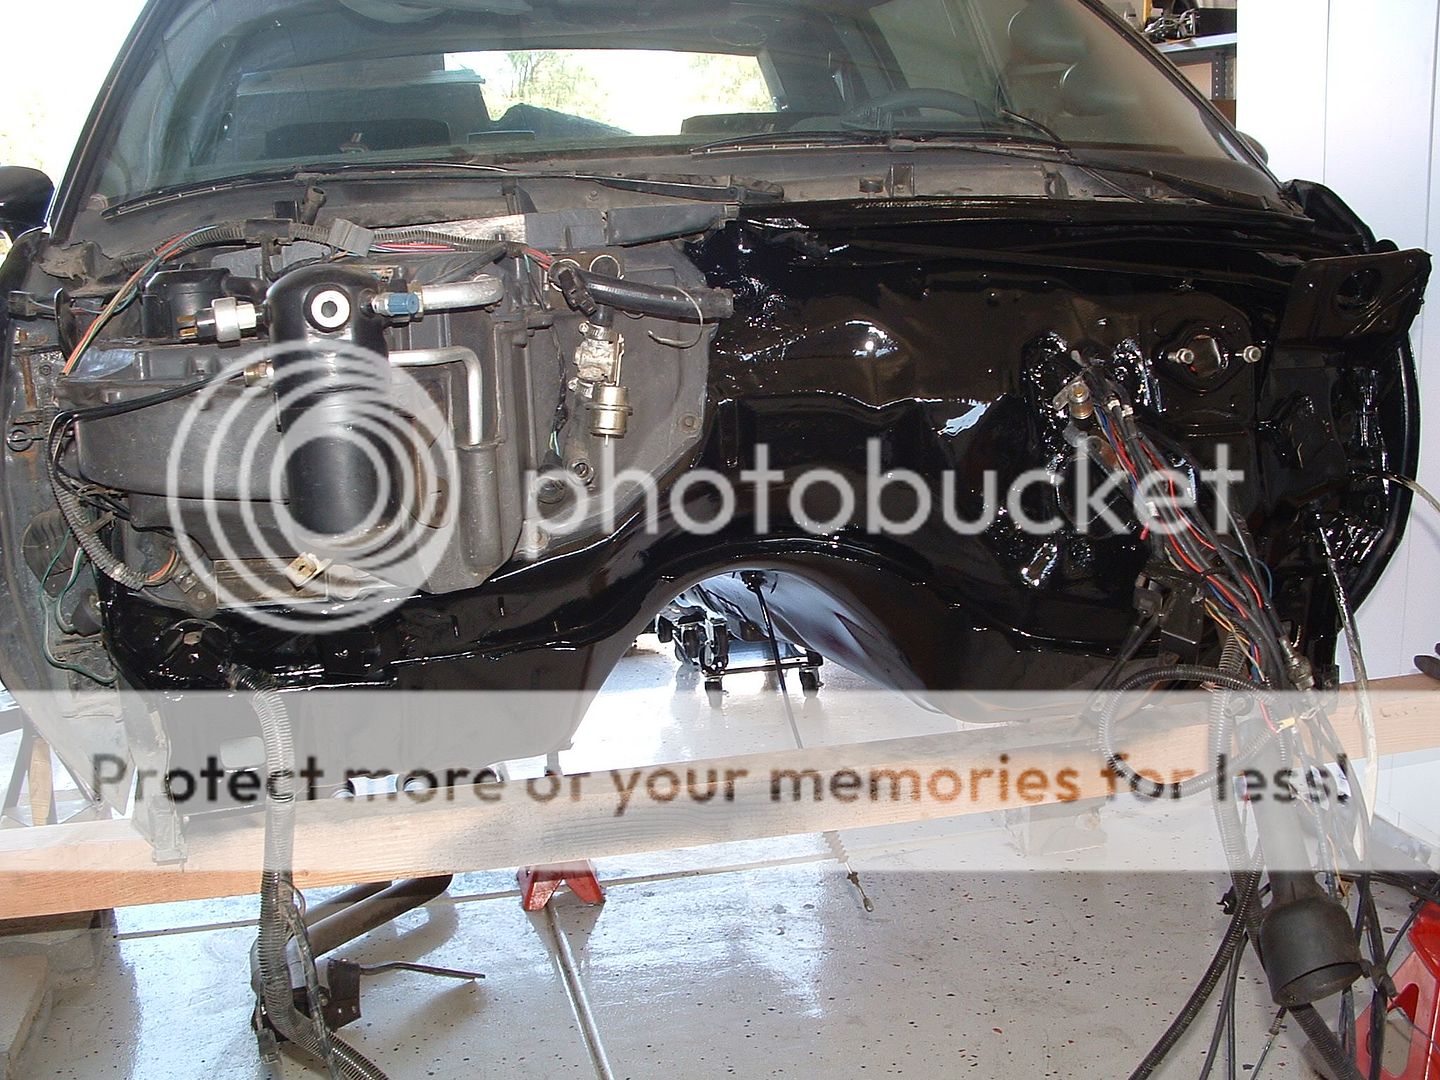
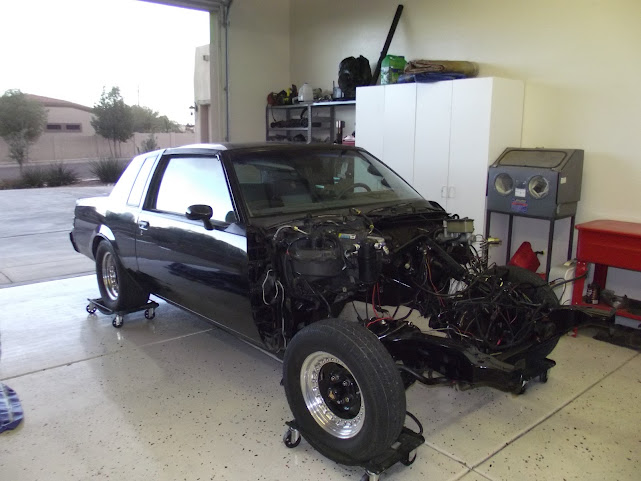
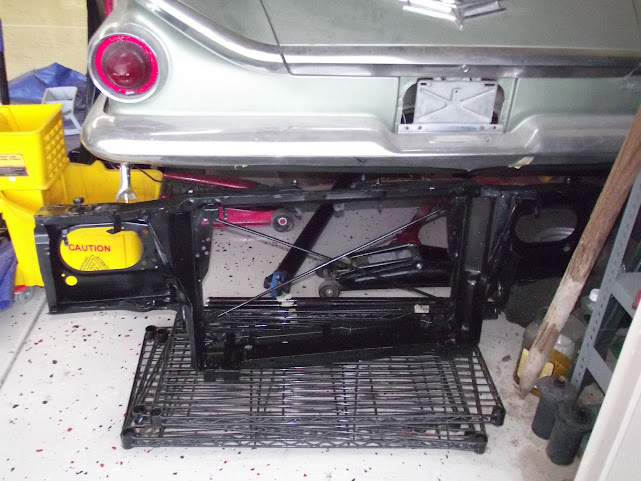
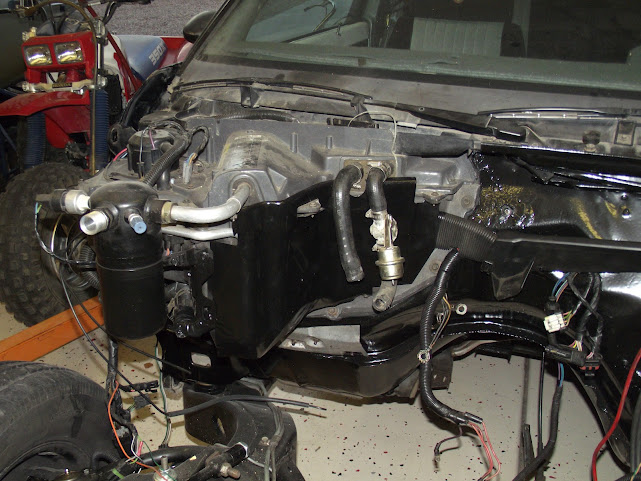
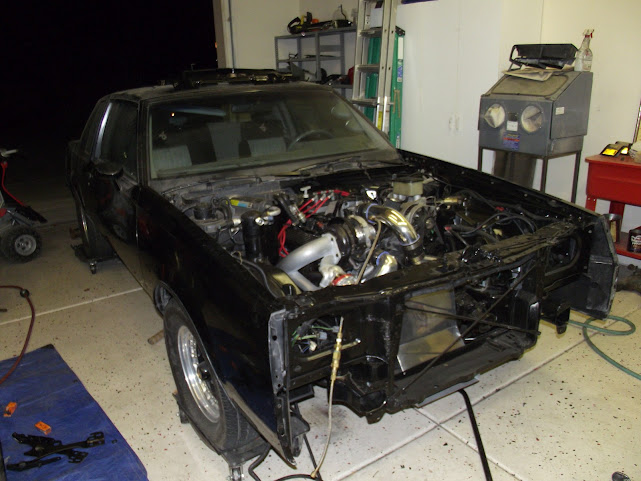
I took the whole front clip apart and removed the motor. I decided that if I need to rebuild the motor I may as well at least clean up the engine bay.

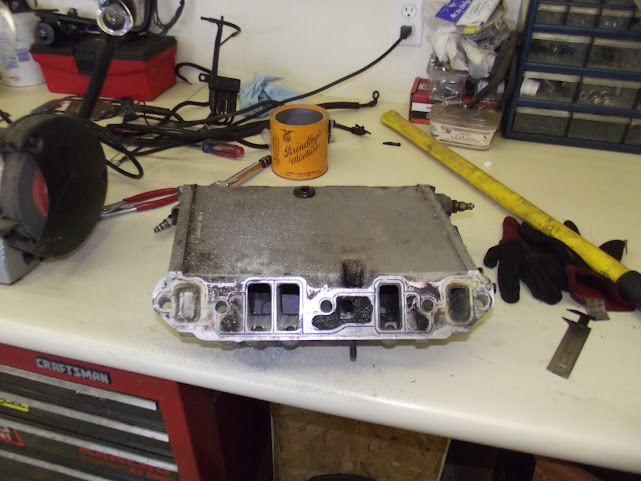
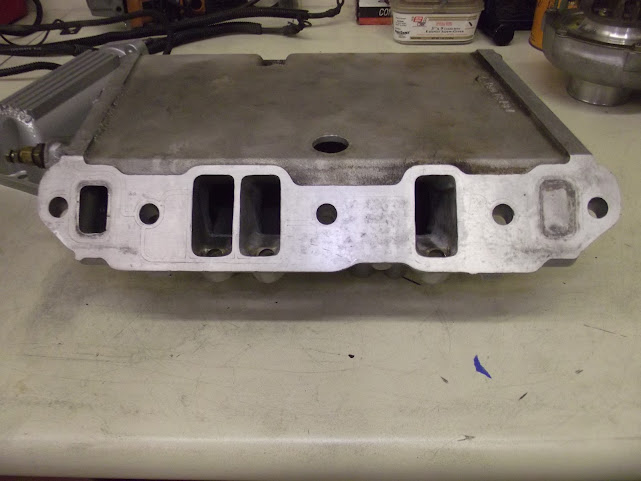
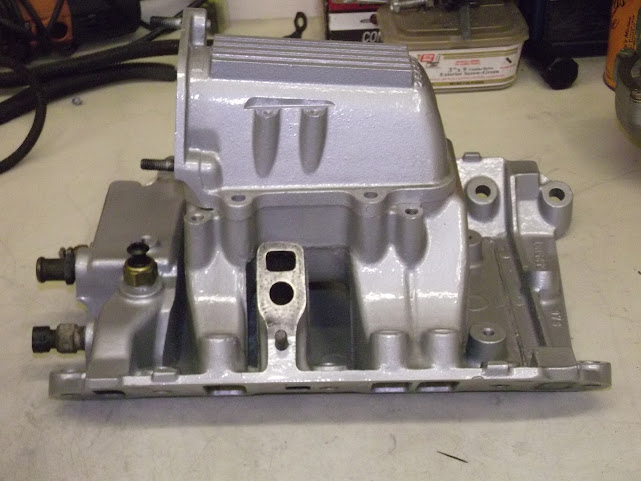
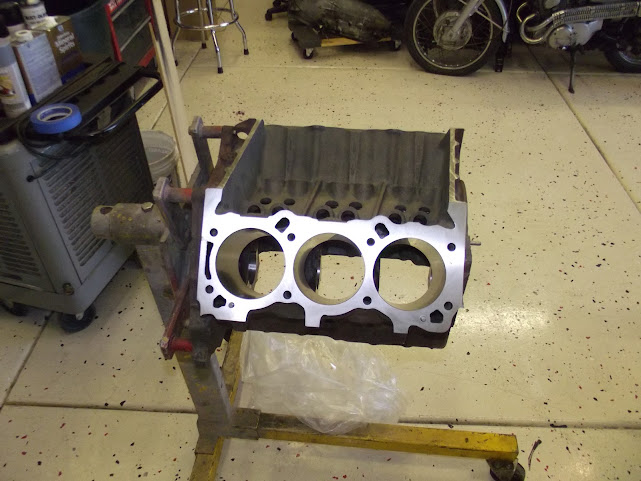
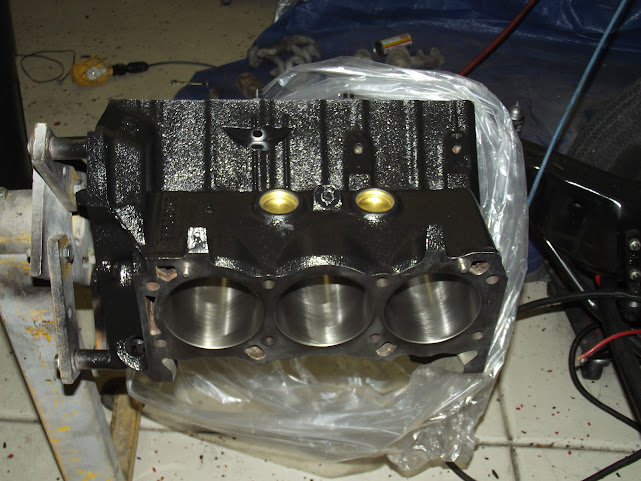
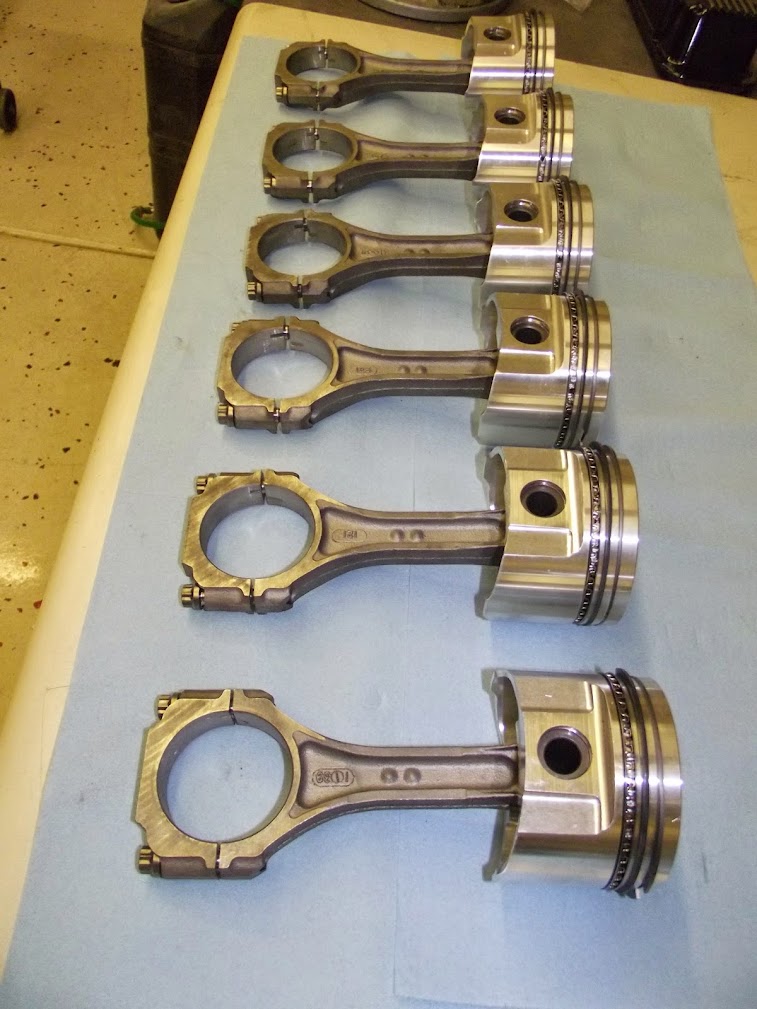
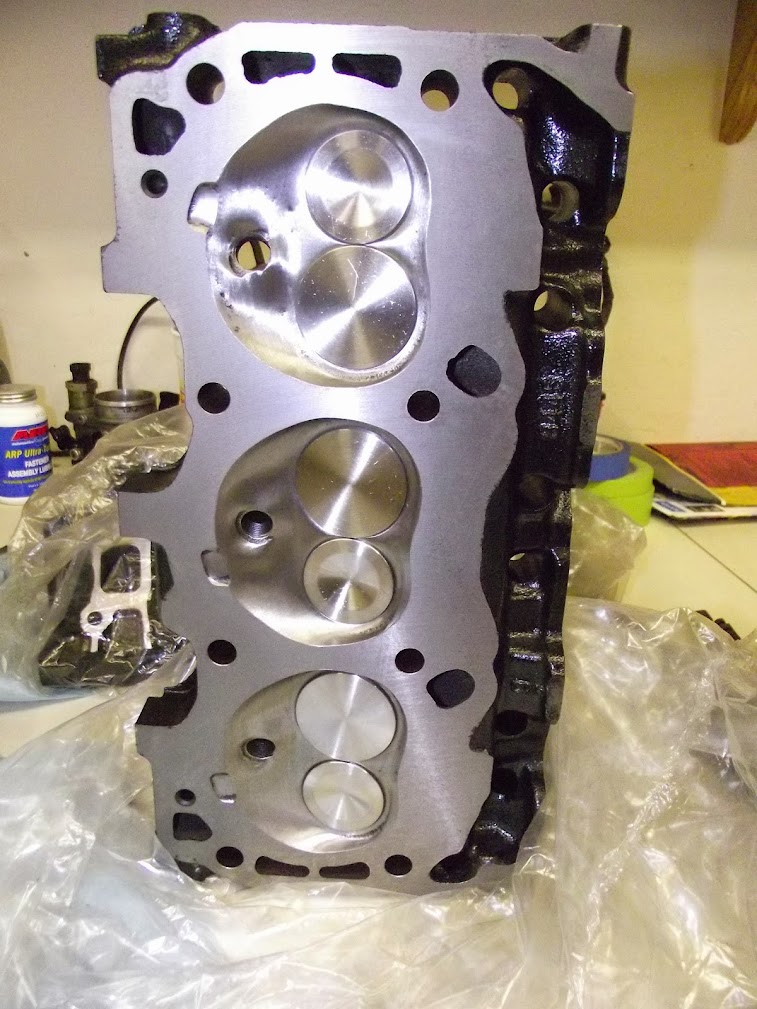
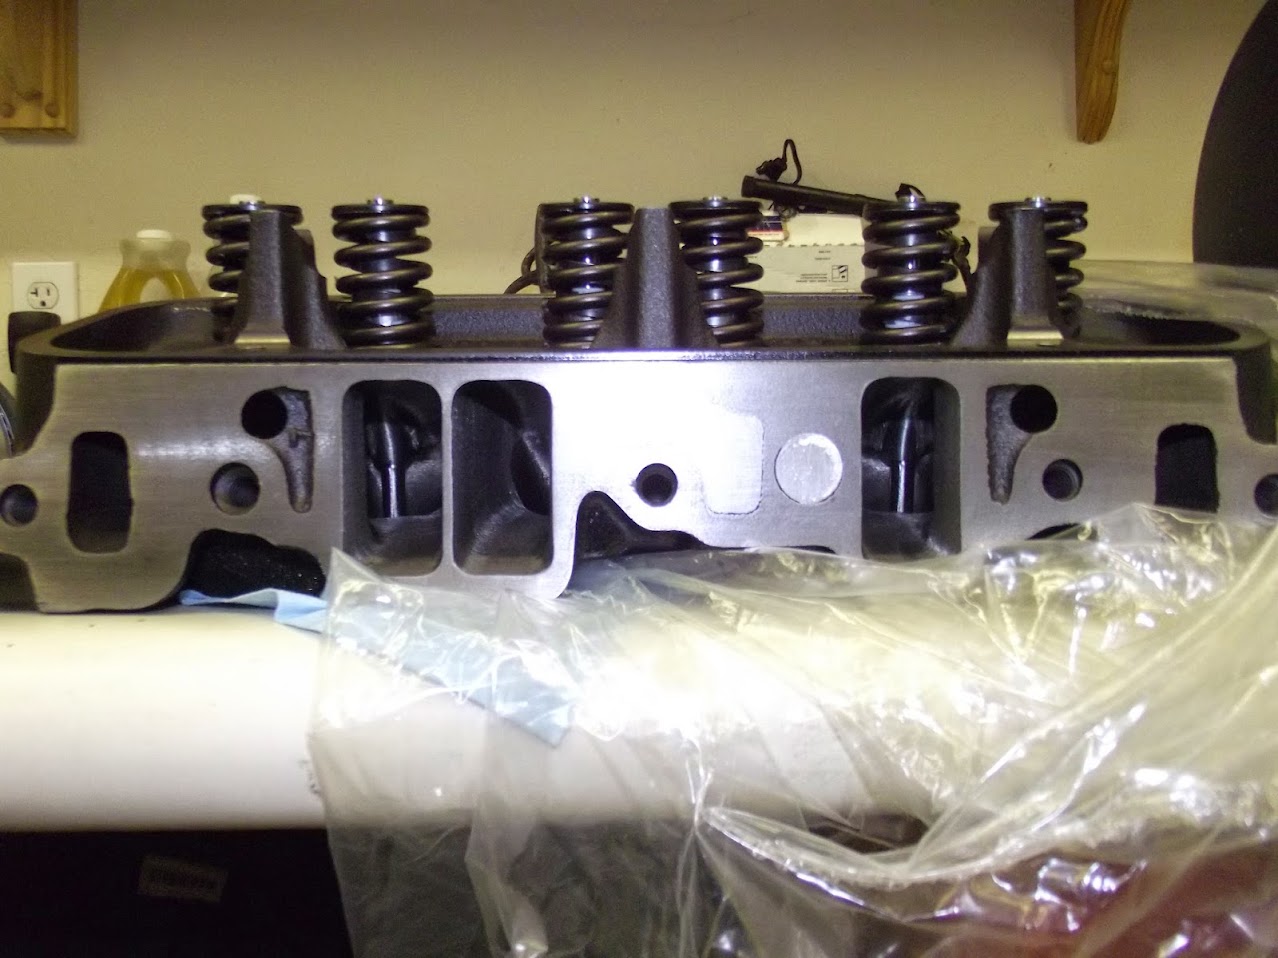
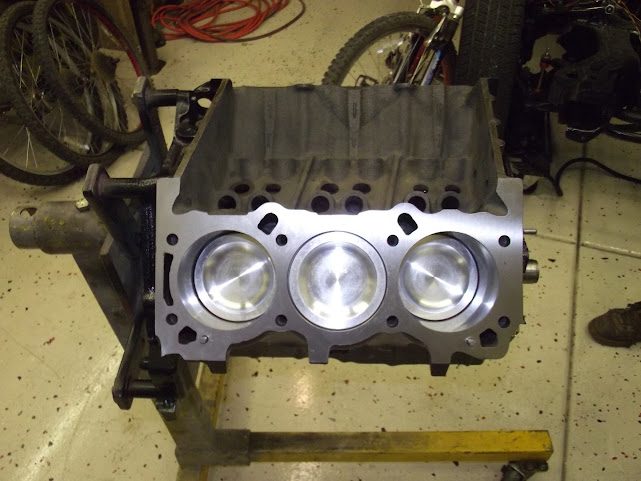
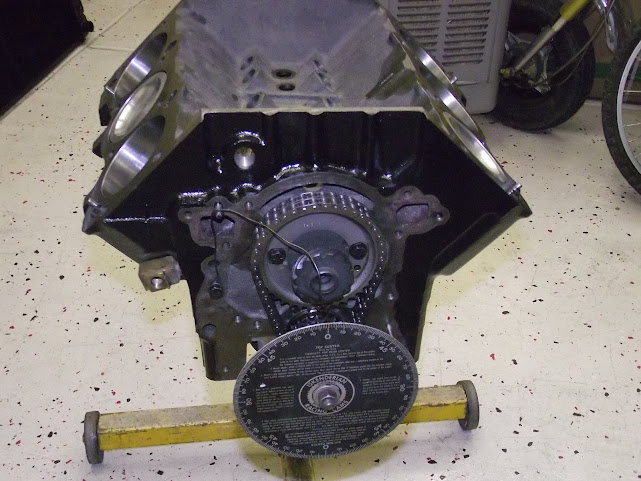
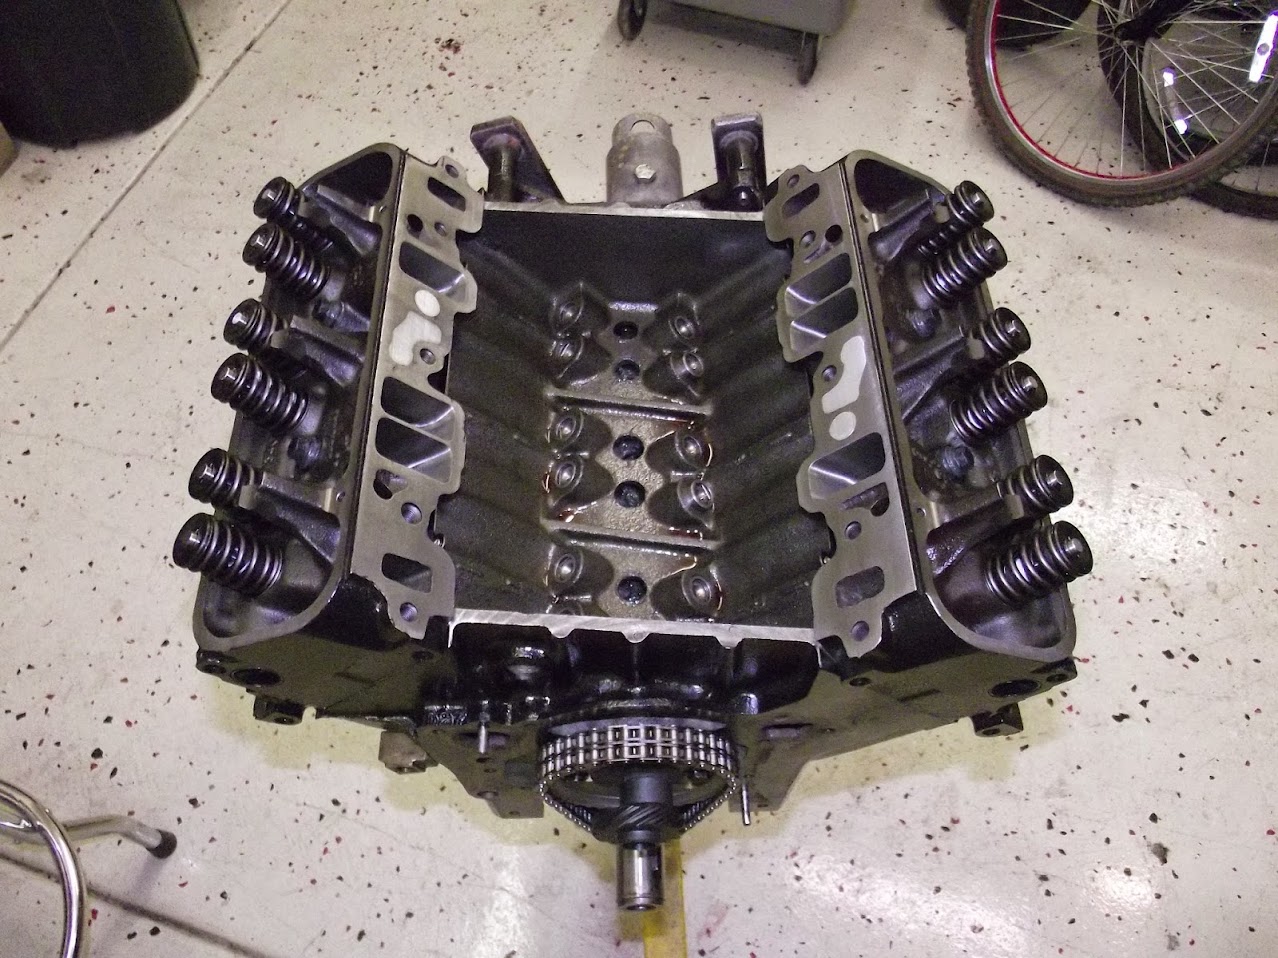
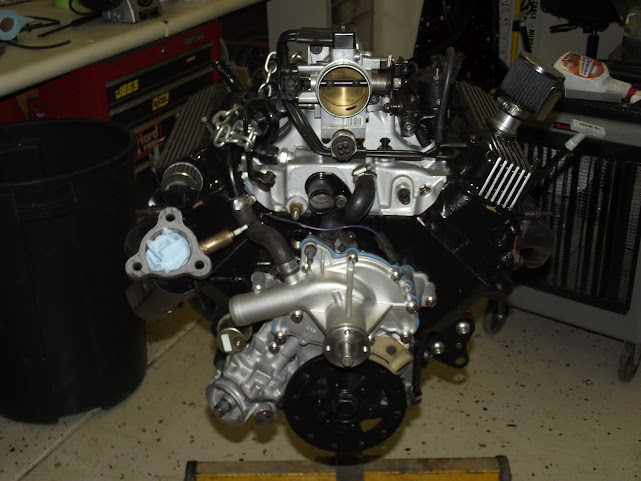
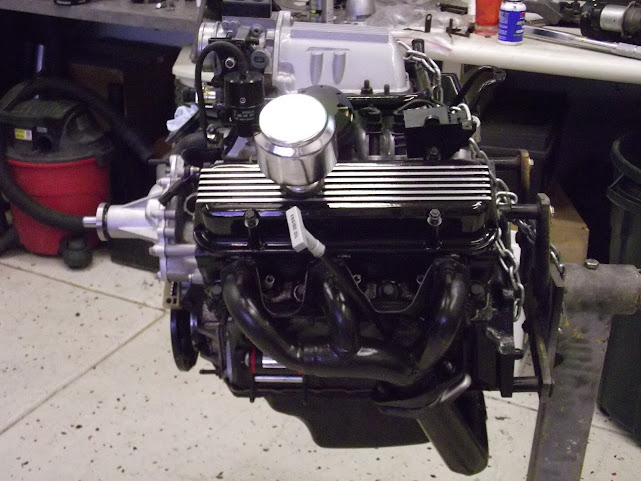
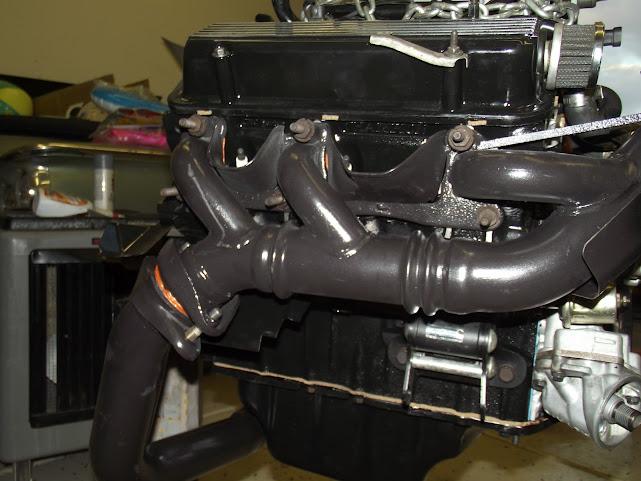
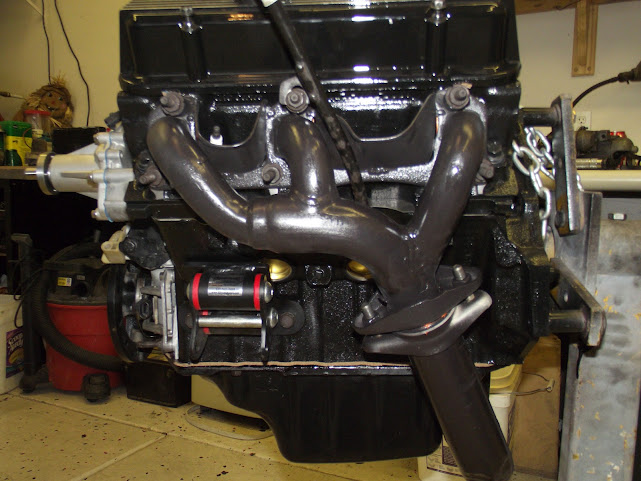
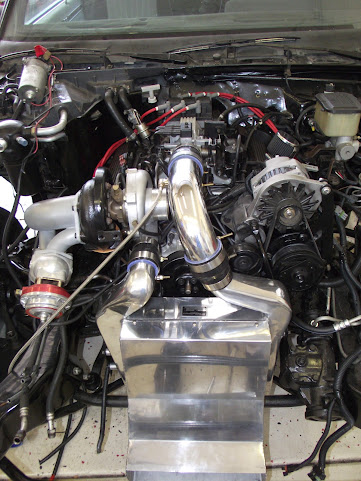
The car sat like that for a bit while I saved up money to have the motor machined. I had the block line honed and decked, bored .030 over. I had the rods resized with ARP bolts and put on some Wiseco forged pistons. I got ARP studs for the mains. The crank just needed to be polished. I also got all the bearings from the machinist. I bought Champion iron CNC ported heads. The motor is now sitting around waiting to be assembled.

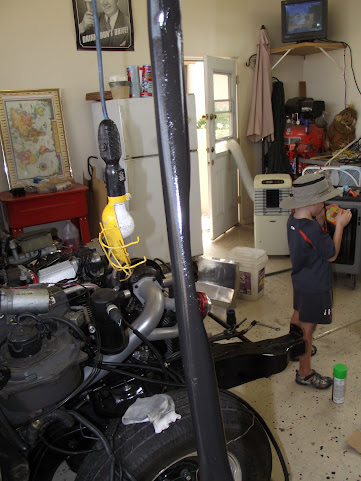
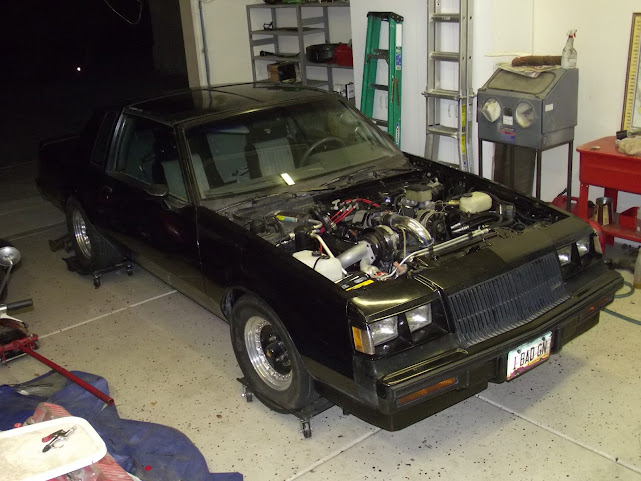
In the mean time, I decided to pull the body off the frame and clean it up.

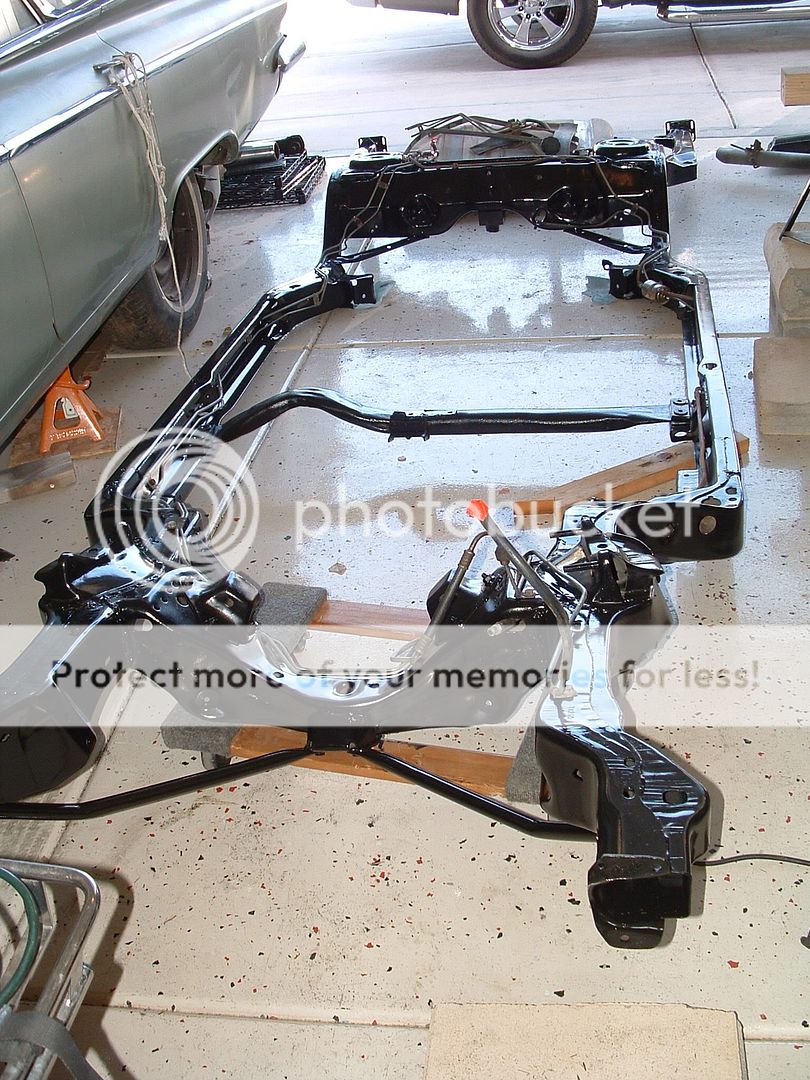
I took the frame to the back yard and sand blasted it.

DSCF0011.jpg


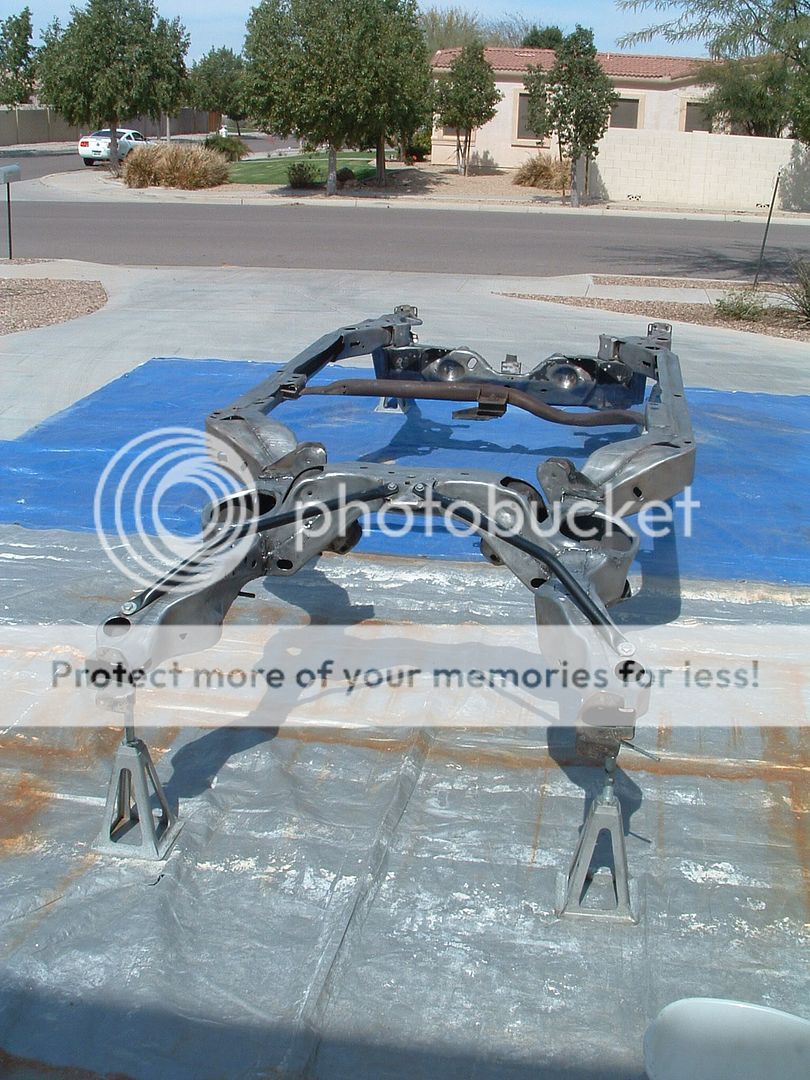
I then painted it. People ask why I did this all myself. Well, this whole process cost me $20. Yes, I could have had it powder coated for $350 or so but that money went to other things.

DSCF0048.jpg


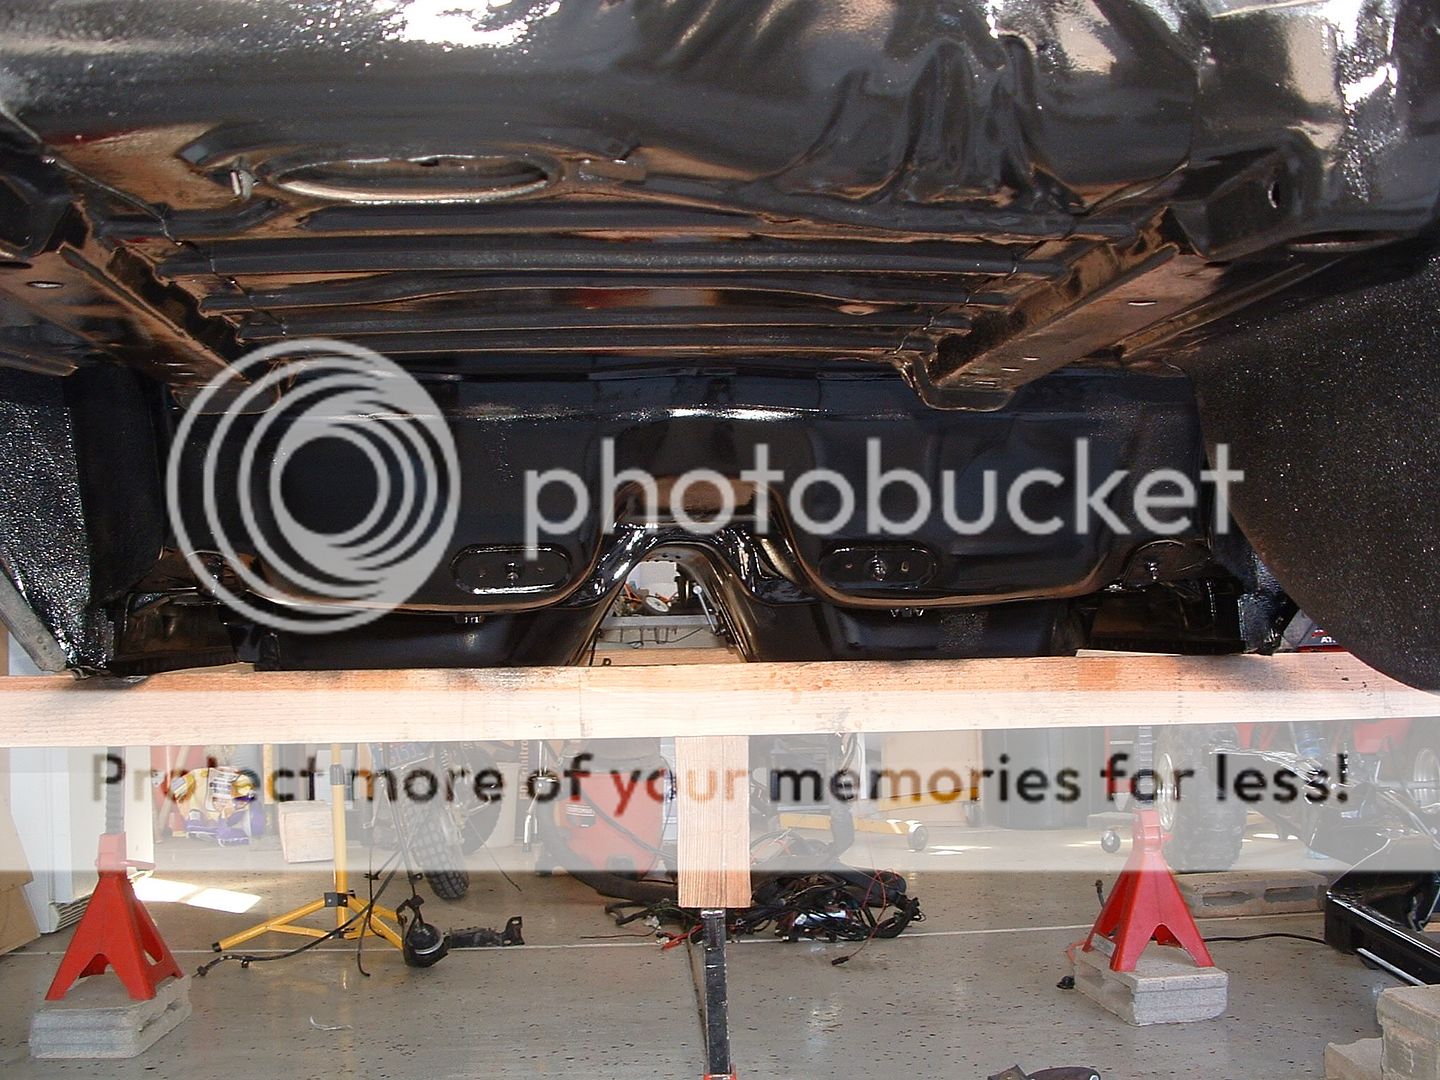
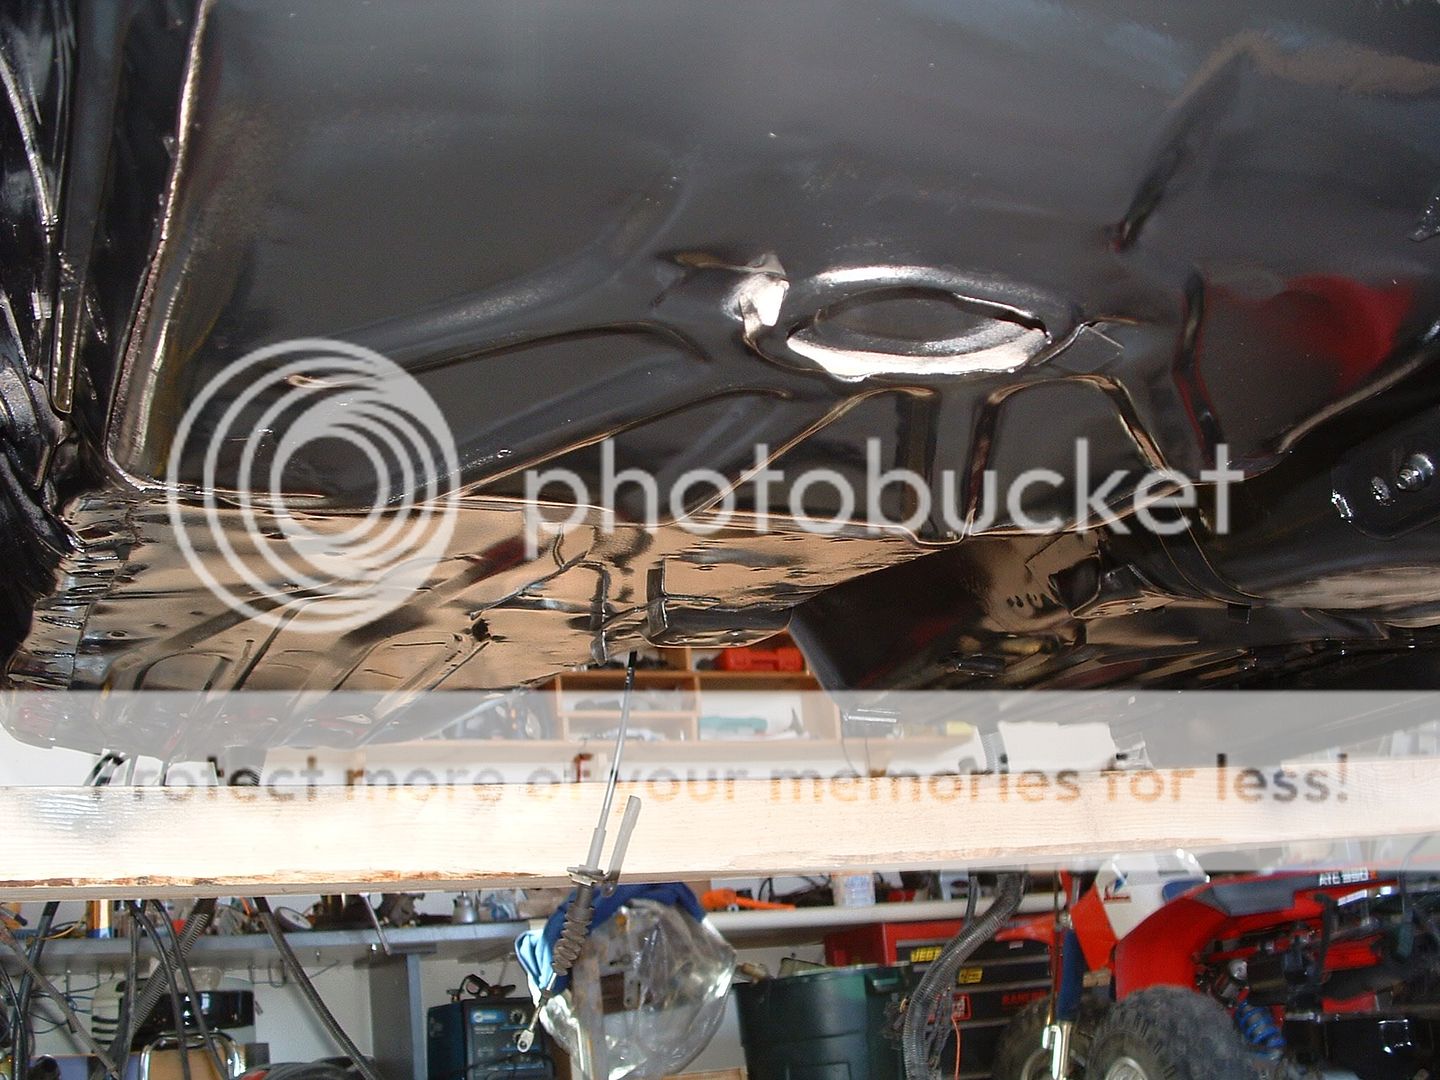
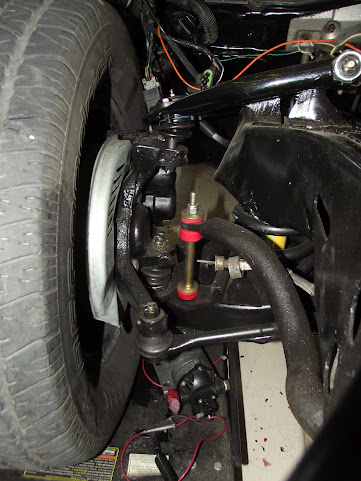
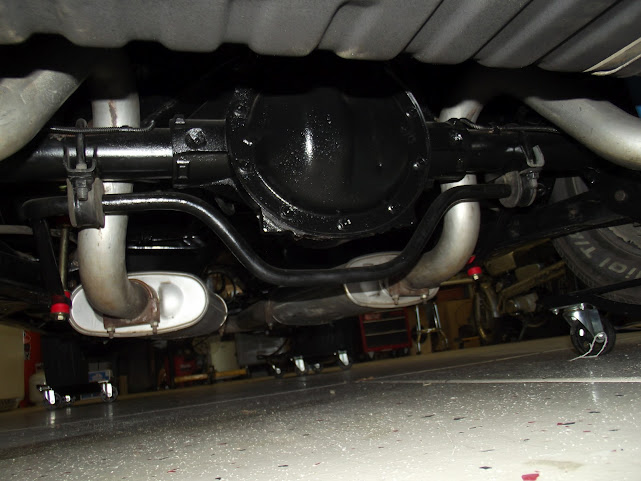
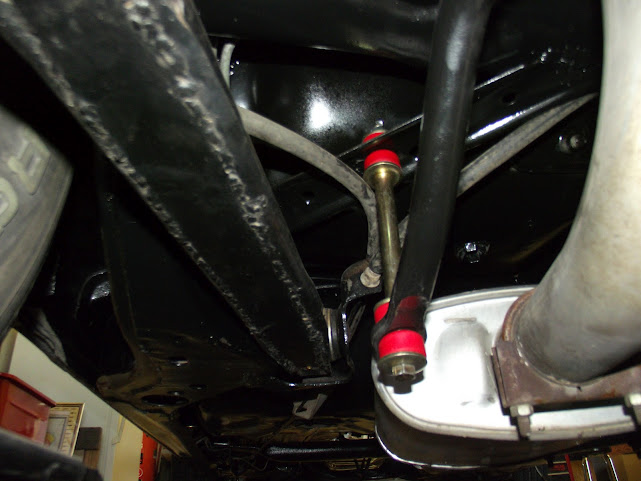
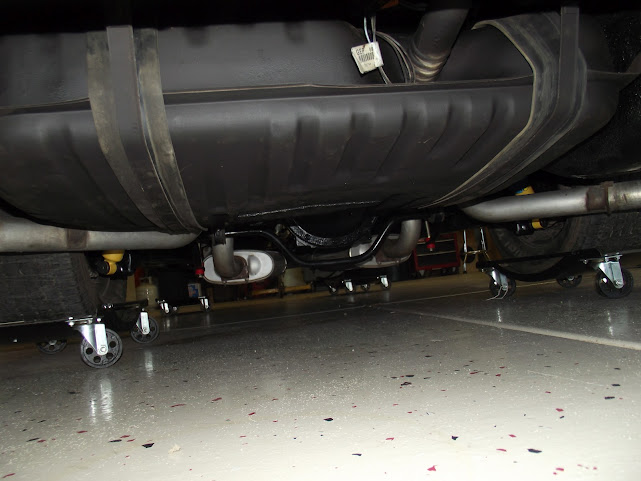
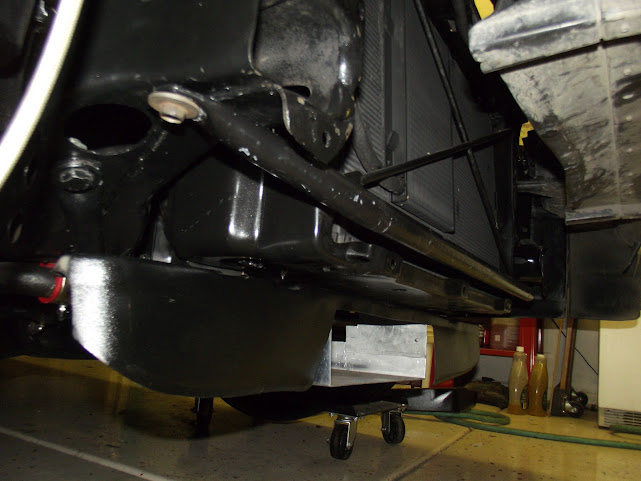
I also cleaned up and painted the underside of the car and firewall.

DSCF0045.jpg


DSCF0046.jpg


DSCF0047.jpg
 
Here is the body back on the frame. I used Energy suspension Poly body mounts. This should really stiffen things up. All regals except the GNX are missing the lower halves of 2 bushings on each side and also 2 bushings over the rear wheel between the frame and the body. This kit has all this.

Cars+002.JPG


I had custom front UCA's built by UB Machine to fix the suspension geometry issues that the G bodies have. I spent months on the Internet trying to find a budget alternative to the SC&C arms with Howe ball joints before I came across this.

Edit: missing pic

Cars+012.JPG


The ball joints are from PowerPerformanceMotorsports.com. Both the uppers and lowers are 1/2" taller than stock to get more separation between the lower and upper control arms. This allows for negative roll in camber. the old way to do this was to use B body spindles, but there is a lot of bump steer with that method. U had the UCA's built to accept early 80's Chevy C10 upper ball joints They are beefier and have the correct taper and length. The lowers are longer stock type ball joints. The custom UCA's are required to keep the proper angle on the ball joints with the new geometry and allow for a good amound of negative camber (-3 degrees if I want) and allow for up to 6 degrees of positive caster.

Edit: missing pic

I went junk yarding and took the front spindles / rotors / calipers off of a '98 2WD 4 Door S10 Blazer. This is the first year that they used 11" floating rotors on sealed bearings and large 2 piston calipers. This will be a nice (and super cheap) upgrade from my stock 10" rotors with single piston calipers. The S10 hub assembly is identical to the G body, so it is a direct bolt on. Another good thing about this setup is that I can upgrade to C5 rotors and calipers with a bracket and nothing else. This is a cheap upgrade for you 1st gen S10 owners.

Edit: missing pic

I also found a steering shaft out of a '96 Jeep Grand Cherokee and make it work. The U joints in this shaft will take out some slop created by the old style rag joints.

Edit: missing pic

I also put in new SPC springs and Bilstein HD shocks all around. The car should actually have a real nice low stance when its back together. The tie rod ends, idler arms, and centerlink are all new Moog parts as well.
 
I rebuilt the rear end will all new bearings and seals.


Cars+008.JPG


I boxed the stock control arms and installed HR PartsNStuff greasable poly bushings. These are actually low durometer for poly and do not bind. These were on before I blew up the car and worked awesome. Once I get the thing together and settled I will work on setting the pinion angle by ovaling the holes in the UCA's, setting angle, and welding washers in place. Sure, it's kind of ghetto, but it gets the job done and saves me money I can put somewhere else for now.

I removed the stock rear sway bar and connected this one out of a '98+ 4WD, 2DR S10 Blazer. It bolts to the rear axle and mounts to the frame. I got some Energy Suspension endlinks and connected them to some angle supports on the frame. I may need to beef those up, but we'll see. This works the same as the $400 HRParts bar that everyone loves, but is a little smaller and only cost me $30 total.


Cars+009.JPG


I cleaned out the tank and undercoated it. This way it will not stick out like a sore thumb and will dampen the sound of the fuel pump a little. New fuel lines installed as well.

Cars+007.JPG
 
Here are some more things.

I needed to port the intake to match the new heads. Here is it on the bench early on. The runner on the right is still untouched. You can see how much I opened the other two.


Here are the ports opened up.


Buick+007.JPG


I cut out the EGR tower and cleaned up a few casting marks / rough edges.

Buick+005.JPG


Here's the intake all cleaned up and painted.

Buick+009.JPG


Here's the block.

Cars+015.JPG


All painted up and freeze plugs installed.

Buick+001.JPG


This is actually the trans AFTER I cleaned it. It was covered in oil bad thanks to all the leaks caused by the blow by. It was rebuilt recently and can handle 650hp no prob. I have a Vigilante 3200 stall 5 disc lockup converter for it as well.

Cars+006.JPG


Misc parts cleaned up or painted waiting to be installed.

Cars+014.JPG


I repainted the inner fender wells and skins.

Cars+005.JPG


The radiator support is repainted and ready to go.

Cars+004.JPG
 
I sand blasted the exhaust parts and will be ceramic coating them soon. The headers, crossover, and turbine housing will be black. The downpipe will be a polished stainless looking coat. I got the coatings from here: Caswell Inc. - Tech Line Coatings My friend has used this with great success.

Buick+002.JPG
 
Here are a few motor parts (pistons, rods, heads) ready for assembly.

004.JPG


005.JPG


007.JPG


Rotating assembly is together. Don't worry, I got a better degree wheel later on.


004.JPG

006.JPG


I got TA Performance rocker shafts. You can see the TA shaft on the right compared to the stock one. I shoundn't snap this.

004%2B%282%29.JPG


Heads are on with Cometic gaskets. Preload has been set using TA Performance adjustable push rods.

001%2B%282%29.JPG


Intake, valve covers, and timing cover are on.

014.JPG


At this point the motor is assembled enough to install.


015.JPG
 
Last edited:
Here are my headers ceramic coated.

018.JPG


019.JPG


I was able to tuck the main wiring harness inside the head shield in front of the AC. This will make a nice difference once the motor is in.

021.JPG


The motor and trans were mated up and I got them bolted in the car. YAY!!!!!!!!!

022.JPG
 
It's been hot out and I've been super busy, so I haven't had too much time to work on the GN. I have been picking away at cleaning up the wiring harness and installing odds and ends like trans lines, shifter linkage, sensors, etc over the last couple months.

Over the last week I finally got the turbo on, downpipe installed, and all of the accessories on.

011+%282%29.JPG


Here is the stretched G Body Parts intercooler being mocked up. I had to make some mods to one of the intercooler brackets and will have to relocate the diagonal front frame braces to make it fit. No big deal. I also need to moch up a new Turbo to MAF pipe or find a different one because the 4" one I bought will not even come close to fitting. I'm hoping to get that figured out and have the IC mounted by next weekend.

012.JPG
 
Got some more progress done.

I got the antenna hole filled on my fender. I'm done with the crappy power antenna and will go with a windshield antenna instead.

004+%282%29.JPG


I was able to just dent in one of my triangle braces to clear the new intercooler. Yay!!

006+%282%29.JPG


Here is the new intercooler with shroud and up pipe installed.

011.JPG


Got the front fenders and radiator support back on.

002.JPG


Got the radiator, condenser, and all the lines installed. The grill and headlights are back on.

005.JPG


My Pontiac Grand Prix front frame brace wouldn't clear the IC shroud, so I mounted it in front or the core support.

006.JPG


Got the rest of the front end parts on.


010.JPG


Now I'm basically putting in fluids and hooking up the battery away from firing it up. It's just too damn hot now for me to do that at this point. Maybe I'll break it in this weekend if I can get up early enough. We'll see.
 
I am truly impressed. Nice work!

Peter

Thank you! It's been a long, slow process. I still have a ton to do, but I am not looking past getting the motor broken in at this point. I'm hoping I did everything correct. Once I am able to get past break-in and drive this thing around the block I will move onto other things. The paint and interior are trashed, the weatherstripping is bad, and I need to work on other little things once it's running like MAF translator gen 2, tuning, etc. I'm sure I'll have plenty of other bugs to work out as well.
 
Great work!!

BTW, I couldn't get a good look at the fins, what is that other Buick, a 59 or 60?? Tell us about it.
 
Thanks guys. It's been a learning process. I've done everything myself except for the machine work and welding up the fender. Everything has been done with budget in mind. I got a good deal on the SPC springs, the rest of the suspension was all junk yard finds, the control arms were designed for a guy who was entering a grass roots motorsports class but wanted the suspension geometry that the SC&C setup has to offer, I saved money with a flat tappet cam (keep your fingers crossed for me), the pistons are Wiseco's that I got for $200 new because the previous owner thought they were 9.0:1 and wanted lower. They are actually 8.5:1. Even though they only have a 25cc dish, the deck height is lower than comprable 29cc dish pistons. I've really enjoyed the hunt for parts and finding my own way with this car. Writing a check to a shop to do the work takes away from the true spirit of hotrodding IMO. That being said one day I'm sure I will say "I'm too old for this crap" and I'll just be interested in driving something cool.

I'm not out of the woods yet. Let's hope I didn't overlook something when building the motor. As long as the break-in goes well I will have a huge weight lifted off of my shoulders. Even then I still have a ton of work to do. I still need to get my LS1 MAF and translator gen 2 in, tune the car, get new tires, align it, get new interior, fix the window wiring issues, paint it, get new weatherstripping, new gauges, etc.
 
The other car is a 1959 Buick LeSabre 4 door sedan. My grandfather bought it in 1959 after it was traded in at 6 months old by a doctor who used it only to take his buddies golfing. This was my grandfather's third and final car. He drove it until 1994 when he decided to put it to rest due to health issues. He passed away in 1998 and the car went to my parents back yard in Tucson. It sat there for years getting sun baked and eaten by rats until I finally brought it to my house in Queen Creek in 2006. I then started saving money to build a detatched garage so I could get the car inside until I could restore it. I decided to work on the GN first since it is the more practical car, but now think that I should have started with the LeSabre. Oh well, I will get to it in about a year. It's powered by a 364 nailhead with a 2 speed dynaflow. It's actually an interesting car since it has dual A arm front suspension with all steel bushings, torque tube, big ass rear diff with track arm and panhard bar rear suspension. Oh, and no crappy X frame like the rest of the cars of its time. It will remain mostly stock, with the exception of power brakes, a couple minor motor upgrades, and airbags. I will possibly get a second set of rims but for now I will get white walls. I do have the stock hubcaps.

Here are my grandparents with it back in 1991.

1991.jpg


Here it is in my garage. You can see the GN in the background before I ripped it apart.

DSCF7574.JPG
 
The other car is a 1959 Buick LeSabre 4 door sedan. My grandfather bought it in 1959 after it was traded in at 6 months old by a doctor who used it only to take his buddies golfing. This was my grandfather's third and final car. He drove it until 1994 when he decided to put it to rest due to health issues. He passed away in 1998 and the car went to my parents back yard in Tucson. It sat there for years getting sun baked and eaten by rats until I finally brought it to my house in Queen Creek in 2004. I then started saving money to build a detatched garage so I could get the car inside until I could restore it. I decided to work on the GN first since it is the more practical car, but now think that I should have started with the LeSabre. Oh well, I will get to it in about a year. It's powered by a 364 nailhead with a 2 speed dynaflow. It's actually an interesting car since it has dual A arm front suspension with all steel bushings, torque tube, big ass rear diff with track arm and panhard bar rear suspension. Oh, and no crappy X frame like the rest of the cars of its time. It will remain mostly stock, with the exception of power brakes, a couple minor motor upgrades, and airbags. I will possibly get a second set of rims but for now I will get white walls. I do have the stock hubcaps.
Here are my grandparents with it back in 1991.
Here it is in my garage. You can see the GN in the background before I ripped it apart.

Great story, amazing car. It looks like it's pissed off. :D
 
Top