Voltmeter in place of dummy light

Getting ready to do this, this week. Though I wont be able to test the voltage of the alternator, my car needs a lot of parts to get it running. :(
 
Started doing this today. It was a royal pita to take the orange paint off the overlay. Instead of using window tint I decided I was going to use window tint spray for models and RC cars.
 
Started doing this today. It was a royal pita to take the orange paint off the overlay. Instead of using window tint I decided I was going to use window tint spray for models and RC cars.

Nail polish remover works like a charm jus be careful not to get it on the other side
 
I used nail polish remover. But it was the cheap stuff. Took a bit longer and had to use a bit of elbow grease. I havent taken a picture of the cluster yet but you cant tell its not stock.
 
Looks like the tint is a little on the dark side?
The best transmission/contrast is with a filter of the same color, red in this case.
Thinking out loud... Maybe a very light smoke gray in from of that to help blend into the rest ?
 
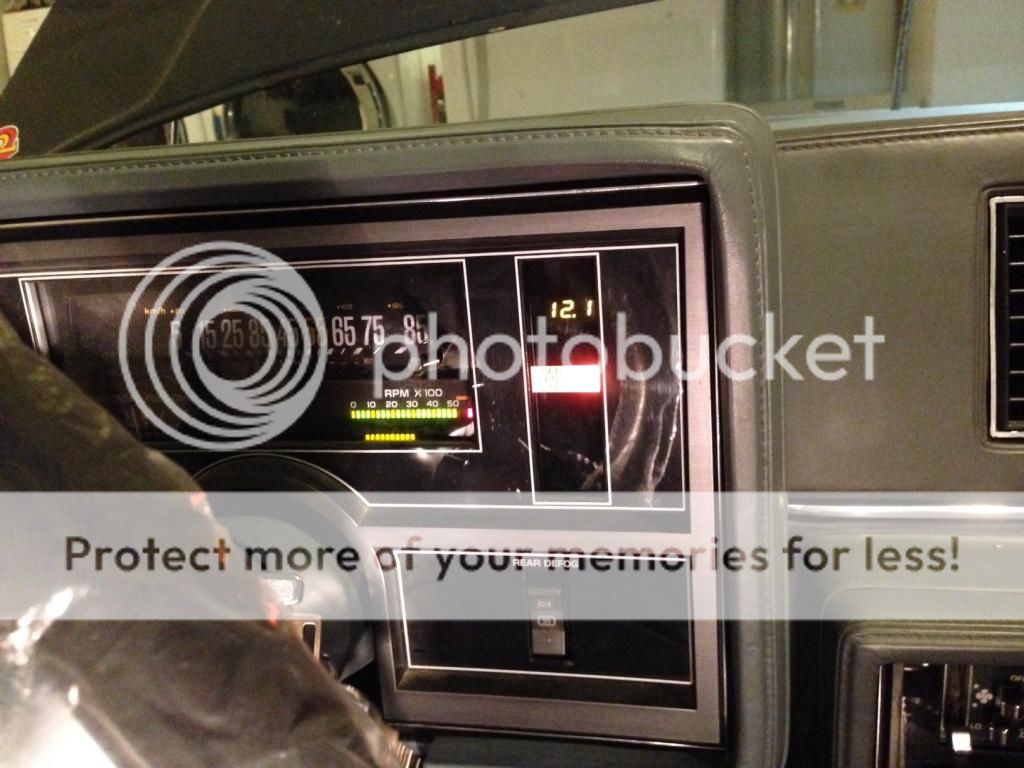
Finally finished install :)

Might be a bit dark :whistle:
Before

After. Think I got it. Its much brighter.


I also noticed that the car has the GNX brace on it!
 
Last edited:
Oh, I know what that is. I have always known it by a rear seat brace.
 
First off you start with one of these from MCM Electronics
http://www.mcmelectronics.com/product/21-12395
View attachment 197064
To mount it is simple, take off your trim around your speedo then remove the two small bolts holding in your dummy lights. Pick your spot and get this when you push it into one of those rectangle holes it fits snug. Just make sure the wire lays flat or that might have issues. Should look something like this.
View attachment 197065
Now for wiring I just used what was already at the gauges and soldered the leads onto where the low fuel indicator would get + and -
I don't have any pics for that part sorry just the wires running through.
View attachment 197066
Next the longest part. The plastic that it must shine through is colored red yellow or orange depending on which hole you use. Some paint or lacquer thinner will take that off, took a little time but it works. Then to get the black lettering off you must very carefully with a sharp razor blade lift the black print off the clear plastic. After that is done a little plastic cleaner/polish will help if you scratched it. Then take some tint, I used the static cling 5% tint and cut to size and place on the back
View attachment 197067
Then re assemble and it should look factory when the key is off
View attachment 197071
Then when the key is on you get
View attachment 197068
View attachment 197069
View attachment 197070
You can see how clear it is at night but it is not bright to where it lights anything up. Some individuals have brought up the possibilities of doing the same with the other gauges we use like oil pressure, water temp, boost and so on. I would like to do that but time wise might be awhile so please feel free to take that how to if you get it done first.


That is cool
 
Ok lets sum this all up in one place. Correct any mistakes please. (1) Brown wire goes to ground, red wire to positive, yellow goes direct to battery
(2) Using name brand nail polish remover, you wipe off the orange/green/red color from the factory tinted cover (side away from you, not side facing driver)
(3) Installing a colored tint is where I am confused. If you purchase a colored led why do you need a tint? Wasn't the purpose of cleaning the tint off with nail polish remover so that the led color can shine thru? Or does the tint just give it a more factory look?
I appreciate the info. Thanks guys.
 
Last edited:
The pc board height of both of those mentioned is 20mm. The dimensions must have recently changed for the 3 wire unit. I have an AVC dash which only uses the left row of dummy lights. The bottom slot is the largest and it is only 16 mm tall. It is used for the "cruise" light. I think this one from Ebay might squeeze into the top slot. Should be a little faster shipping than waiting for China. http://www.ebay.com/itm/111194752525?ssPageName=STRK:MEWAX:IT&_trksid=p3984.m1423.l2649
 
Last edited:
I have the AVC dash so things are a little different for me. I cleaned the plastic with Goof Off, on the top slot. Installed the LED, buttoned everything up, then found out the top slot is blocked by the plastic dash. :mad:The 15mm LED won't fit in any of the other slots. So I slipped a 20 gauge wire thru the mounting holes and hung it from the tilt lever. I'll install the smaller LED when I get it from China in about 3 weeks.
 
I got the smaller one to work. took a couple weeks to get from China. I cleaned off the fasten seat belts spot with Goof Off. Even though the gauge doesn't fit tight in the slot, it has no where to go so I just slipped it in there. I'm glad I used the three wire gauge so I get the signal direct from the battery.
 

Attachments

  • HPIM3047.JPG
    HPIM3047.JPG
    534.7 KB · Views: 347
  • HPIM3048.JPG
    HPIM3048.JPG
    610.9 KB · Views: 321
Top