
You are using an out of date browser. It may not display this or other websites correctly.
You should upgrade or use an alternative browser.
You should upgrade or use an alternative browser.
Rear Frame Rail Notching How To!
- Thread starter Alky V6
- Start date
ttypewhite
Well-Known Member
- Joined
- Oct 1, 2001
I think I just wet myself. That things looks mean...... If you could find a way to keep that motor under the hood that would by far be the sexiest Buick around.... Nice job.
She gets the bill.I Love it....
Can't wait till more Video gets Posted.
Does the wife know how much you spent on this car:biggrin:
Since you mention it, I've been playing with an idea to have the up-pipe curve down coming off the throttle body so that it lays more flat along the cutout in the hood.I think I just wet myself. That things looks mean...... If you could find a way to keep that motor under the hood that would by far be the sexiest Buick around.... Nice job.
She gets the bill.
Phew... Thats Good news Don....:biggrin:
Your Craftsmanship is Second to none.
Reach around and Pat yourself on the Back.
This is one of those cars That will be talked about for 50 years.
Frame Notch is done..
I have just finished my frame notch after much research from other turbobuick and g-body community members and this thread.
I thought I would share my videos and pics of the frame notch I did. I took the best of what I thought were good ideas from DonWG and the other frame notches posted and added a couple of my own thoughts. One noted difference is how I tied in the frame plate to the frame just forward the rear wheels. I reasoned that this was going to be important to maintain or improve the strength for the triangulated torque forces during launch formed between the frame riser and spring perch, the UCA mount point and the LCA mount point.
Feel free to take a look. I have also linked to my photobucket album for more pics.
Thanks,
Don
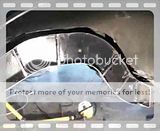
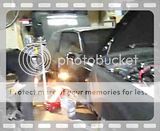
Welded Ribs:
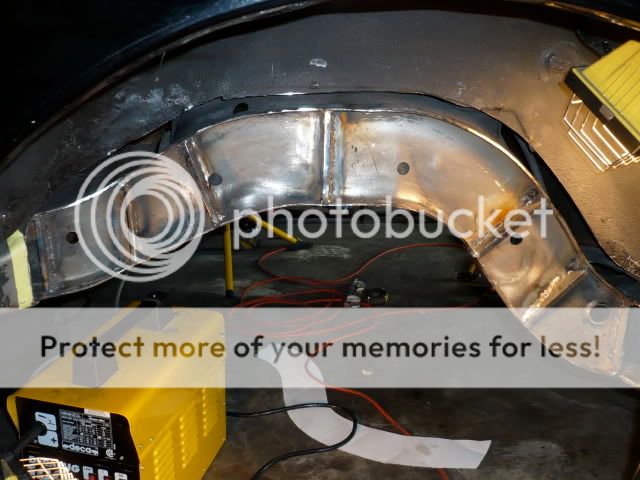
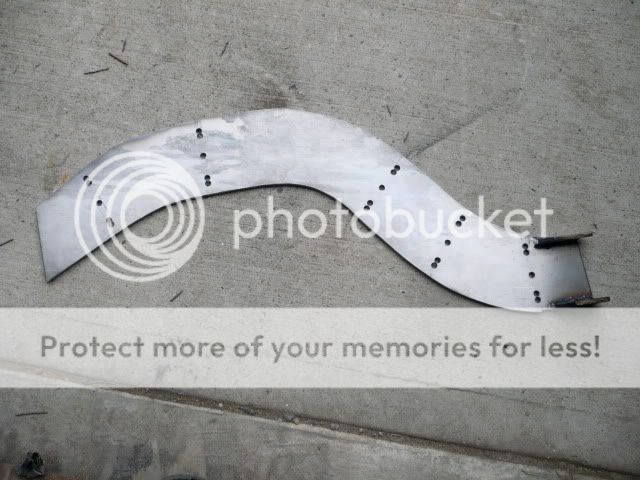
Frame Plate with plug holes drilled:
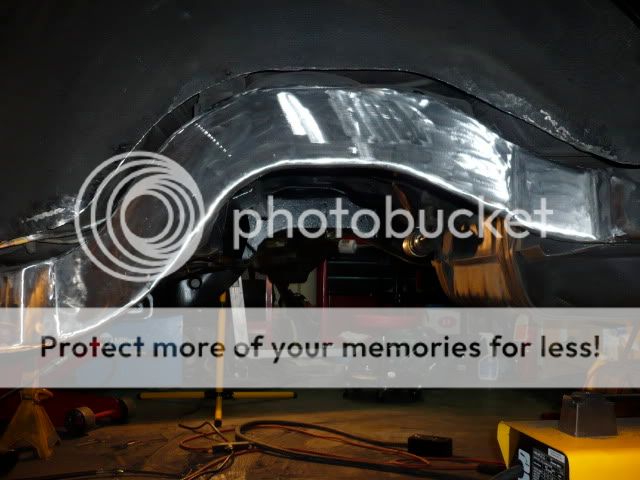
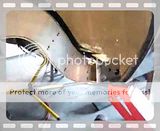
After welding and polishing:
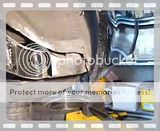
After paint:

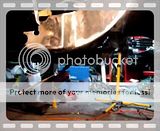
Videos:
Passenger side
My complete Album of the frame notch:
Frame Notch pictures by dlafont - Photobucket
I have just finished my frame notch after much research from other turbobuick and g-body community members and this thread.
I thought I would share my videos and pics of the frame notch I did. I took the best of what I thought were good ideas from DonWG and the other frame notches posted and added a couple of my own thoughts. One noted difference is how I tied in the frame plate to the frame just forward the rear wheels. I reasoned that this was going to be important to maintain or improve the strength for the triangulated torque forces during launch formed between the frame riser and spring perch, the UCA mount point and the LCA mount point.
Feel free to take a look. I have also linked to my photobucket album for more pics.
Thanks,
Don
Welded Ribs:
Frame Plate with plug holes drilled:
After welding and polishing:
After paint:
Videos:
Passenger side
My complete Album of the frame notch:
Frame Notch pictures by dlafont - Photobucket
Nice job. I like the textured paint look.
Yes.. it's PF 718 from Pro Form:
Welcome to Pro Form Products
Use a Siphon (Schutz) Gun to get the texture. This stuff is tougher and thicker than POR 15 once applied. It also is rubberized so that it stays flexible however it is super hard once applied and resist abrasion very well.
Don
turbodave231
Moderator
- Joined
- May 24, 2001
Donnie,
Awesome work. I'm going to school on all the work you've done. I will be doing a notch on my car in the near future.
I want to lower the rear stance of my car and my 4 link calculator software tells me that I need to raise the upper control arm frame attachment.
So, I want to incorporate a couple of higher attachment points on the frame for the upper control arms. I also want to add adjustable spring buckets in the frame so I can adjust ride height down without changing springs.
Donnie,
Awesome work. I'm going to school on all the work you've done. I will be doing a notch on my car in the near future.
I want to lower the rear stance of my car and my 4 link calculator software tells me that I need to raise the upper control arm frame attachment.
So, I want to incorporate a couple of higher attachment points on the frame for the upper control arms. I also want to add adjustable spring buckets in the frame so I can adjust ride height down without changing springs.
Thanks,
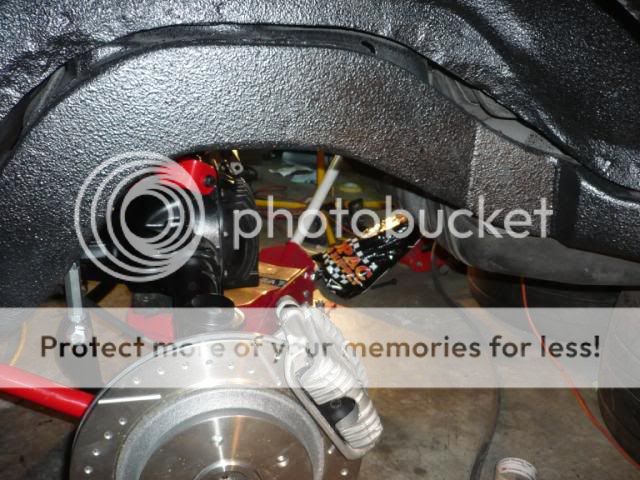
If you are thinking of raising your upper control arm mounts and want to tie in the two frame rails with a crossbar you might have to be careful with the clearance between the upper control arms and this crossbar.
I noticed that there is not much clearance here when the suspension is fully compressed.
Don
turbodave231
Moderator
- Joined
- May 24, 2001
Don,
My current setup is a little different than yours in that the rear frame is already tied together in two places with the CM cage and two cross members. I don't think I need to plate the inside of the rail. I really like the ribs and plug welding you did to yours.
Donnie used 1/4" CM steel on the outer skin which has got to be very strong (probably overkill). I'm leaning toward that approach but adding in the ribs and plug welds.
My goal is not to stuff the biggest tire possible under the car. I'm looking to step up to a Hoosier 10.5 X 30 radial slick on a 10" rim. I'm currently running a 9 X 30 radial slick and love the way they work. I want to get the car down over the tires and leave lots of room to spare. I may end up doing the DOT radial tire thing as well........I'm thinking about some limited street driving in the future.
I appreciate you guys posting all your pictures. It helps me get a good handle on what I want to do.
Dave
Attachments


gbodydude540ci
New Member
- Joined
- Aug 18, 2010
i like to get the notch kit also.how what i order it?
gbodydude540ci
New Member
- Joined
- Aug 18, 2010
where can i order the notch kit at.
where can i order the notch kit at.
I know someone had started a thread that was showcasing someone's kit. Keep searching. I'm sure you'll stumble across it. I don't remember the title of it. Sorry.
gbodydude540ci
New Member
- Joined
- Aug 18, 2010
thanks,those are some nice car in this thread.
Similar threads
- Replies
- 0
- Views
- 517
- Replies
- 1
- Views
- 559
- Replies
- 7
- Views
- 901
- Replies
- 2
- Views
- 1K