Rear fiberglass filler fitment - poor gap

John Larkin

Sublime Master of Turbology
Joined
May 25, 2001
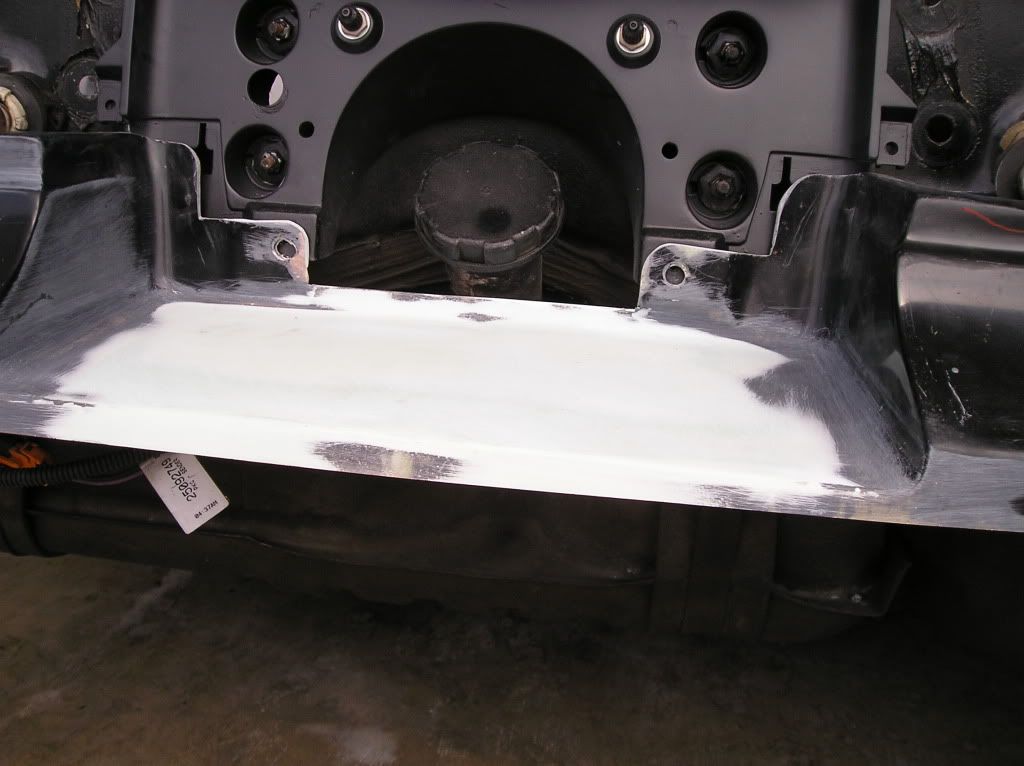
Got the fillers and got them fitted at the ends well. The center has a 1/2" gap where the right one steps down to go under the left one. There is maybe 1/4" at best of overlap. Wondering if everyone just goes with that gap or if you lay a little fiberglass down in the gap and extend the overlap underneath. The gap is fairly even front to back but it would look better with just a seam. Anyone done this?
 
Here's one way of doing it.
P1010016-1.jpg


P1010021-1.jpg


Mike Barnard
 
I really like that Mike. My only concern would be it being one piece the length would make it flimsy unless there was a reinforcing bar underneath. Nice work though, looks beautiful.
 
I really like that Mike. My only concern would be it being one piece the length would make it flimsy unless there was a reinforcing bar underneath. Nice work though, looks beautiful.

On this one piece bumper filler, I made the flat section about 1/2" thick so I could get that nice reflection, with no distortion. Also, once it's bolted to the car, it's not as flexy. If you want them to fit nice, you'll be spending some hours. Ask me how I know.:D

Mike Barnard
 
No pictures yet, but I'm having mine done as one piece also, by a professional (Mike Ruberg at Richard Clark's place), that's doing the paint work on mine.
 
IMG_0831.JPG
IMG_0829.JPG
IMG_0830.JPG
I started my project tonight. Made a rounded piece of 2x4 to fit in the overlap as a mold. Clamped that down while sandwiching a piece of wax paper as a release agent (it works). Roughed up the backside of the overlap. Got a small fiberglass repair kit from Walmart ($15) with way much product (only used 2 of 8 oz tonight, plenty left over + plenty of mat). Mixed up the resin and made a tray out of aluminum foil to soak the mat in along with a popsicle stick. Laid in about 6 layers of mat 7" x 1.5". Built it up about 1/8" thick on the backside. It cured outside in about 30 minutes. Removed the mold and it came out nice, flush and solid. Will let it cure until tomorrow night when I fill the overlap on the inside at the pencil line. Should look almost OEM when I am done (I hope). Here are pics:
 
Dirty little trick for you John. First put the resin and hardner in the fridge over night. That will increase the hardening time. The next one will throw you a bit. T thicken it up to a paste quality add some plain flour to it. That will let you use it like a filler and fill the crack in better. It's basically wood flour you buy at a much cheaper prie and that's how I built my canoe several years ago. Never had an issue with it either.:)
 
I'll try that tomorrow. I need to sand the patch level with the old first. Not sure how I will make the next mold but something will come to mind. I think I should refit them first to make sure nothing moved.

Anyone know what the thread size is on the filler studs? I may use nuts and washers instead of speed nuts. Speed nuts tear up soft material.
 
Don't know about the studs but you might try reading on some of the boat forums. I spent 2 years looking at techniques (sp) and designs before I designed my own boat and then built it. Tons of good tech and lots of helpful guys just like here. Even if you're not doing a boat I'm sure they'll help you understand about fiberglass blush and molding.:)
 
IMG_0832.JPG
Tried the flour method, should have used more but I see how it works. Some progress today, this was a two-day project. Ground the extended fiberglass smooth and refitted the fillers to the car to ensure I found the right joining point. Began building up the front side yesterday by clamping my wax-paper-wrapped 2x4 along my pencil mark, first roughing the entire area for adhesion purposes. Laid several strips of mat to build thickness and let cure. Today I ground that smooth and as flush as possible to the original surface. Then clamped a wax-paper-wrapped paintstick and used quite a few strips of duct tape at it's end to create the vertical curved end. I mixed the thickened resin, used a little mat in the vertical area but pretty much just built resin over the new area. It flowed out pretty nicely and I "tooled" the resin with a popsicle stick. Tomorrow I will need to sand this flat, straighten the parting line, and skim coat it with glaze to hopefully a final surface ready for primer. In short, I have basically made the filler about 3/4" longer front and back.
 
You now know how to make your own body filler if you want John.:) It takes a little practice but it works fairly well, doesn't it.:D
 
More progress tonight. Got the new shape massaged out, ground and blocked down as flat as possible, parting line sharpened, applied a skim coat of glaze and blocked with 80. Put a guide coat on to block again tomorrow night with 180 and fix any divots with a little putty. Almost ready for primer. Paint next week if I am lucky.
IMG_0833.JPG
 
The final product. Nice coat of 2K primer, just needs blocked with 500 now and it's ready for paint. I am going to try to have that done next week and get the car back together next week as well. Long journey, still baffled that these fit so poorly.
IMG_0834.JPG
 
Top