Creating GNX vent brackets for mounting removable vents

Tdishon

Active Member
Joined
Apr 30, 2013
I didn't want to tape on my vents so I made up some brackets that go on the inside of the fender to mount the vents using two small 8/32 button head bolts. I did everything while the fender was on the car.
ventbracket1_zps538fe582.jpg

ventbracket_zpsd30beffc.jpg

gnxvent1_zps3f28a994.jpg
gnxvent2_zps16627de9.jpg

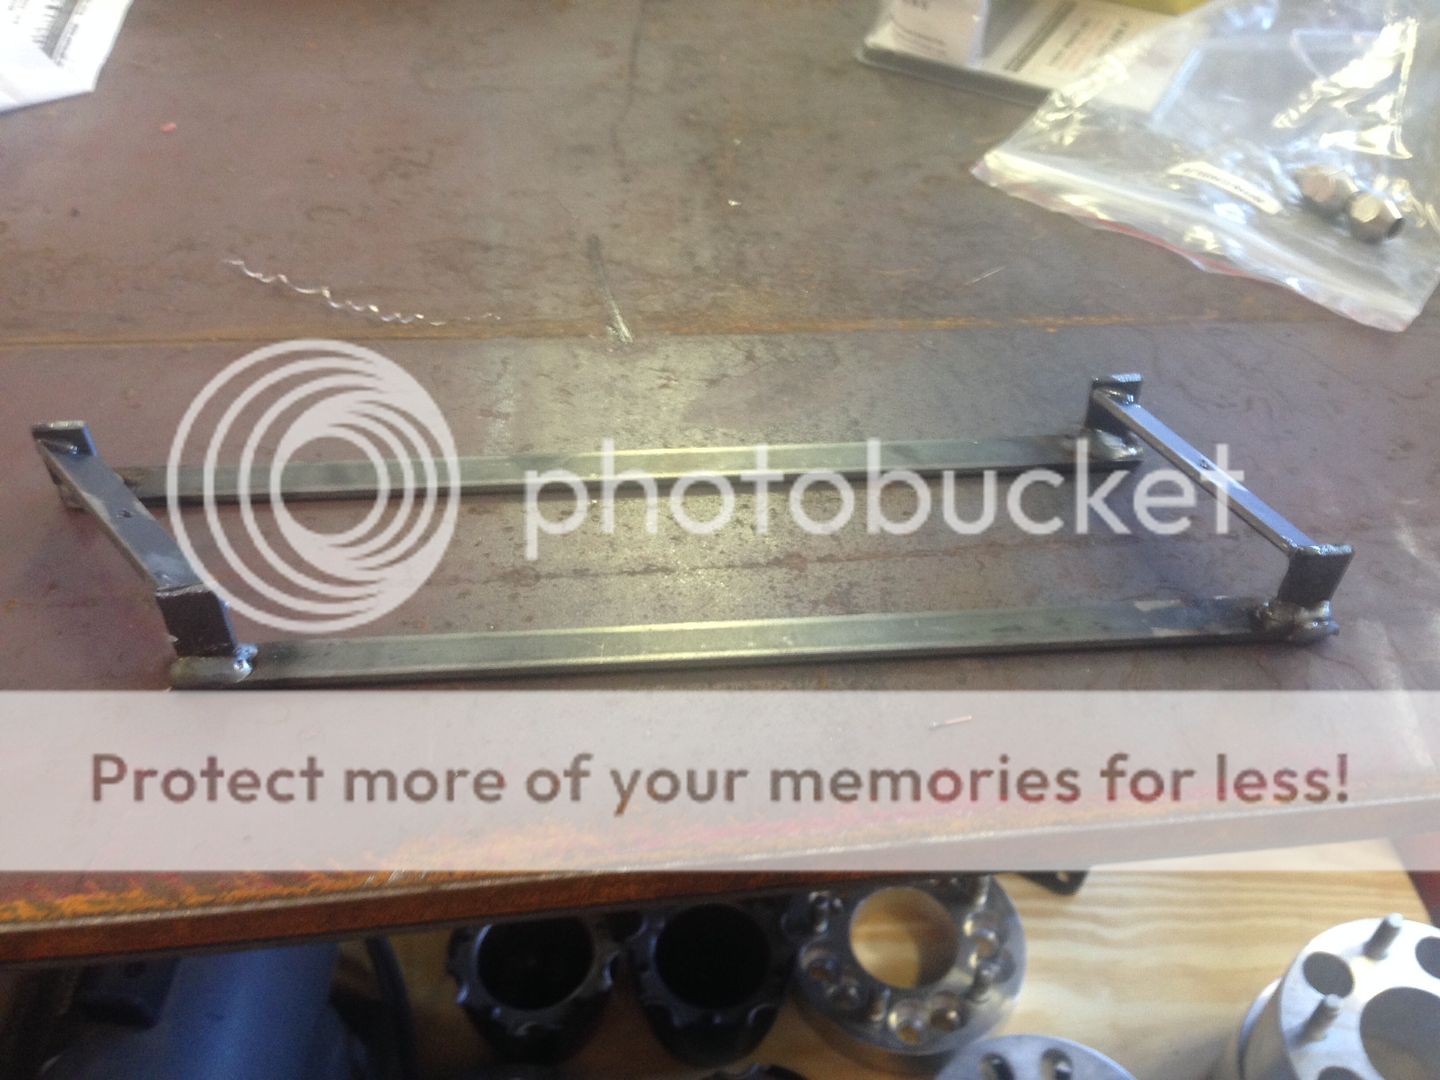
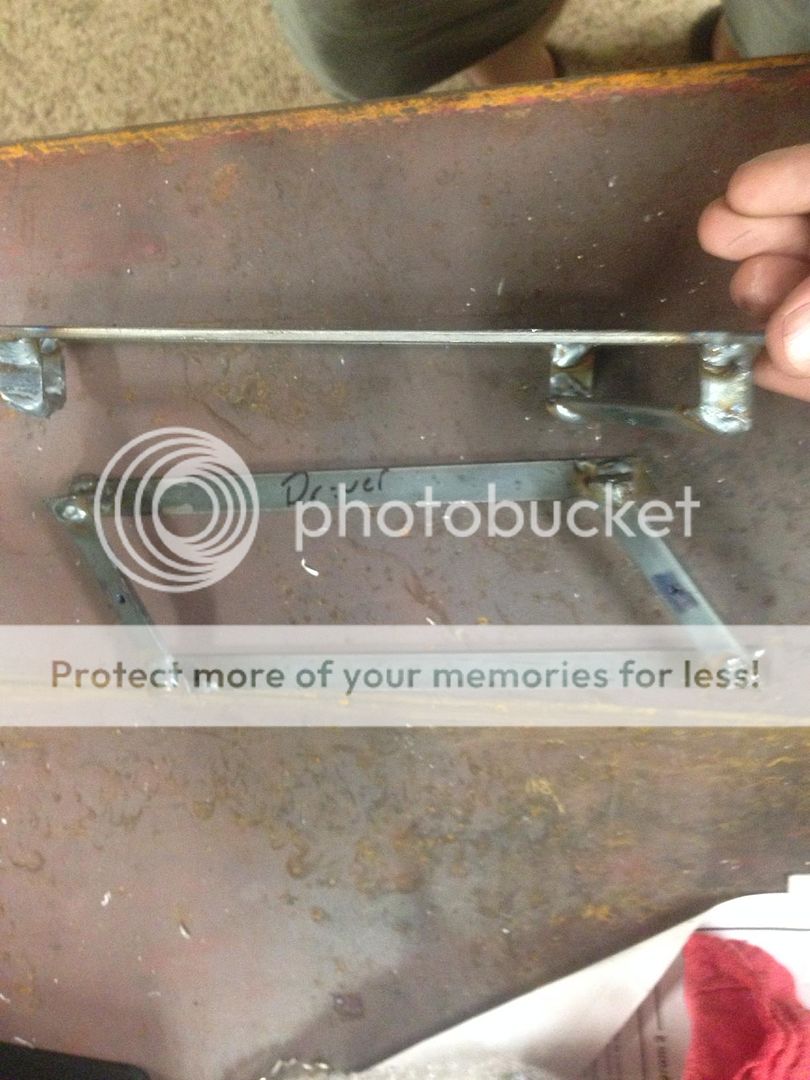
After fitted, powder coat and used 3m double sided tape on the brackets. They sandwich around the fender. A kit used to be available, but I could not find it anywhere so...
 
Thx guys. It was a lot of trial and error and went though a set of vents to get it right.
I would rather remove the vents when I polish and wax the car. Takes about 1 min each to remove.
 
Yes, I initially was going to have one small bolt in the first vent and one in the last...Mistake.
One bolt in the second vent and one in the last(rear), like the factory.
I bought some 1/16" black ABS plastic on Ebay for $2.00 and reinforced the mounting area on the back of the vents. I used modeling glue. It made a huge difference. The plastic GNX vents are pretty flimsy and the button head bolt puckered it in at the mounting point before I reinforced it.
Once you have the bracket ready to 3m tape it on the inside of the fender, I would recommend only pealing back about an inch of the tape protective strip. I needed to adjust the bracket to make sure the vent was lined up perfect.
After it if good, I snugged the bolts (to press the tape on the bracket against the fender) and then backed the bolts out and removed the vents.
I then pulled the rest of the protective film off and mounted it with all the tape. Once it's on, it's on. I made a mistake and peeled all the tape off (the first time) and needed to move it about 1/8". It was interesting...
After it is all done, It is a nice!
 
Home Depot: 1/8" x 1/2" metal stock. I think 36" is plenty. It was about $8.00.
When making the brackets, I laid out the upper and lower horizontal metal pieces (about 8")and then cut the vertical pieces and drilled and tapped, then bolted them to the vents. Then you have to cut the smaller spacer pieces. Each one is a little different. I laid the vent upside down and built the bracket on it. Be careful tack welding it. The plastic vent can get interesting... Once tacked, I fully welded later and trial fitted on the car. Took a weekend for me to do. I'm not the best fabricator, but I think it turned out very functional and clean.

I initially tried to use the fiberglass vents, but they needed too much work.
 
I didn't take pics of the final piece before installing. I grinded down the welds, cleaned up and powder coated.
 
Top