
You are using an out of date browser. It may not display this or other websites correctly.
You should upgrade or use an alternative browser.
You should upgrade or use an alternative browser.
Twin Turbo Buick GS Project
- Thread starter Bent6
- Start date
Haven't updated this thread in a while.......
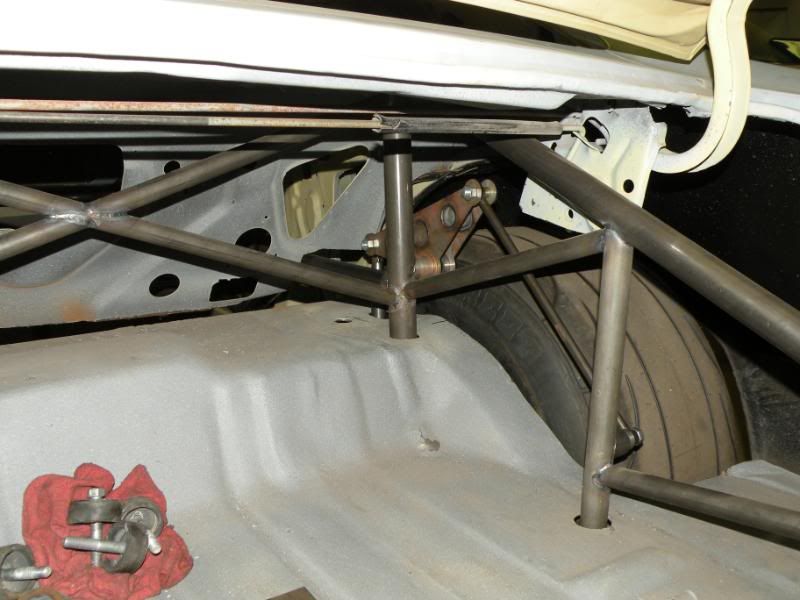
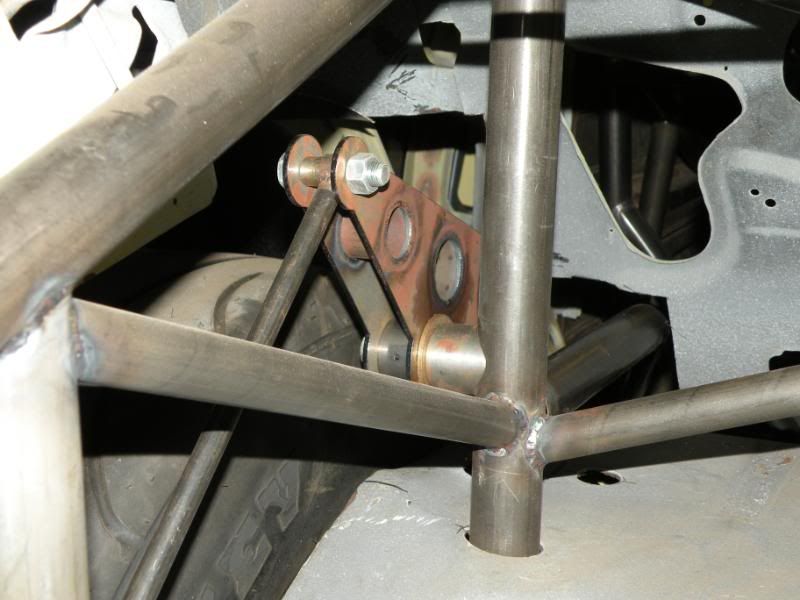
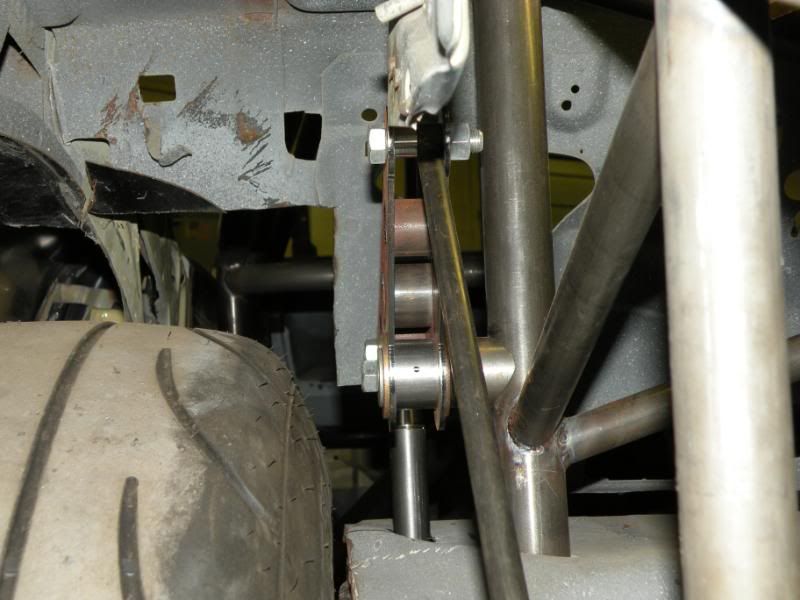
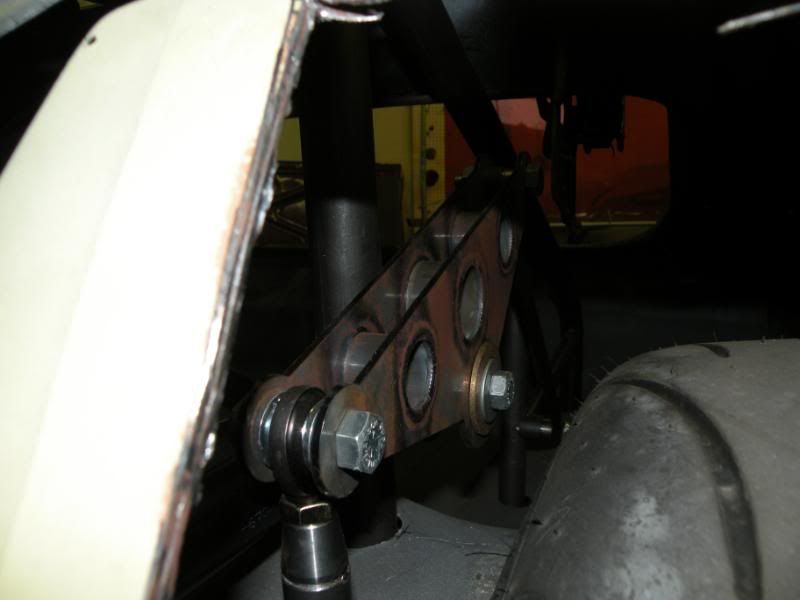
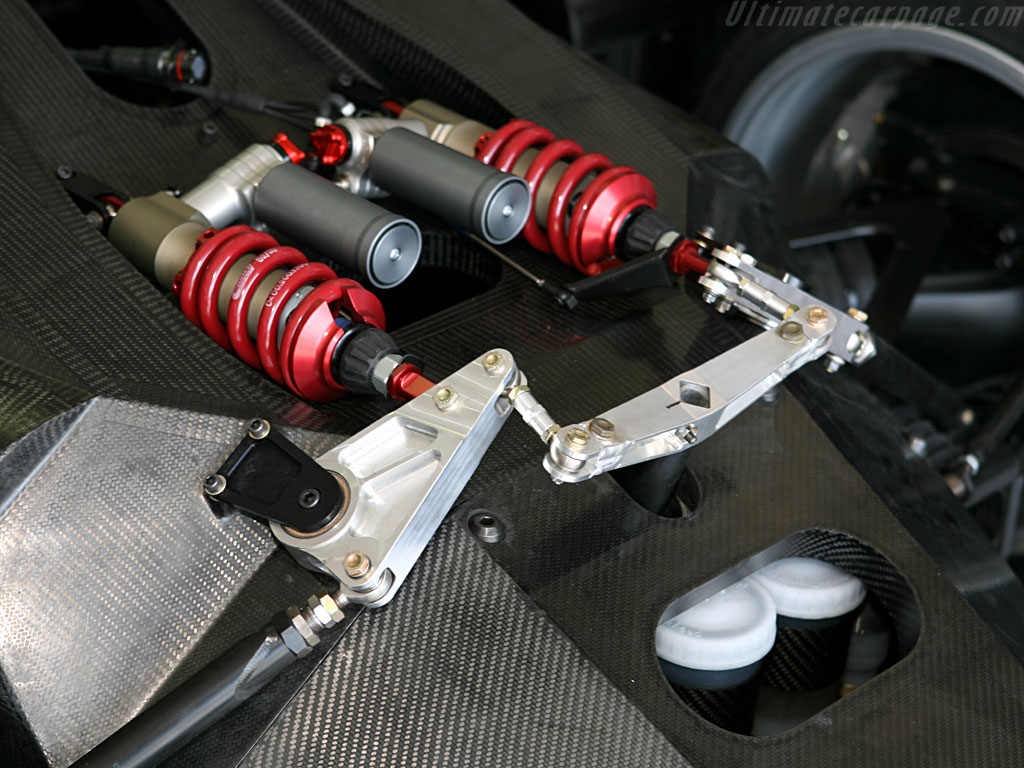
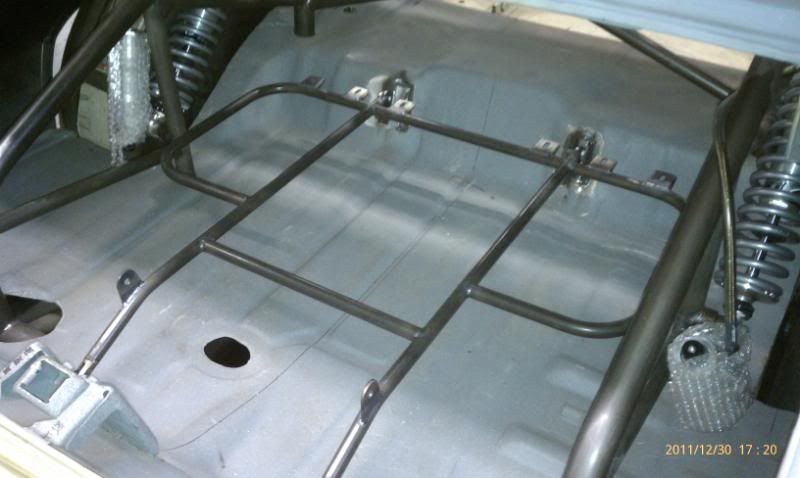
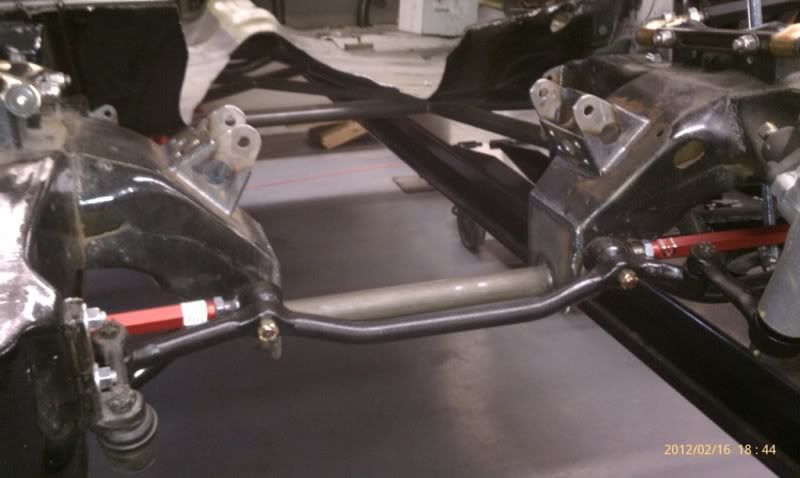
Trying to think outside of the box. We are using a rocker/cantilever setup on the rear suspension. The shocks themselves will be completely inside the trunk between the rear cage bars and the wheel tubs. The rods running from the front of the rockers going thru the trunk floor connect to the rear end housing. The small struts on the back side of the rockers are where the Afco M1 Big Gun shocks will be mounted. These shocks have about a billion adjustments and use remote nitrogen reservoirs.
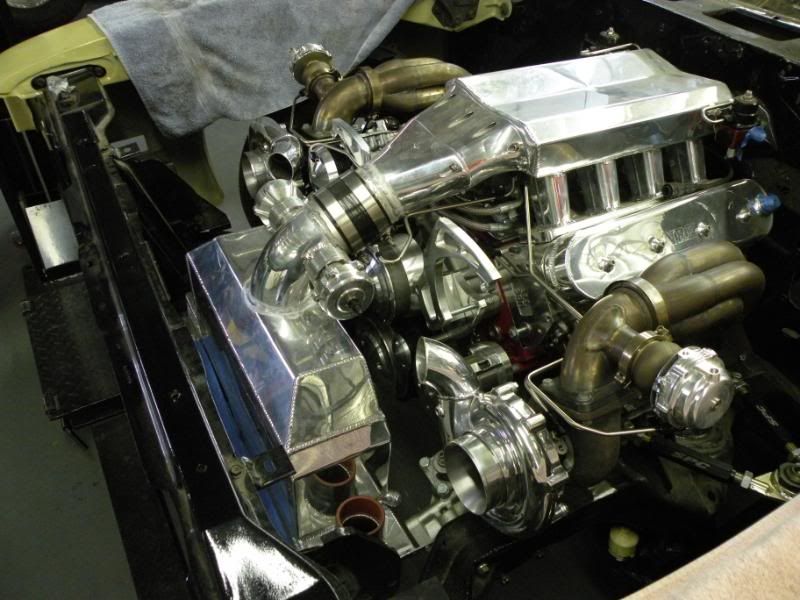
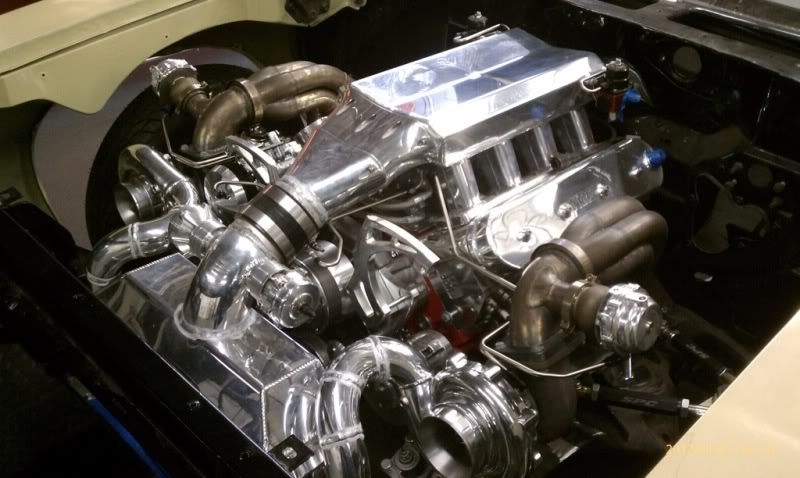
Engine mounted in the car.............
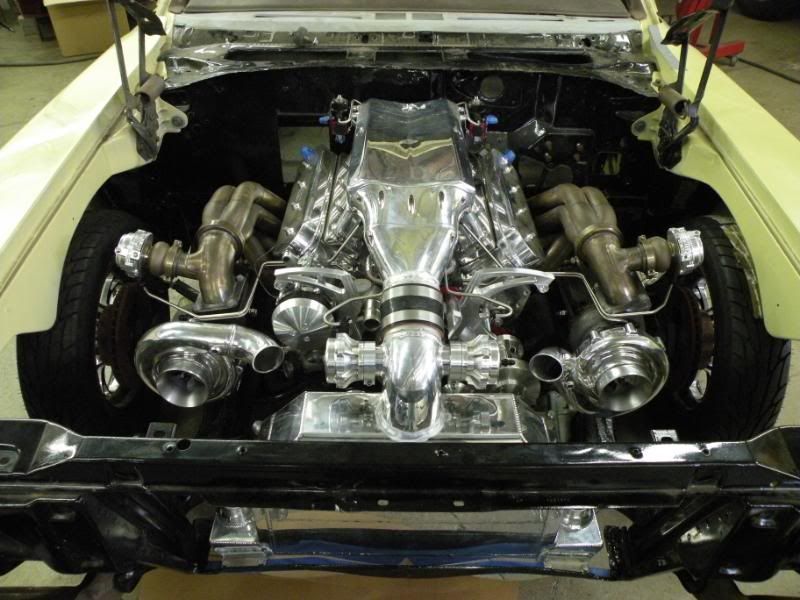
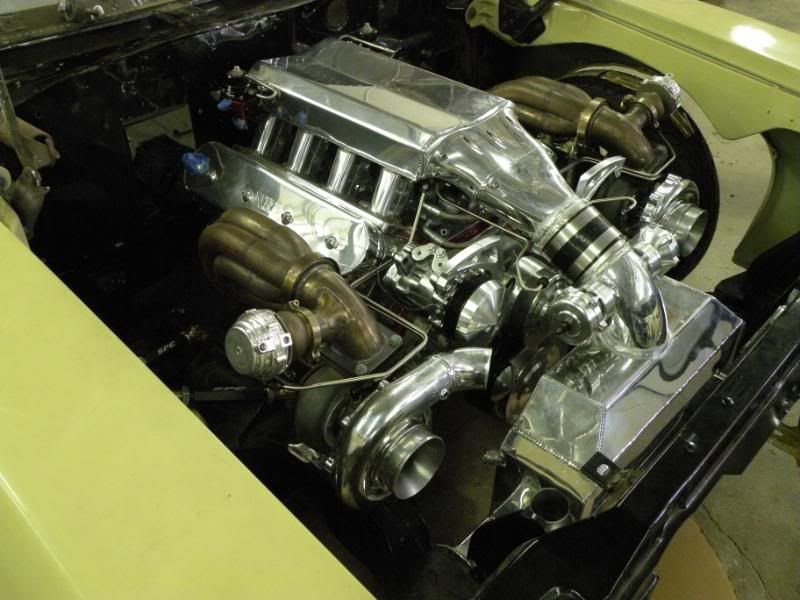
Engine mounted in the car..............link to that portion of the build is here >>> 25.3 Buick GS Twin Turbo LSx 455 Build - Yellow Bullet Forums
Trying to think outside of the box. We are using a rocker/cantilever setup on the rear suspension. The shocks themselves will be completely inside the trunk between the rear cage bars and the wheel tubs. The rods running from the front of the rockers going thru the trunk floor connect to the rear end housing. The small struts on the back side of the rockers are where the Afco M1 Big Gun shocks will be mounted. These shocks have about a billion adjustments and use remote nitrogen reservoirs.
Engine mounted in the car.............
Engine mounted in the car..............link to that portion of the build is here >>> 25.3 Buick GS Twin Turbo LSx 455 Build - Yellow Bullet Forums
GlockandRoll
Member
- Joined
- Nov 13, 2009
I've always liked the radical SR-9 rear end linked coil-over combo anti-sway bar setup..
Can you take a better pic of the shock set up Will. I'd like to see more and how it works.
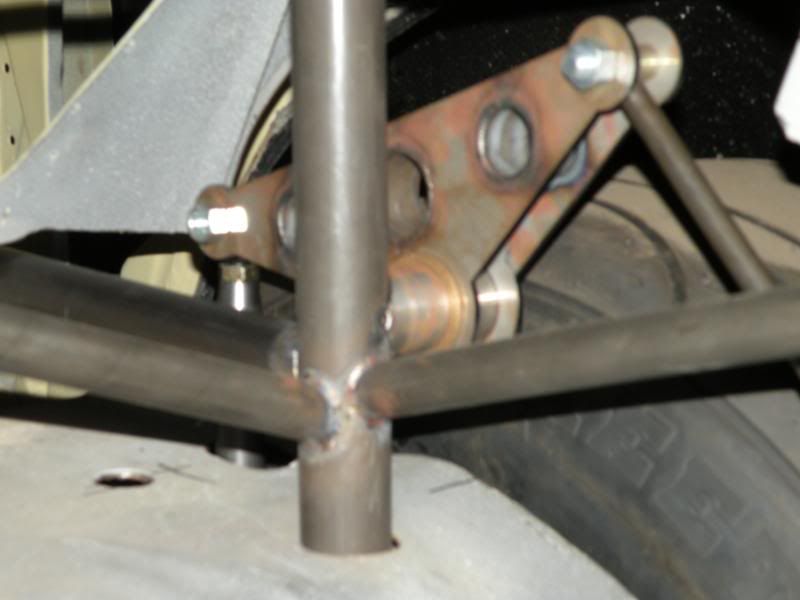
Here's a shot from the side looking through the fender well. The rocker assembly is a 1:1 ratio and rides on needle bearings. The smaller strut in the pic is just for mockup - this is where the shock will be mounted.

highboostgn
Well-Known Member
- Joined
- May 24, 2011
sweet baby jesus
Just ran across this writeup on Dragzine.com by total accident. Most of it looks to be copied from this thread and over on YB.com but it's still neat nonetheless. Does this count as my first magazine?:biggrin:
Check it out........Street/Strip ’70 Buick GS Mated With 1,400+ HP Twin Turbo LSX Bullet - Dragzine.com
Check it out........Street/Strip ’70 Buick GS Mated With 1,400+ HP Twin Turbo LSX Bullet - Dragzine.com
Just ran across this writeup on Dragzine.com by total accident. Most of it looks to be copied from this thread and over on YB.com but it's still neat nonetheless. Does this count as my first magazine?:biggrin:
Check it out........Street/Strip ’70 Buick GS Mated With 1,400+ HP Twin Turbo LSX Bullet - Dragzine.com
Very Nice Will...
I'm sure this is the first of many write up's on your build. I'm thinking it'll be on the covers of a few of the magazines by the time it's finished.
Not to bad for a "street car"
")
Update......
It's been a while since I've had any real progress to share. As with most major builds, it moves along for a while then slows to a snail's pace if not a complete stop.
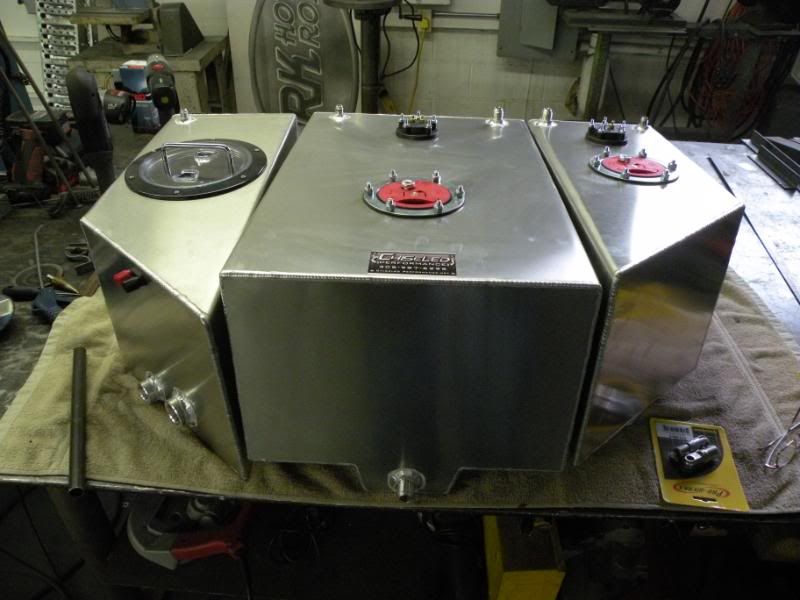
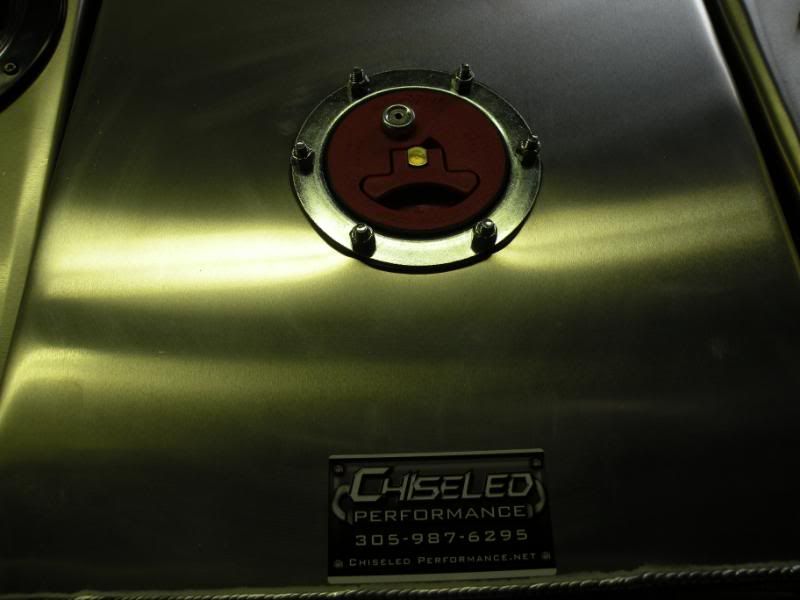
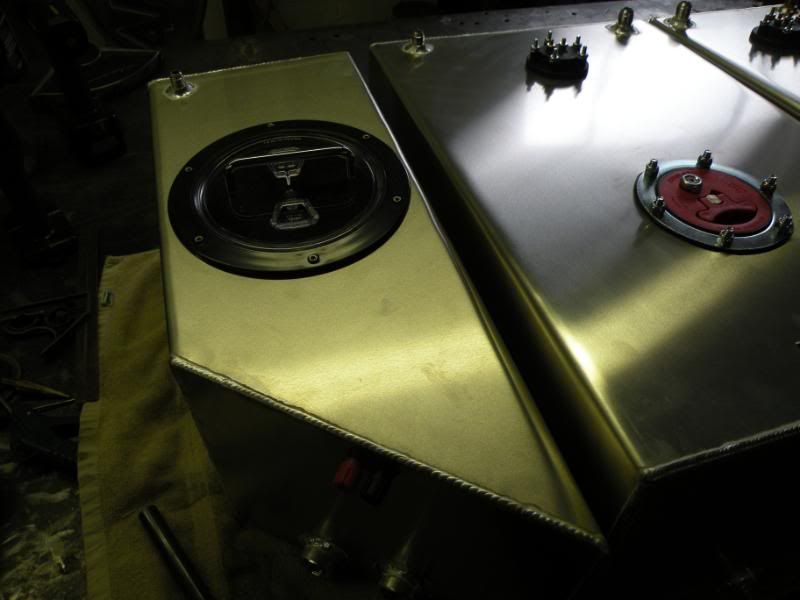
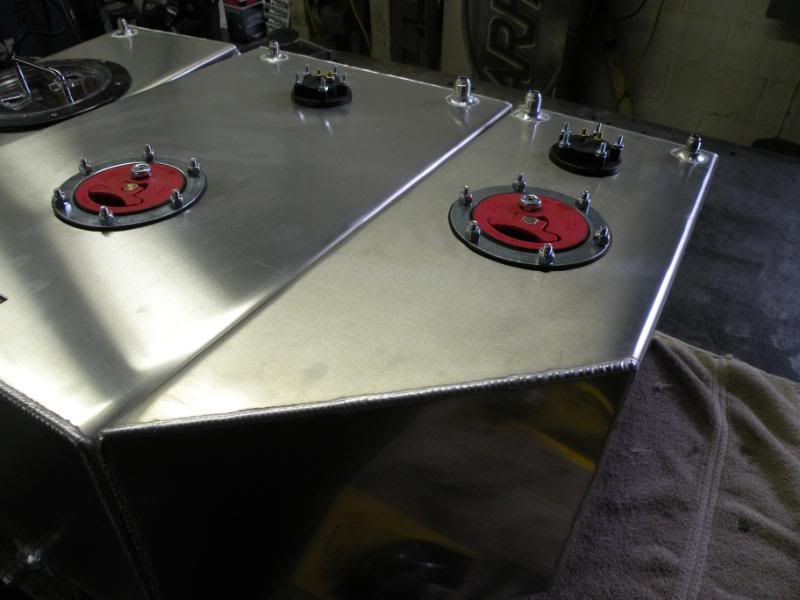
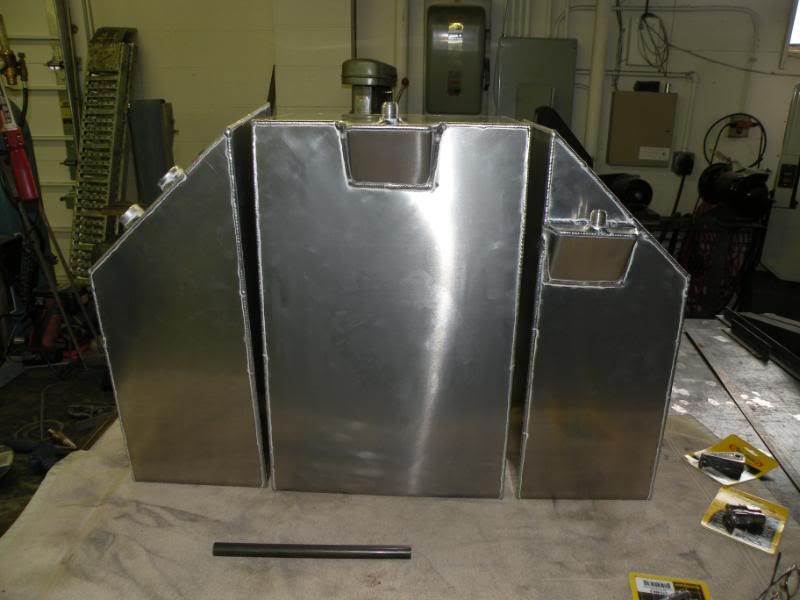
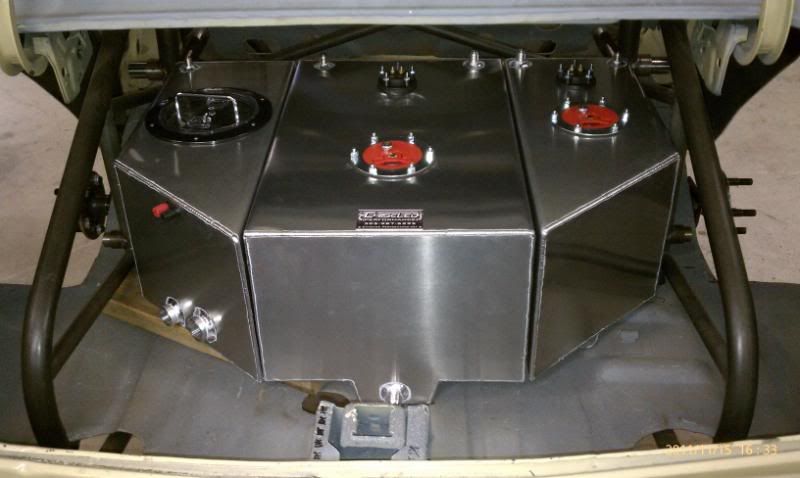
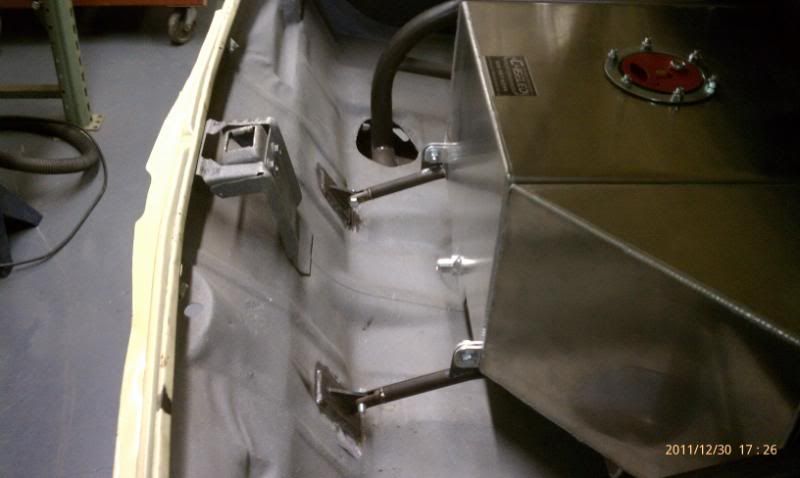
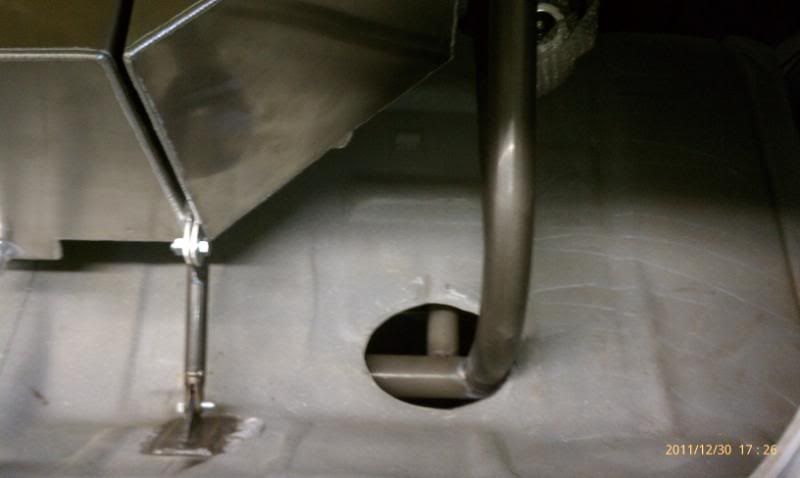
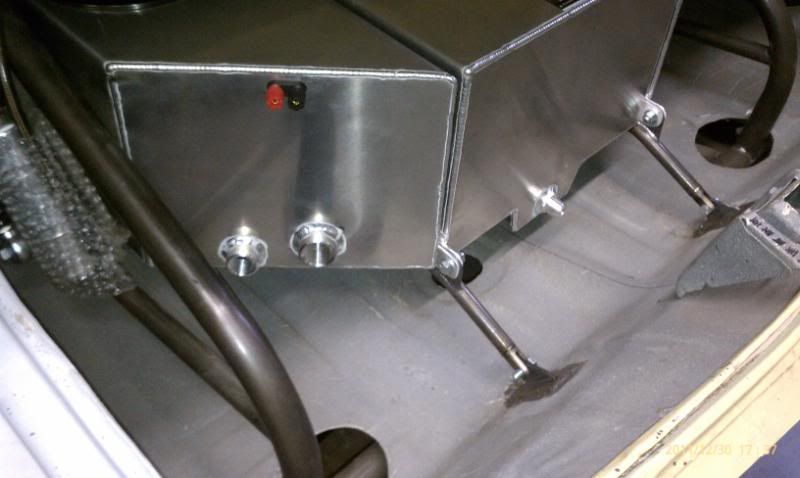
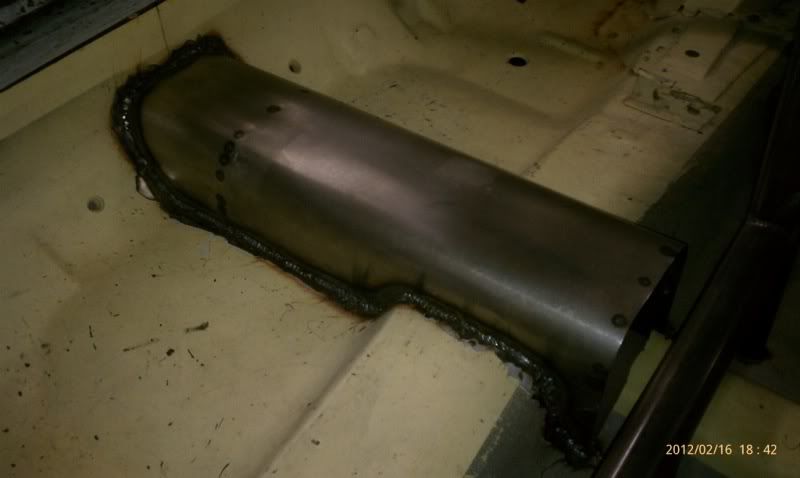
Anyway, things are getting back to rolling along. Most of these are of the trunk area. The 3 piece fuel cell/water tank is a design I came up with and was fabbed by Robert at Chiseled Performance. As the photos show, his work is second to none.
The large middle cell is the pump gas cell, the one to the right is the race fuel cell for the staged sequential injectors, and the driver's side cell is the water tank with built in Rule pump.
It's been a while since I've had any real progress to share. As with most major builds, it moves along for a while then slows to a snail's pace if not a complete stop.
Anyway, things are getting back to rolling along. Most of these are of the trunk area. The 3 piece fuel cell/water tank is a design I came up with and was fabbed by Robert at Chiseled Performance. As the photos show, his work is second to none.
The large middle cell is the pump gas cell, the one to the right is the race fuel cell for the staged sequential injectors, and the driver's side cell is the water tank with built in Rule pump.
More Updates...
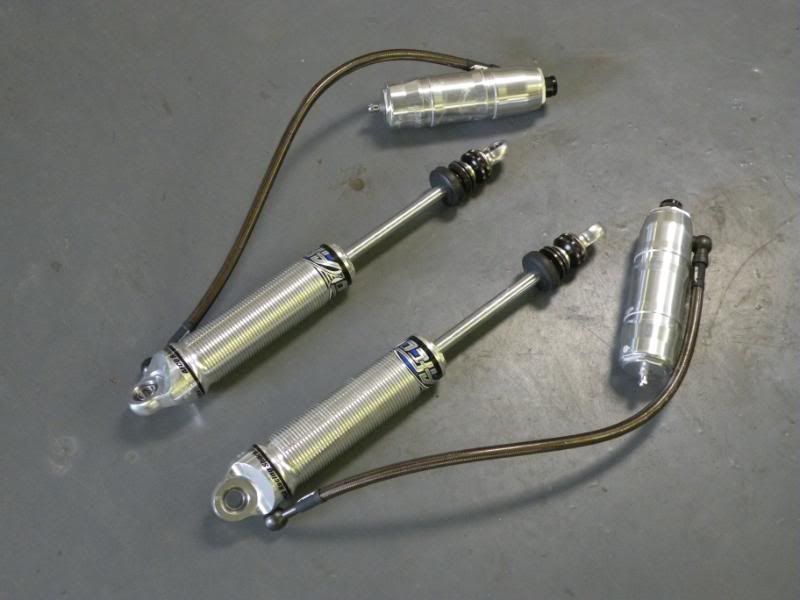
Here are a few shots showing the Afco Big Gun shocks with remote resevoirs along with the cantilever setup.
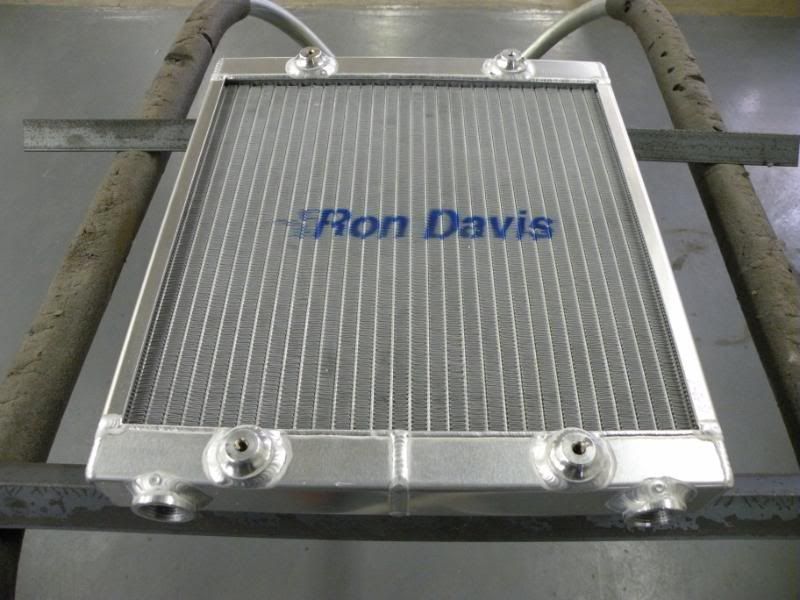
Also is the Ron Davis heat exchanger for the liquid intercooler while on the street. It will be mounted directly under the trunk floor.
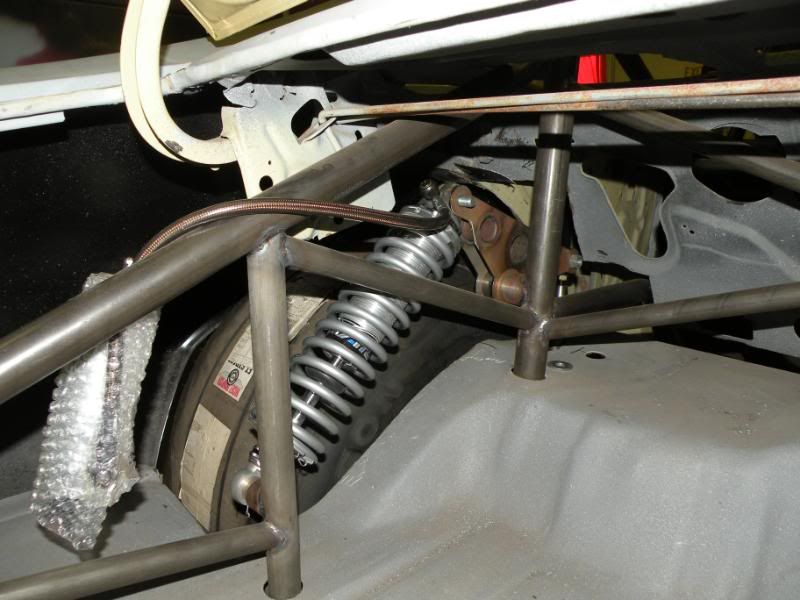
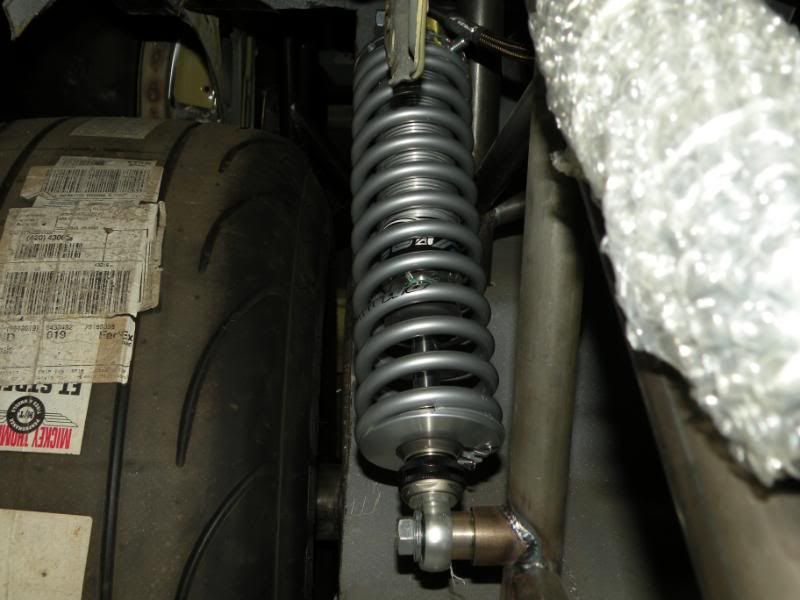
Here are a few shots showing the Afco Big Gun shocks with remote resevoirs along with the cantilever setup.
Also is the Ron Davis heat exchanger for the liquid intercooler while on the street. It will be mounted directly under the trunk floor.
Few More....
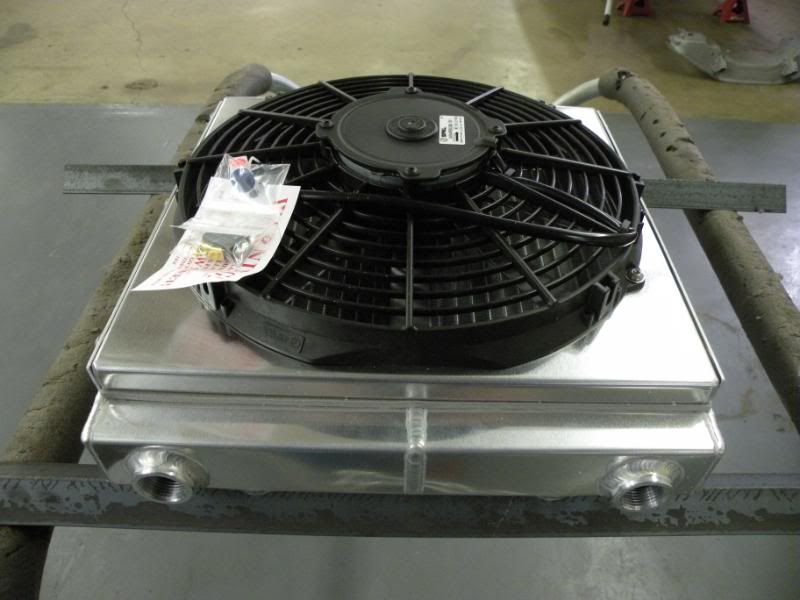
Here are some of the custom Ron Davis radiator with dual Spal fans. This is one heckuva piece of engineering - I see why all the dessert trucks run these things now.

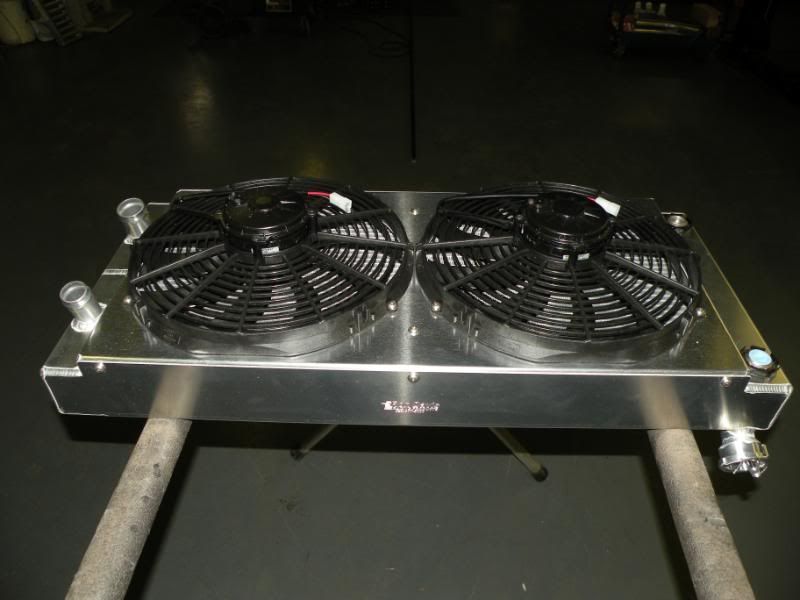
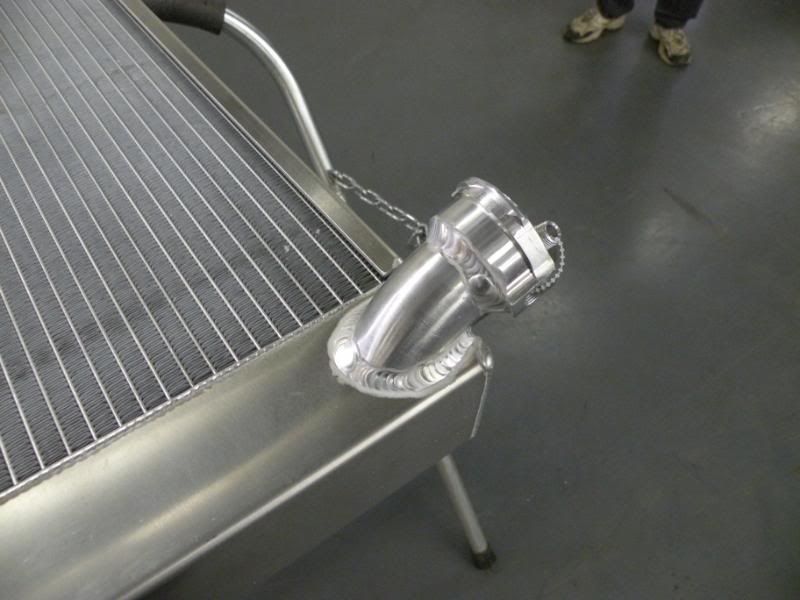
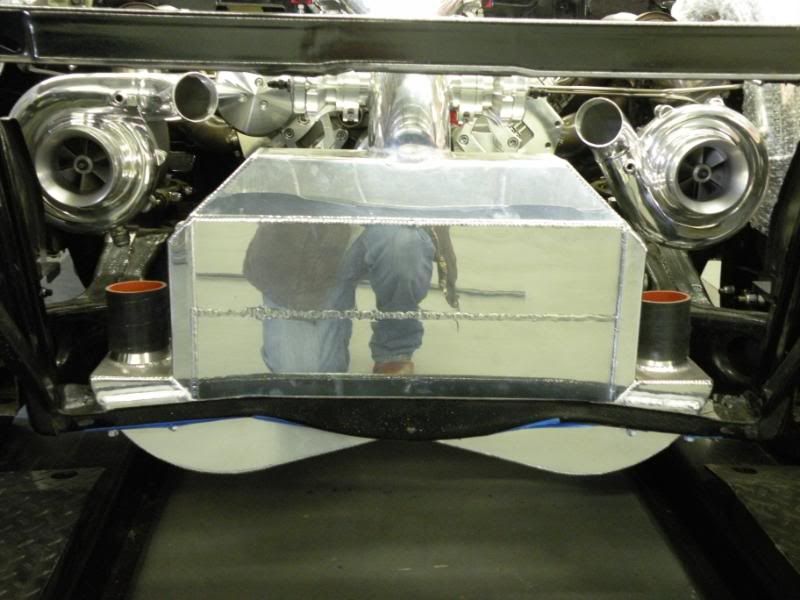
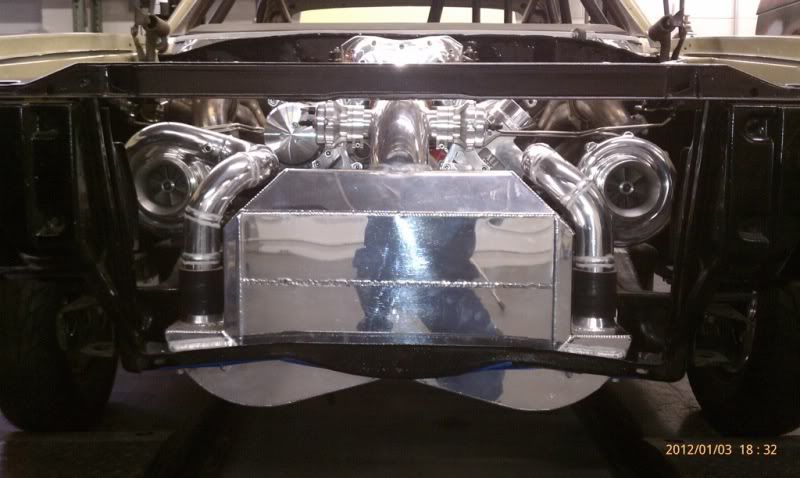
Also got the liquid intecooler mounted to the stock core support. Radiator will mount in front angled forward. Still waiting on some parts to finish the charge piping from the turbos.
Here are some of the custom Ron Davis radiator with dual Spal fans. This is one heckuva piece of engineering - I see why all the dessert trucks run these things now.
Also got the liquid intecooler mounted to the stock core support. Radiator will mount in front angled forward. Still waiting on some parts to finish the charge piping from the turbos.
Squid4life
Well-Known Member
- Joined
- Jul 5, 2004
Beautiful is not a strong enough word for this car and the fab and engineering into it. Truly amazing! I really like the 3 cells and the cantilever shock setup. Very interesting to say the least. Digging the heat exchanger idea too.
Squid4life
Well-Known Member
- Joined
- Jul 5, 2004
Hey Will, after looking at your fuel cells, I noticed you have the same red cell fill caps as mine. If they get a little worn from opening and closing they tend to get stuck, requiring you to use a small flathead to convince them to come off. I noticed Todd has a nice modification to his cell on this thread:
http://www.turbobuick.com/forums/fabrication-no-solicitation/346379-g-body-25-3-sfi-rebuild.html
Here is where he got them:
2-3/4 in. BLACK FILL CAP WITH ALUMINUM 6 HOLE CELL BUNG - C73-705 at The Chassis Shop
Even though the diagram shows 5 bolts, the pic and description shows 6, and I verified the bolt spacing is same as mine. They look killer, in my opinion.
Making progress but not a lot to show yet.
Finally got the charge piping done from the turbos to the intercoolers. We decided that the easiest way to smooth the firewall was to cut out the stocker and make our own. Turned out to be a good thing because once it was removed we found a little hidden rot that had to be repaired. While it's out is the time to hang the Vintage Air condensing unit under the dash while it's easily accessible for welding tabs. When the engine was mounted it was decided that we would position it higher in the back in order to keep the driveshaft in a more horizontal position in relation to the rear end in an effort to free up some horsepower over the stock configuration. This requires raising the entire driveshaft tunnel. Instead of just raising the stock tunnel like we originally planned, we decided to just fabricate a new one. The rear section is completed and the front portion from between the seats to the firewall will be a tubular frame with removable panels. Also including a couple of shots of the modified front frame crossmember and some of the steering linkage.
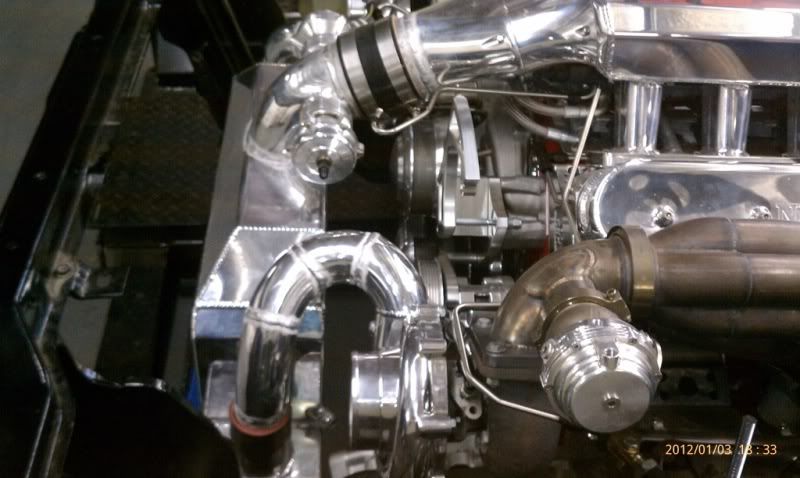
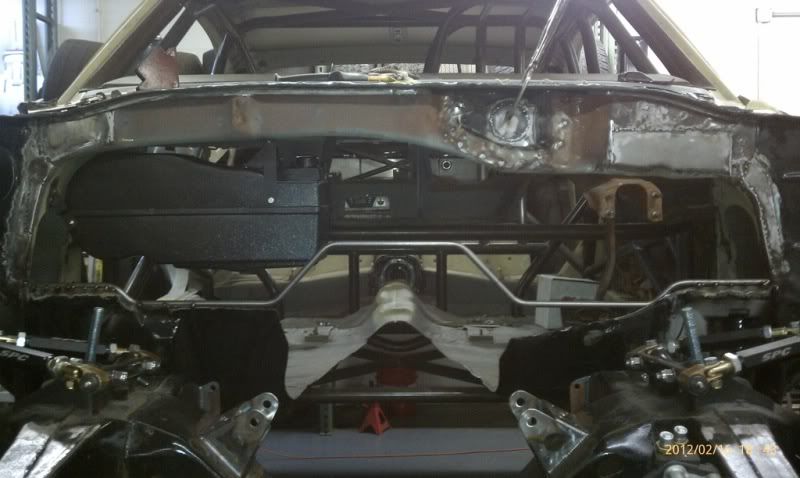
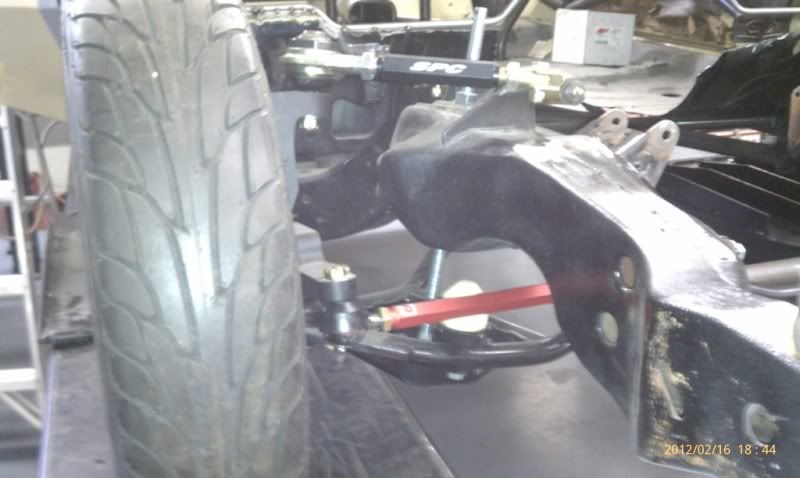
Finally got the charge piping done from the turbos to the intercoolers. We decided that the easiest way to smooth the firewall was to cut out the stocker and make our own. Turned out to be a good thing because once it was removed we found a little hidden rot that had to be repaired. While it's out is the time to hang the Vintage Air condensing unit under the dash while it's easily accessible for welding tabs. When the engine was mounted it was decided that we would position it higher in the back in order to keep the driveshaft in a more horizontal position in relation to the rear end in an effort to free up some horsepower over the stock configuration. This requires raising the entire driveshaft tunnel. Instead of just raising the stock tunnel like we originally planned, we decided to just fabricate a new one. The rear section is completed and the front portion from between the seats to the firewall will be a tubular frame with removable panels. Also including a couple of shots of the modified front frame crossmember and some of the steering linkage.
Royal-T-Ltd
Well-Known Member
- Joined
- Jul 12, 2003
Will,
just a quick question --- is there any particular reason you didnt go with NRE symmetrical turbos... just wondering....
aaron
just a quick question --- is there any particular reason you didnt go with NRE symmetrical turbos... just wondering....
aaron
The tunnel looks nice Will. The engine compartment is starting to fill up and you still have a few things to add. Should look really busy by the time to get the downpipes mounted.
This may go down as one of the most over the top "street cars" ever built. Has anyone told you, your just a little crazy ? I've got to keep an eye on you and Alec, you guys are just pulling all the tricks out on this build...
This may go down as one of the most over the top "street cars" ever built. Has anyone told you, your just a little crazy ? I've got to keep an eye on you and Alec, you guys are just pulling all the tricks out on this build...
Similar threads
- Replies
- 63
- Views
- 4K
- Replies
- 7
- Views
- 373