stock header removal

GNONYX

Well-Known Member
Joined
Oct 16, 2009
Hi All,
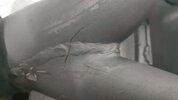
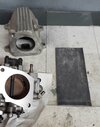
I forgot when I installed header gaskets many years ago when I was younger in age it was a breeze, but now my age has caught up to me and I can't remember shit.
I know this much, to remove the driver side header, I have to remove the driver side tire to get to the header bolts, and unbolt underneath the crossover pipe.
Do I have to remove the downpipe to get to the pass. side header bolts, or can the downpipe stays bolted in place and I work around it to remove the pass. header bolts?
 
Hi GNONYX,
It was a long time ago for me too!
I'm not sure if this will help you, but here is what I did:
Cracked the front lug nuts loose.
Jack stands under frame right behind the front tires.
Removed both front tires.
Pulled Turbo Shield and Downpipe off.
Removed crossover pipe.
Removed DS Header.
Removed Turbo.
Removed PS Header.
Reversed procedure with New Headers and Downpipe.

I hope this helps, it has been a while !!! ;)
Thanks for the info
I was hoping not to remove the downpipe, but still manage to remove the pass. side header bolts
 
Sorry GNONYX,

I replaced my headers and downpipe at the same time.
Wish I could have been more helpful!!!
 
Hopefully you are removing the turbo first which would necessitate unbolting the downpipe at the top. Are you just wanting to change the bolts out? I would loosen the downpipe so you can move it around, fairly sure it will be blocking access to some bolts.
 
Hopefully you are removing the turbo first which would necessitate unbolting the downpipe at the top. Are you just wanting to change the bolts out? I would loosen the downpipe so you can move it around, fairly sure it will be blocking access to some bolts.
Thanks for the reply
I did a smoke leak test and found the driver side header is leaking, and as of right now I'm just going to replace only the driver side header since the pass. side is not leaking. I thought I could change both if I didn't have to remove all that is connected.
I have the Fel-Pros gasket; do I spray Permatex Copper high temp sealant on one side or both sides?
 
Okay here is the latest scoop, I plugged one exhaust pipe and the other side I place a shop vacuum hose blowing towards the engine. I then remove the A/F sensor from the downpipe and installed a brass air fitting in place for the smoke machine.
Turn everything on and found the drive side header and crossover leaking with some baby oil mist from the smoker extruding from the header gasket and crossover pipe.
As I started to loosen the crossover bolt at the driver side header, one of the bolt was a bit loose.
Is this called the collector where the header and crossover pipe connects?
Anyway, I removed the DS header, but not the crossover as visual it look good and not out of shape.
Installed the DS header with Fel-pro gasket, spray exhaust side with Permatex copper high temp sealant, and I also used a high temp copper rtv around the ds header were it connects to the crossover pipe, bolted everything and waited the next day to start engine.
Started engine and I was very upset to found the the collector leaking of smoke again. The sad part is I can't tell if the smoke is coming from the collector or from the ds header where the heat shield is spot welded to the header.
At this point I don't know if I should remove the ds header again, or remove the crossover pipe and replace it with the
TA Performance Crossover pipe
Any opinion would help, Thanks
 
A REAL BIG THANK YOU
041
TO EARL
:cheers:

I removed the header shield and as you can see the informous crack.
I used a magnified glass and I think their might be another hair line crack right by the edge of the poor weld job the factory did.
I know these headers are not fully S/S, do I get welded like steel rod or get welded by mig welder?
 

Attachments

  • 20200308_164635.jpg
    20200308_164635.jpg
    301.6 KB · Views: 163
Update: I finally got the ds header welded, used Fel-Pro gasket, spray on the header side high temp copper gasket sealer, and installed. Started engine, and the blm stay at 128 until engine hot warm and then the blm started to climb up to 160 again. I did notice some smoke coming from what looks like underneath the turbo or around the lever arm of the wastegate.
Correct me if I'm wrong, anything coming from the downpipe to the elbow has nothing to do with blm, but everything from the elbow towards the engine has everything to do with the blm?

I do understand these engine never came with gasket, I used the gaskets when I replaced both headers many years ago.
During the time of replacing both headers, I also gutted the convertor
I thought maybe the crossover pipe connected to the ds header might leaking since that time I saw some smoke coming from that connection or coming from the ds header. So I put some high temp rtv around the ds header ball end that connects to the crossover pipe, and when I remove the ds header again the ds header ball the rtv was perfectly clean off from being compress from the 2 bolts of being tighten.
Keep in mind I haven't driven this car for over 15 years, I only start it occasionally 3 months or so.
This is why it so hard for me to understand the crack on header if I haven't driven the car.
This why I'm asking about the turbo gasket by the waste gate area, or the triangle shape gasket underneath the turbo. Keep in mind I also replaced the triangle shape gasket with graphite gasket.
Would anyone have other items of why the blm is so high?
 
I would make sure you don’t have a vacuum leak from one of the many rubber hoses that attach to the top of the plenum. Very common source for high BLM readings. Rule that out before yanking the exhaust apart again.
 
GNONYX - Any conclusion to this thread ????
What I did, I got my original stock headers which had some cracks on both headers, and decided at that time instead of repair them I brought another stock headers set many, many years ago. The 2nd set that was on the engine and after not driven the car for many years and once I started the engine is when I started having the high BLM issues, and both headers were cracked. The 2nd headers set was sent to have the headers surface level by using a belt sander, and rewelded the cracks. I did used headers gaskets, installed them.
After doing all repairs I still had high BLM #, and again the headers were cracked again, so I decided to used the original headers, when to another machine shop who also used a belt sander, and rewelded both headers cracked areas. Found the Throttle body having vacuum leaks at the Throttle plate seals. I got the seals at GBodyParts, but keep in mind these seals are not drop in replacement. I had to used a Dremel hand tool with a round sander bit, and sanded around the seal hole and it fits perfect. Trust me I learned the hard way by doing it easy thinking it's just drop and press seals, but only to find it was leaking again around the at the Throttle body seals.
I didn't use headers gasket, since I decided to do it the factory way of using Hi-temp silicone, and after all of those repairs including RJC Power Plate. Now the BLM # and Scan Masters # are reading normal, and no vacuum leaks.
 
Thanks, I also am chasing a high BLM. All vacuum lines are new. I'm about to replace the stock exhaust manifolds with an OEM repaired set. I think I'll take your advice and skip the Header Gaskets & have a Machine Shop check the exhaust Manifolds surface before the install. Hope this will take care of the BLM's. The Throttle Body Seals have not been checked, but I did replace all the gaskets with a GBody Gasket Set when changing out the Vacuum Lines. Any advice on inspection & changing the TB seals would be appreciated.
 
I used a clean shop vacuum and place the exhaust hose into the tail pipe, and place a rag or towel into the other side of the tail pipe.
Get a spray bottle and fill it with some soap detergent (Dawn) and water, and spray every vacuum area including around the Throttle body area.
My advise before using this technique is install the headers after being repaired, and that's including the cross over pipe.
Once everything is assemble is when you can use the soapy technique and check all vacuum areas and also check the headers hi-temp silicone area and cross over pipe for any leaks.
In case if you need the Throttle Body seals
I got this gasket since mine is original AcDelco Throttle Body Gasket 25517008 fit 84-89 Buick Oldsmobile Pontiac 3.8L V6 | eBay
As you can in the photo is what did to make sure all surface is flat.

If you decide to get the Throttle body seals keep in mind it's not a drop and fit, as I mention before I had to used a Dremel hand tool with a round sander bit, and sanded around the seal hole in a circler motion and sand in small increments and see if the seals fits with a light tap of the hammer.
I hope this help and post if you need more questions
 

Attachments

  • 20210602_175829.jpg
    20210602_175829.jpg
    241.5 KB · Views: 46
  • 20210607_233919.jpg
    20210607_233919.jpg
    163.5 KB · Views: 55
Top