Yes that's right, I have a Turbo6 in my '64 Riviera. This is not a "should I build" or "what does it take"; nope I've done it. I'll admit its not running yet but the hardware part is done, its just the wiring and a bit of plumbing for the oil cooler that's left.
What's all involved:
Car: '64 Buick Riviera, White on White. Originally a 425 and ST400 car with almost all the options to include power windows, power vent windows, 3.23 posi, AC, and a deluxe interior. Currently keeping it's stock brake system and suspension till I figure out the drivetrain then it'll get some more custom stuff.
Engine
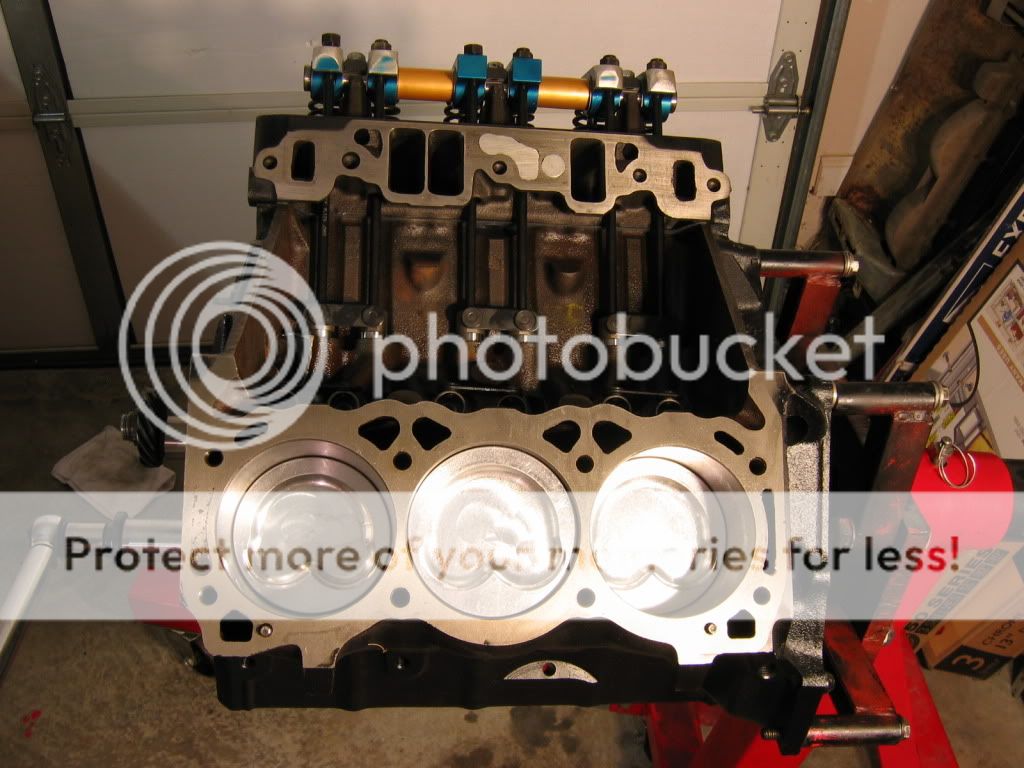
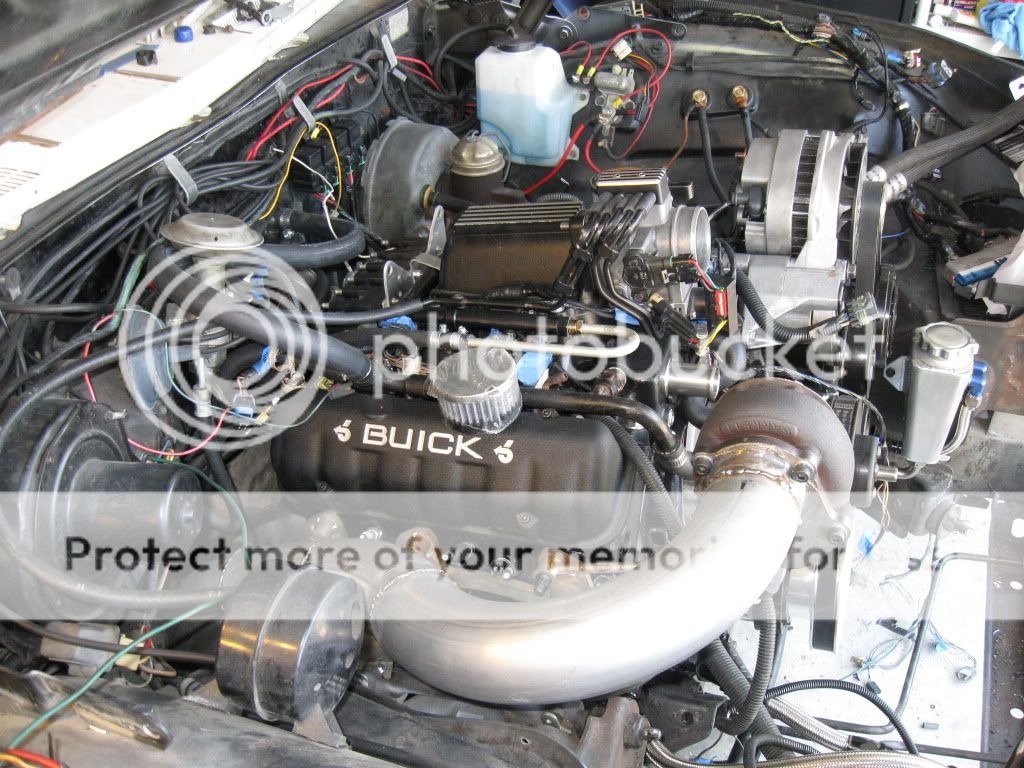
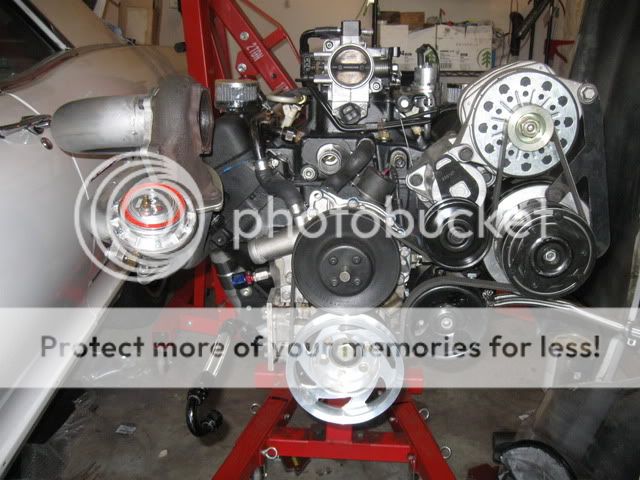
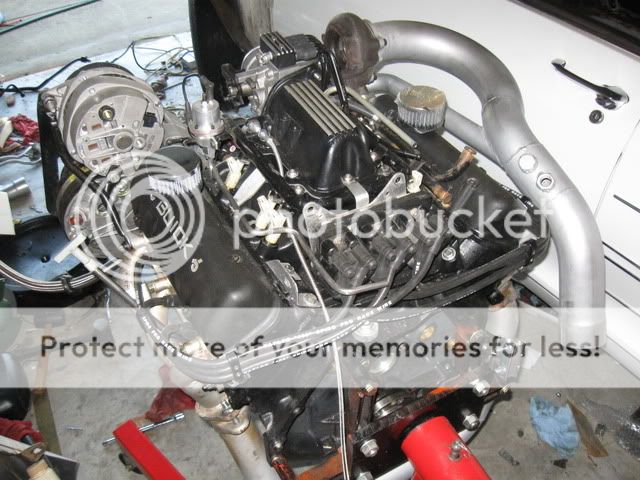
Short Block: 484 4.1L block out of an Electra, Billet front 3 mains, Eagle 3.4in crank (an early one, I had to get the flywheel area remachined), K1 stock length rods (will be upgrading to 6.0in rods if she comes apart), custom forged Diamond pistons that unfortunately are 0.029in in the whole for a sickly 7.9:1 compression. Held in the frame by custom HRPartsnStuff mounts.
Top End: Champion Irons wearing 1.65:1 T&D roller rockers, Comp 212/212 roller with custom TA pushrods, stock (will replace with a ported sometime) intake and plenum.
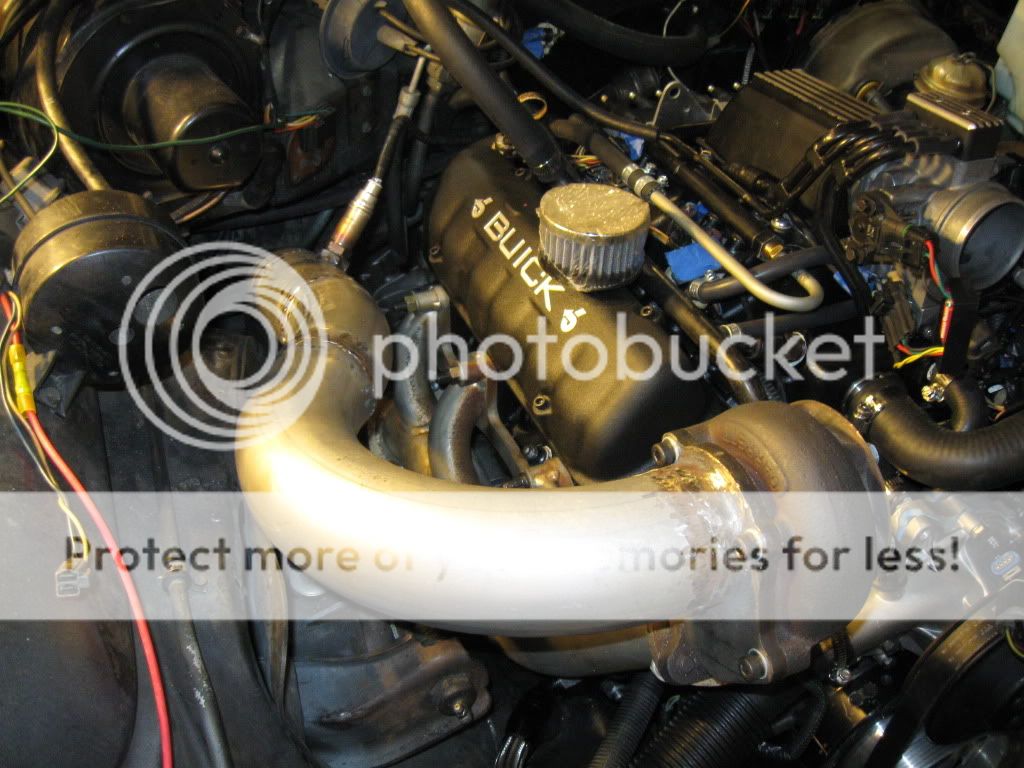
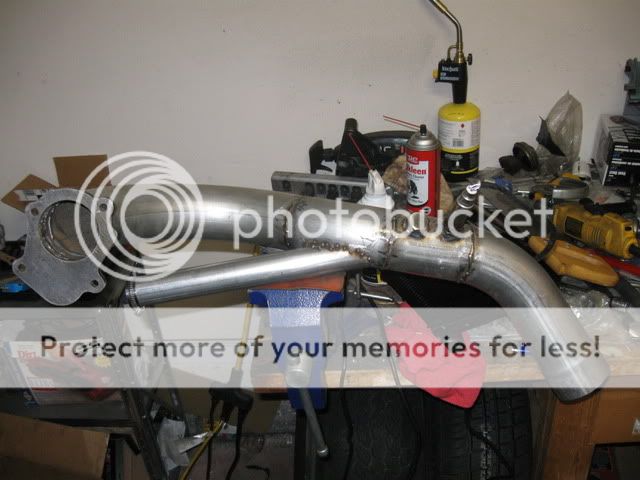
Exhaust: Poston headers cut for an external gate, custom crossover, custom 3in downpipe
Oiling: Stage II/Series II hybrid gerotor pump. Cut down and custom baffled '64 LeSabre 300 V8 pan, stock GM pickup reworked for sump clearance. http://www.turbobuick.com/forums/fa...-long-promised-series-ii-oil-pump-thread.html for details.
Turbo: stock with an upgrade exhaust housing for now, it was cheap and will get me by till I go for the full on ball bearing unit. However I might build my own headers before that so time will tell.
Transmission
'67 Wildcat BT code Switch Pitch 400 with stock converter. Sitting on a custom trans crossmember made out of plate and a junkyard crossmember of unknown origins. All controlled by a custom TPS based box that triggers the kickdown and switch pitch functions by Caspers.
Fuel System
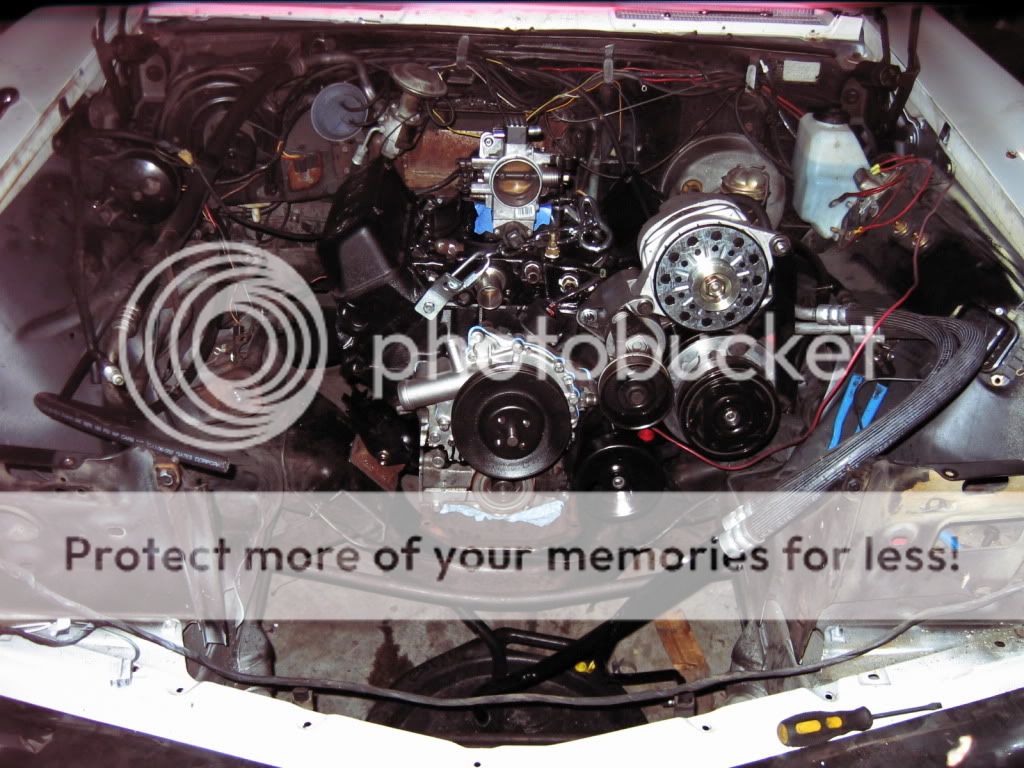
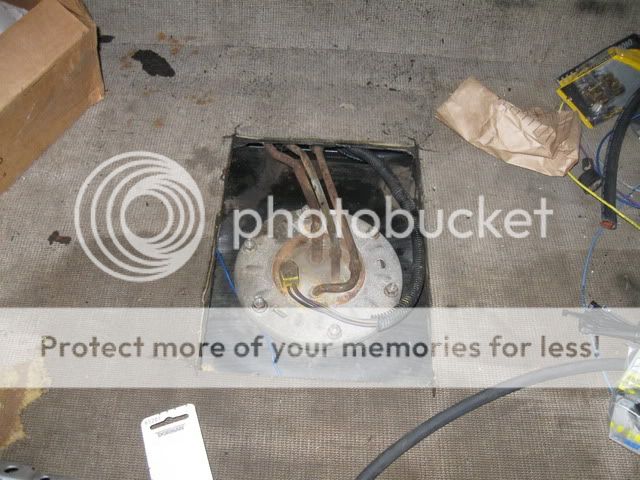
Stock rails holding L67 injectors, 3/8in stock hardline feed and 1/4in stock return (will be replace with 1/2 and 3/8 stainless units later), '96 Impala SS tank pump, and filter. Not bolt in at all for the tank, had to make a custom crossmember to hold the rear of the straps, build stands for the front, cut a hole in the trunk floor to clear the pump/sender unit and lines (not a bad thing since it gives me access to the pump without dropping the tank) and notch the frame to clear the front of the tank.
Cooling
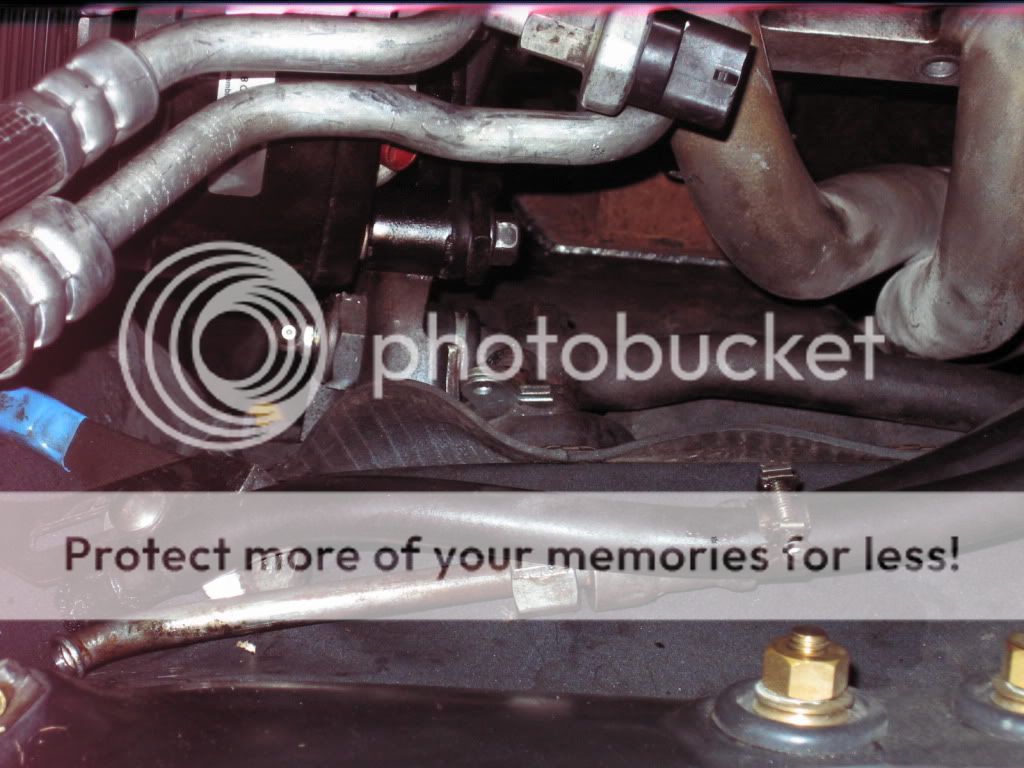
Summit universal fit radiator of whatever size fit, cut off the upper fill hose and had an AN-20 bung welded on and a petcock installed. Cut down billet water neck with another AN-20 bung on it in the intake. Ford Taurus 3.8L fan that amazingly fits in perfectly!
The Biggie!! EFI System
Well it's an L67 computer with a slightly stripped and spliced harness out of a 98 Regal GS, LQ4 MAF, custom cam sensor by Caspers using an LC2 cap with an L67 pigtail. I also put the L67 rings on the Stage II Indy Lites balancer. I'm using all the sensor from the L67 with the exception of going down to a single Knock Sensor and turning the other off. I'll know how well this works when I get the last dozen or so wires connecting the car's existing wiring system to the new wiring system. I specifically kept the 2 seperate so not to load up the old system with the new electronics. If it doesn't work I'll just ditch it and canabalize it for wire to put in a Megasquirt 3X system in it.
I do have pictures but it'll take me a while to load them up so I'll hit the highlights and ask questions or make requests as to what you want to see.
Thanks,
What's all involved:
Car: '64 Buick Riviera, White on White. Originally a 425 and ST400 car with almost all the options to include power windows, power vent windows, 3.23 posi, AC, and a deluxe interior. Currently keeping it's stock brake system and suspension till I figure out the drivetrain then it'll get some more custom stuff.
Engine
Short Block: 484 4.1L block out of an Electra, Billet front 3 mains, Eagle 3.4in crank (an early one, I had to get the flywheel area remachined), K1 stock length rods (will be upgrading to 6.0in rods if she comes apart), custom forged Diamond pistons that unfortunately are 0.029in in the whole for a sickly 7.9:1 compression. Held in the frame by custom HRPartsnStuff mounts.
Top End: Champion Irons wearing 1.65:1 T&D roller rockers, Comp 212/212 roller with custom TA pushrods, stock (will replace with a ported sometime) intake and plenum.
Exhaust: Poston headers cut for an external gate, custom crossover, custom 3in downpipe
Oiling: Stage II/Series II hybrid gerotor pump. Cut down and custom baffled '64 LeSabre 300 V8 pan, stock GM pickup reworked for sump clearance. http://www.turbobuick.com/forums/fa...-long-promised-series-ii-oil-pump-thread.html for details.
Turbo: stock with an upgrade exhaust housing for now, it was cheap and will get me by till I go for the full on ball bearing unit. However I might build my own headers before that so time will tell.
Transmission
'67 Wildcat BT code Switch Pitch 400 with stock converter. Sitting on a custom trans crossmember made out of plate and a junkyard crossmember of unknown origins. All controlled by a custom TPS based box that triggers the kickdown and switch pitch functions by Caspers.
Fuel System
Stock rails holding L67 injectors, 3/8in stock hardline feed and 1/4in stock return (will be replace with 1/2 and 3/8 stainless units later), '96 Impala SS tank pump, and filter. Not bolt in at all for the tank, had to make a custom crossmember to hold the rear of the straps, build stands for the front, cut a hole in the trunk floor to clear the pump/sender unit and lines (not a bad thing since it gives me access to the pump without dropping the tank) and notch the frame to clear the front of the tank.
Cooling
Summit universal fit radiator of whatever size fit, cut off the upper fill hose and had an AN-20 bung welded on and a petcock installed. Cut down billet water neck with another AN-20 bung on it in the intake. Ford Taurus 3.8L fan that amazingly fits in perfectly!
The Biggie!! EFI System
Well it's an L67 computer with a slightly stripped and spliced harness out of a 98 Regal GS, LQ4 MAF, custom cam sensor by Caspers using an LC2 cap with an L67 pigtail. I also put the L67 rings on the Stage II Indy Lites balancer. I'm using all the sensor from the L67 with the exception of going down to a single Knock Sensor and turning the other off. I'll know how well this works when I get the last dozen or so wires connecting the car's existing wiring system to the new wiring system. I specifically kept the 2 seperate so not to load up the old system with the new electronics. If it doesn't work I'll just ditch it and canabalize it for wire to put in a Megasquirt 3X system in it.
I do have pictures but it'll take me a while to load them up so I'll hit the highlights and ask questions or make requests as to what you want to see.
Thanks,